Bridge Signal Forms and Reactive Forms in Angular 21.2
What if you could start using Angular Signal Forms inside an existing Reactive Form without rewriting the entire thing? Well, in Angular 21.2-next, you can! The new SignalFormControl class acts as a compatibility bridge, letting you mix signal-backed fields into a traditional FormGroup while keeping your existing form structure intact. This post walks through how it works, how to add it to an existing form, and what changes in the template.
This approach allows Angular developers to use SignalFormControl for Reactive Forms compatibility without a full migration.
Current Angular Reactive Form Example (Baseline Setup)
In this example, we’ll work with a profile form built entirely with the Reactive Forms module.
The form has three sections: Account Information, Shipping Address, and Preferences:
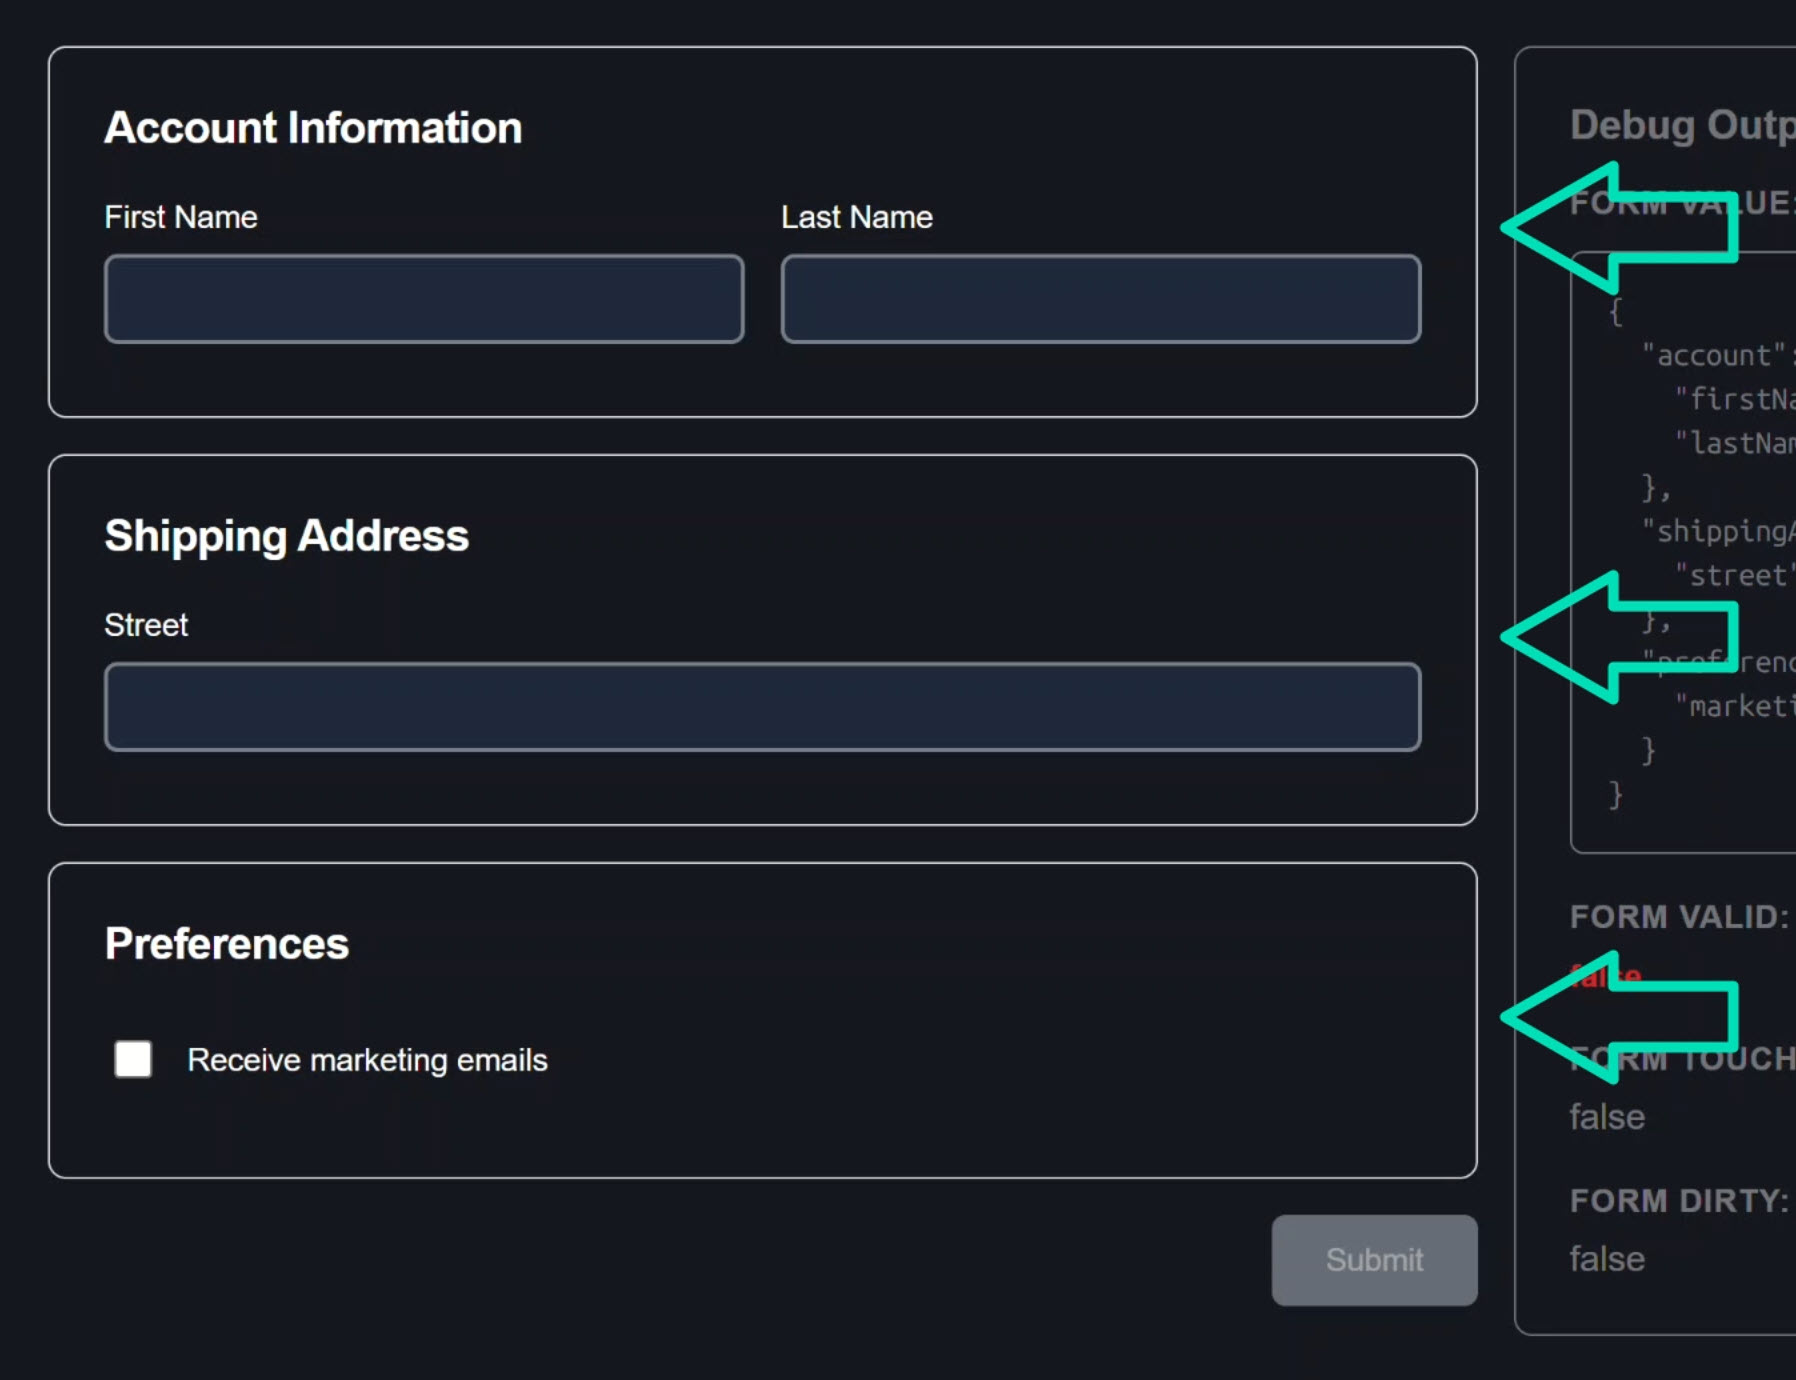
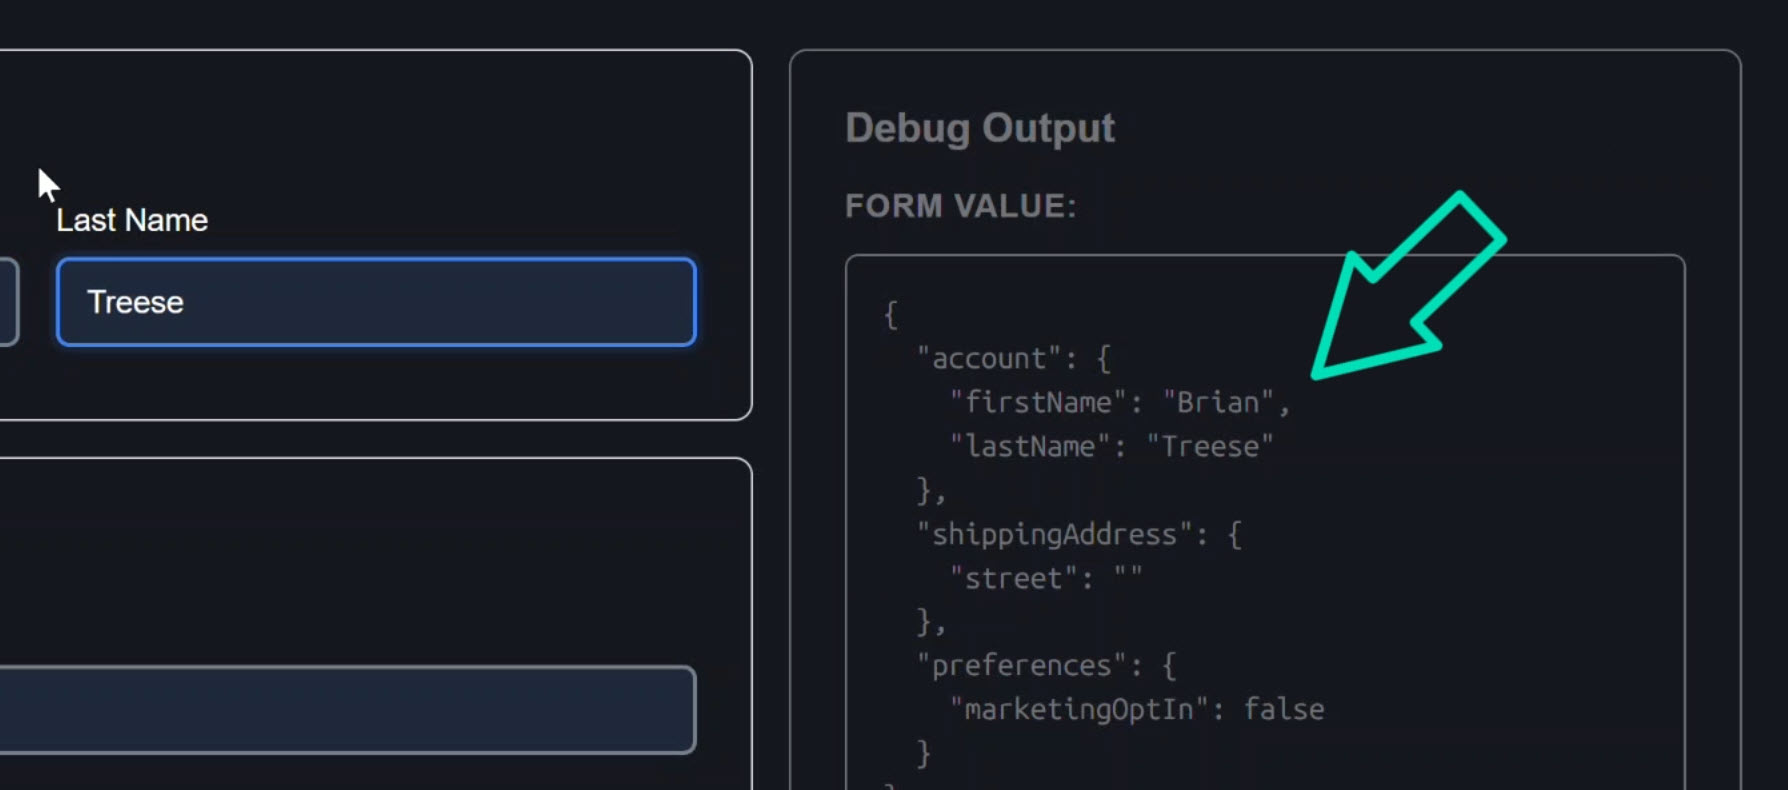
Interacting with the controls in this form updates the debug panel in real time:
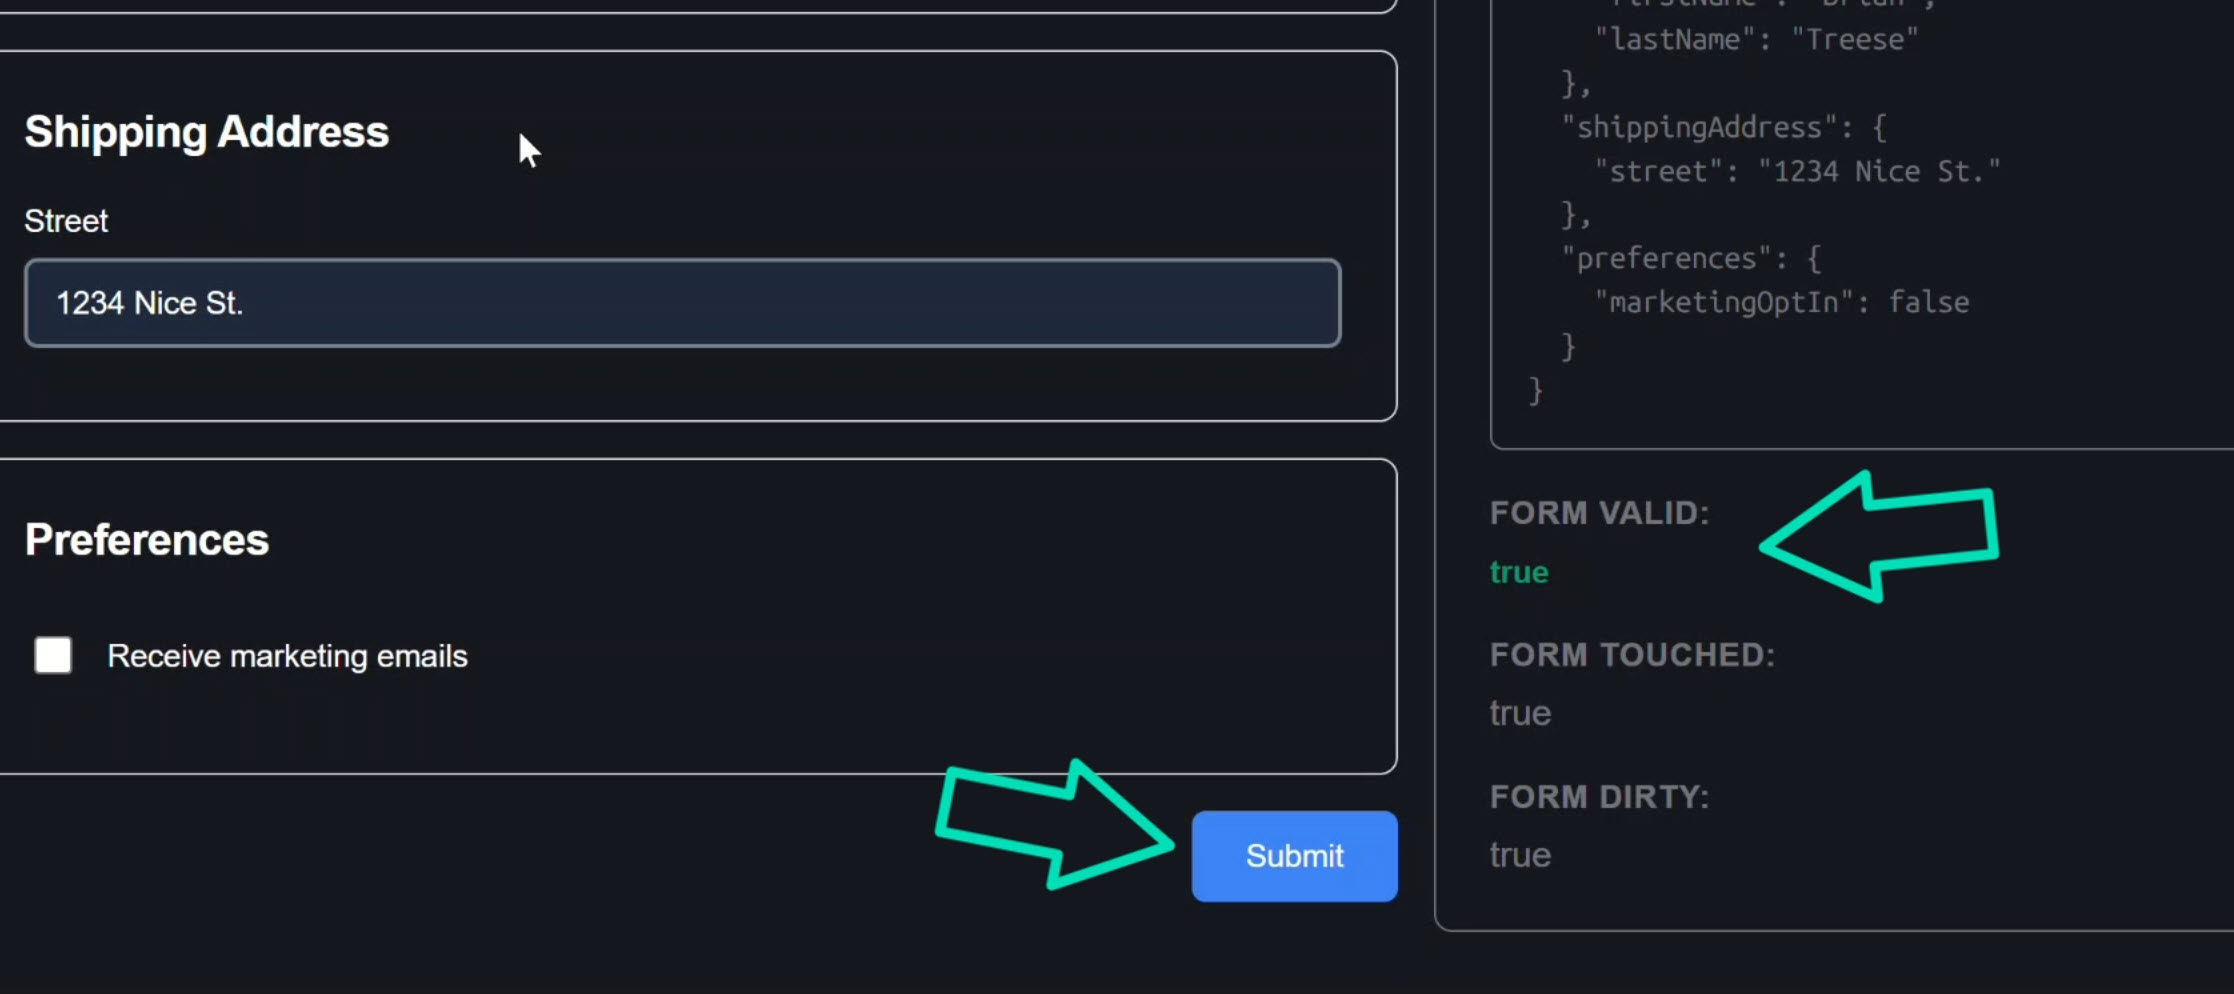
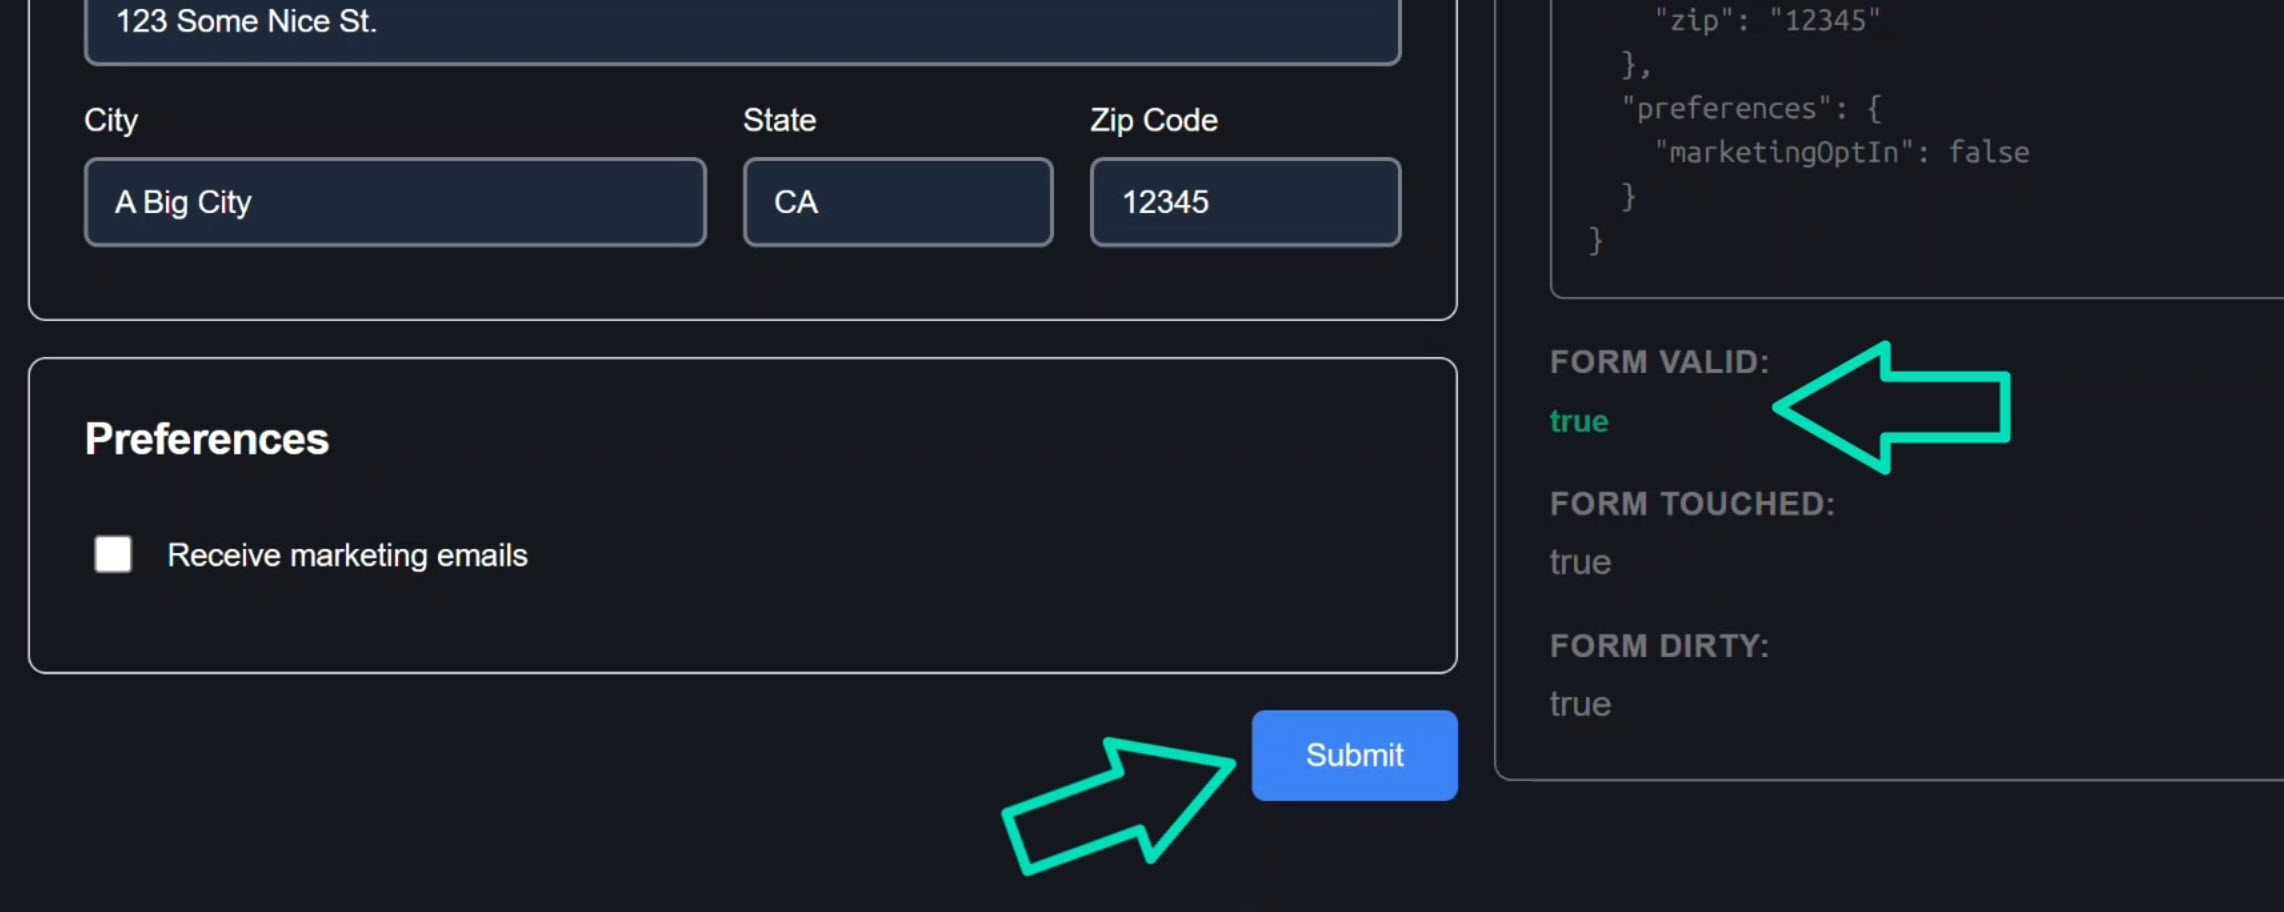
As soon as everything required is filled in, the form becomes valid and the submit button enables:
This is a standard Angular Reactive Form.
Let’s look at how it’s built.
How This Reactive Form Is Built (FormGroup + FormControl)
In the component TypeScript, we have a ProfileForm interface:
interface ProfileForm {
  account: FormGroup<{
    firstName: FormControl<string>;
    lastName: FormControl<string>;
  }>;
  shippingAddress: FormGroup<{
    street: FormControl<string>;
  }>;
  preferences: FormGroup<{
    marketingOptIn: FormControl<boolean>;
  }>;
}
The form is constructed using FormGroup for each section and FormControl for each field:
export class ProfileFormComponent {
  readonly form = new FormGroup<ProfileForm>({
    account: new FormGroup({
      firstName: new FormControl('', {
        validators: [Validators.required],
        nonNullable: true
      }),
      lastName: new FormControl('', {
        validators: [Validators.required],
        nonNullable: true
      })
    }),
    shippingAddress: new FormGroup({
      street: new FormControl('', {
        validators: [Validators.required],
        nonNullable: true
      }),
    }),
    preferences: new FormGroup({
      marketingOptIn: new FormControl(false, { nonNullable: true })
    })
  });
}
The first name, last name, and street address fields are required.
The marketing opt-in field is not.
That’s the form configuration, now let’s look at the template.
How formGroup and formControlName Work in Angular
In the template, the formGroup directive binds the DOM form to the FormGroup instance:
<form [formGroup]="form" (submit)="onSubmit($event)">
  ...
</form>
The formGroupName directive targets the nested “account” section:
<div class="field-group" formGroupName="account">
  ...
</div>
and within it, formControlName wires each input to its FormControl:
<input type="text" formControlName="firstName" />
A template variable holds the control for reuse, then we check touched and errors to display validation messages:
@let firstNameControl = form.controls.account.controls.firstName;
@if (firstNameControl.touched && firstNameControl.errors) {
  <span class="error">First name is required</span>
}
The same pattern repeats for the street field and the preferences section.
Classic Reactive Forms.
Nothing new, nothing fancy, totally predictable.
Why Migrating Large Reactive Forms to Signal Forms Is Hard
This form is moderately complex, but imagine it’s much larger.
Imagine it has many fields, nested groups, and custom components everywhere.
Fully migrating to Signal Forms would be painful and, potentially, not feasible in the short term.
Yet you want to start using Signal Forms for new features.
Until Angular 21.2, there wasn’t a clean way to mix the two.
The new SignalFormControl class solves that.
It’s a compatibility wrapper that allows a signal-backed field to behave like a standard FormControl inside a FormGroup.
If you’re adding new fields to an existing form, that’s the perfect place to try it.
Using SignalFormControl to Bridge Signal Forms and Reactive Forms
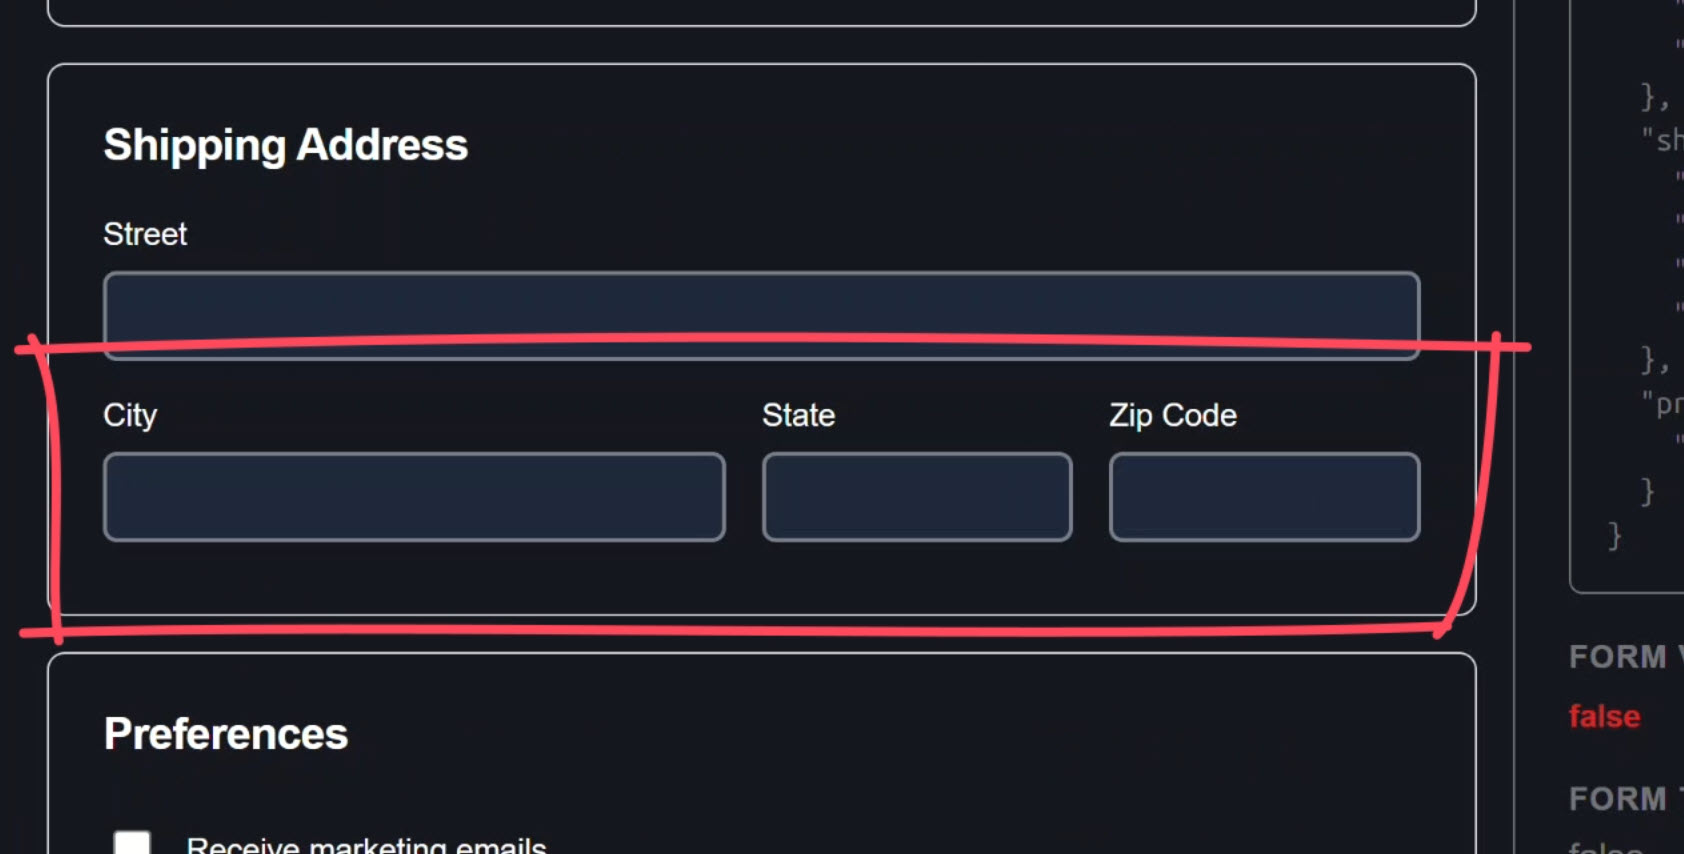
Suppose we need to add three new fields to the shipping address section: city, state, and zip, and we want these to be signal-backed controls.
Step 1: Add SignalFormControl to the FormGroup Interface
First, we need to update the form interface to include the new fields.
Instead of FormControl we’ll use SignalFormControl from the Signal Forms compat API:
import { SignalFormControl } from '@angular/forms/signals/compat';

interface ProfileForm {
  account: FormGroup<{ ... }>;
  shippingAddress: FormGroup<{
    street: FormControl<string>;
    city: SignalFormControl<string>;
    state: SignalFormControl<string>;
    zip: SignalFormControl<string>;
  }>;
  preferences: FormGroup<{ ... }>;
}
The group now mixes FormControl and SignalFormControl, that’s the whole point of the bridge.
Step 2: Creating SignalFormControl with Signal-Based Validation
Now let’s create the new signal-backed controls.
The first parameter is the initial value, the second is the schema callback familiar from Signal Forms where we can add validation:
readonly city = new SignalFormControl('', s => {
  required(s, { message: 'City is required' });
});
Now we’ll do the same for the state field:
readonly state = new SignalFormControl('', s => {
  required(s, { message: 'State is required' });
});
And one more for the zip field:
readonly zip = new SignalFormControl('', s => {
  required(s, { message: 'ZIP code is required' });
  pattern(s, /^\d{5}$/, { message: 'ZIP code must be 5 digits' });
});
This field also has a pattern validator to ensure the format is 5 digits.
Step 3: Mixing SignalFormControl Inside an Existing FormGroup
Now we have our signal-based form controls.
All that’s left is to add them to the form.
This is pretty easy, we just add them to the shipping address group using these new properties:
readonly form = new FormGroup<ProfileForm>({
    account: new FormGroup({ ... }),
    shippingAddress: new FormGroup({
        street: new FormControl('', Validators.required),
        city: this.city,
        state: this.state,
        zip: this.zip,
    }),
    preferences: new FormGroup({ ... }),
});
Notice the FormGroup type, submit handler, and root-level structure stay the same.
We’ve officially mixed signal-backed controls into a Reactive FormGroup without changing the form itself.
Using the formField Directive with SignalFormControl
Now we need to render these fields in our template.
We can’t use formControlName for these new fields because they’re not plain FormControl instances.
They expose a fieldTree, which is the signal-based representation of the control’s state (value, touched, errors, etc.).
Instead, we need to use the FormField directive from the Signal Forms API.
So let’s add FormField to the component imports:
import { ..., FormField} from '@angular/forms/signals';

@Component({
  selector: 'app-profile-form',
  ...,
  imports: [ReactiveFormsModule, FormField]
})
Then over in the template, inside the shipping address section, we’ll use the formField directive to connect the input to the signal field tree:
<label>
  City
  <input type="text" [formField]="city.fieldTree" />
</label>
This properly wires up the signal-backed control to the input.
Then, we’ll use a template variable to check touched and errors and iterate over error messages to handle validation:
<label>
  City
  <input type="text" [formField]="city.fieldTree" />
  @let cityControl = city.fieldTree();
  @if (cityControl.touched() && cityControl.errors(); as errors) {
    @for (error of errors; track error) {
      <span class="error"></span>
    }
  }
</label>
And that’s it, the City field is now signal-backed inside a Reactive Form.
Then, we do the same for the State field:
<label>
  State
  <input type="text" [formField]="state.fieldTree" />
  @let stateControl = state.fieldTree();
  @if (stateControl.touched() && stateControl.errors(); as errors) {
    @for (error of errors; track error) {
      <span class="error"></span>
    }
  }
</label>
And one more time for the Zip Code field:
<label>
  Zip Code
  <input type="text" [formField]="zip.fieldTree" />
  @let zipControl = zip.fieldTree();
  @if (zipControl.touched() && zipControl.errors(); as errors) {
    @for (error of errors; track error) {
      <span class="error"></span>
    }
  }
</label>
Alright, this is all we need now to intermingle signal form controls with reactive forms.
Let’s save and try it out!
Testing SignalFormControl Inside a Reactive Form
Now we have our new fields in the address section:
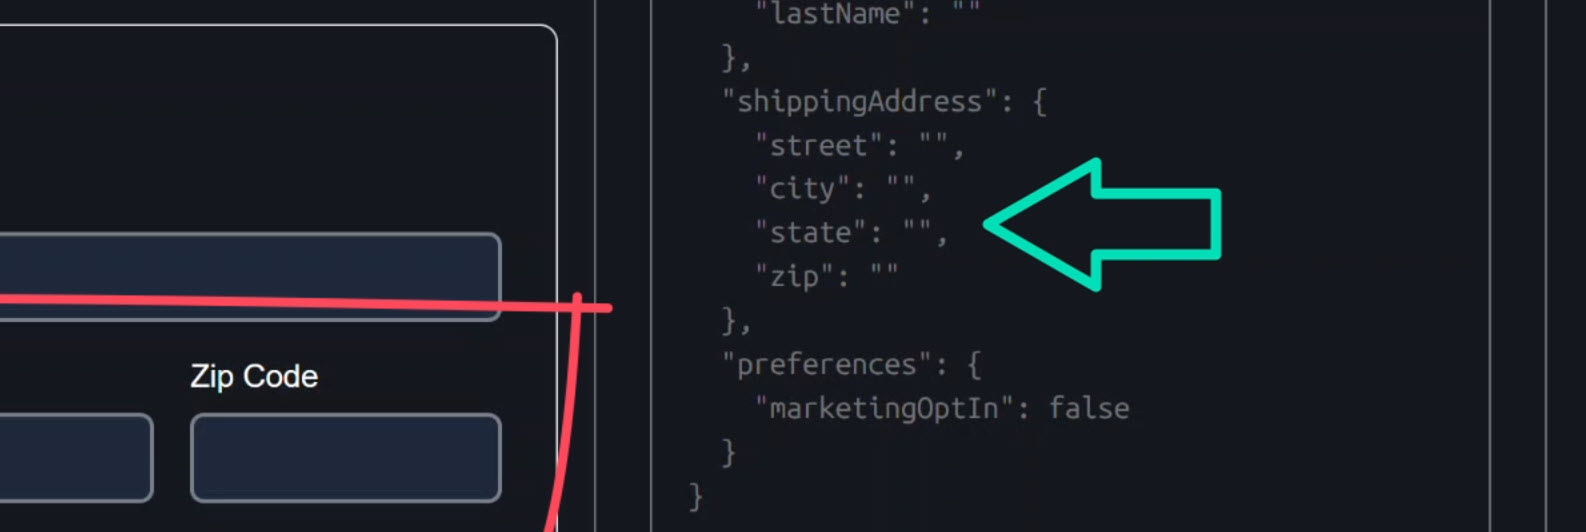
We also have these new properties displaying within our form group object:
When we add a value in the City field, the debug panel still reflects everything correctly:
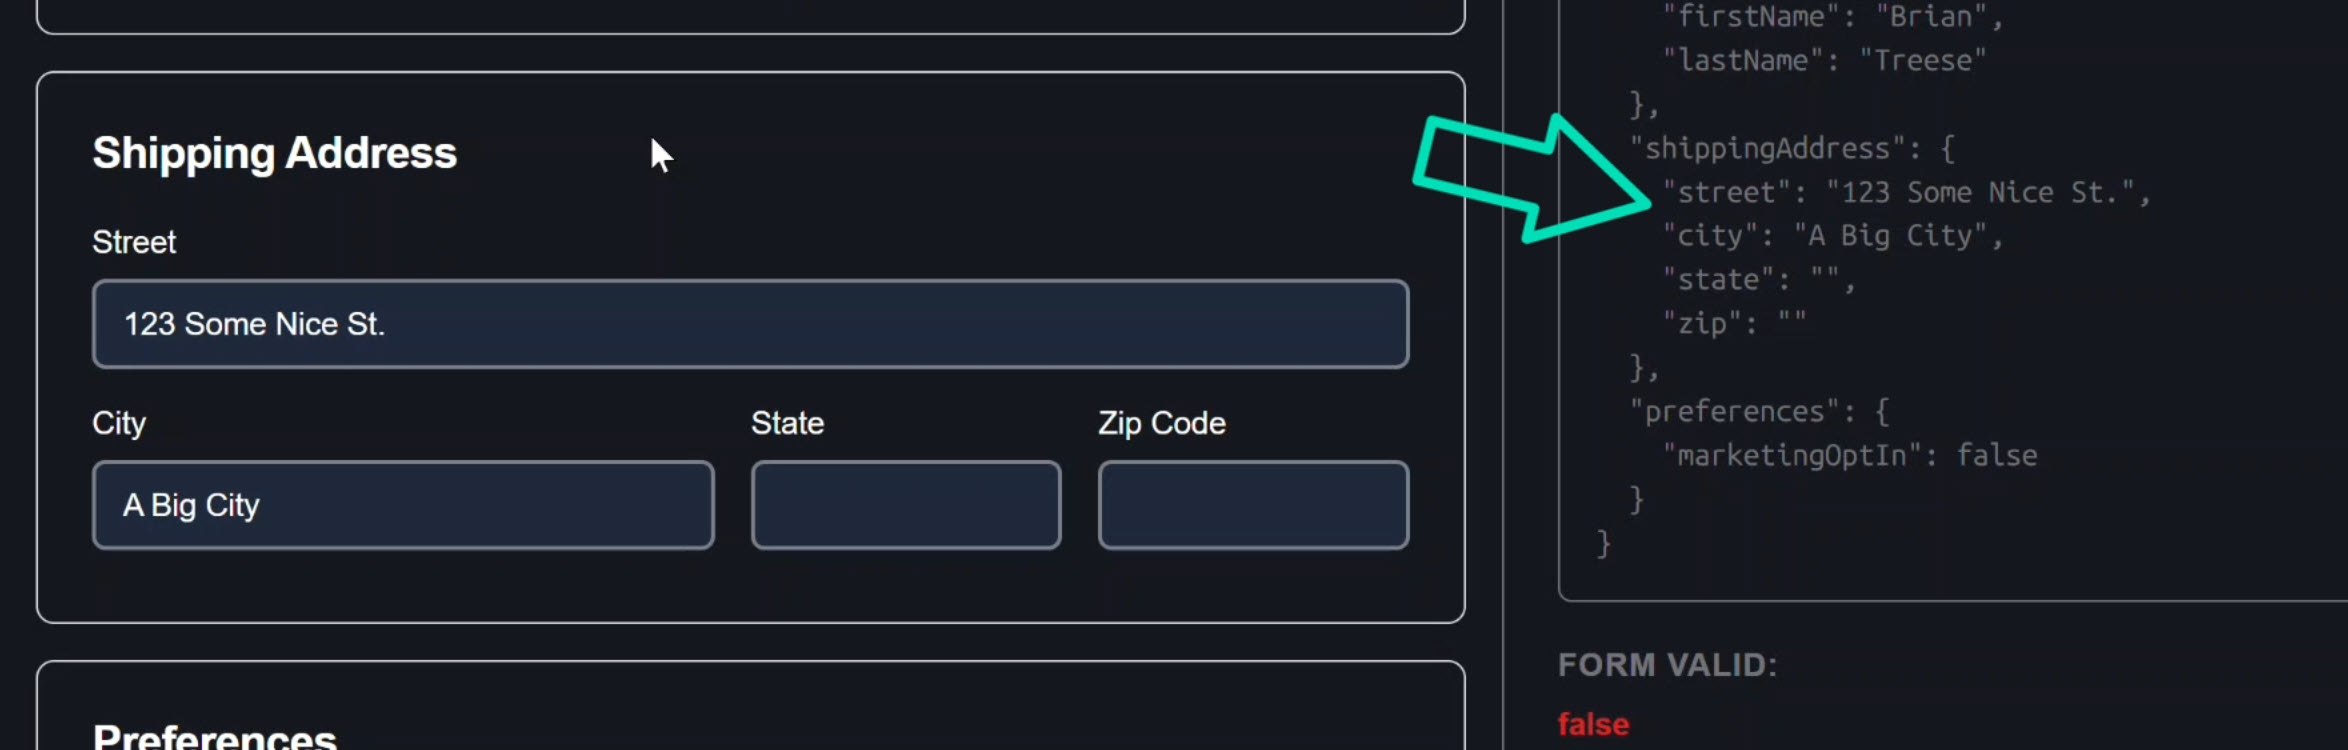
From Angular’s perspective, this behaves like a normal FormControl.
But under the hood, this field is powered by signals.
And when we clear out the value:
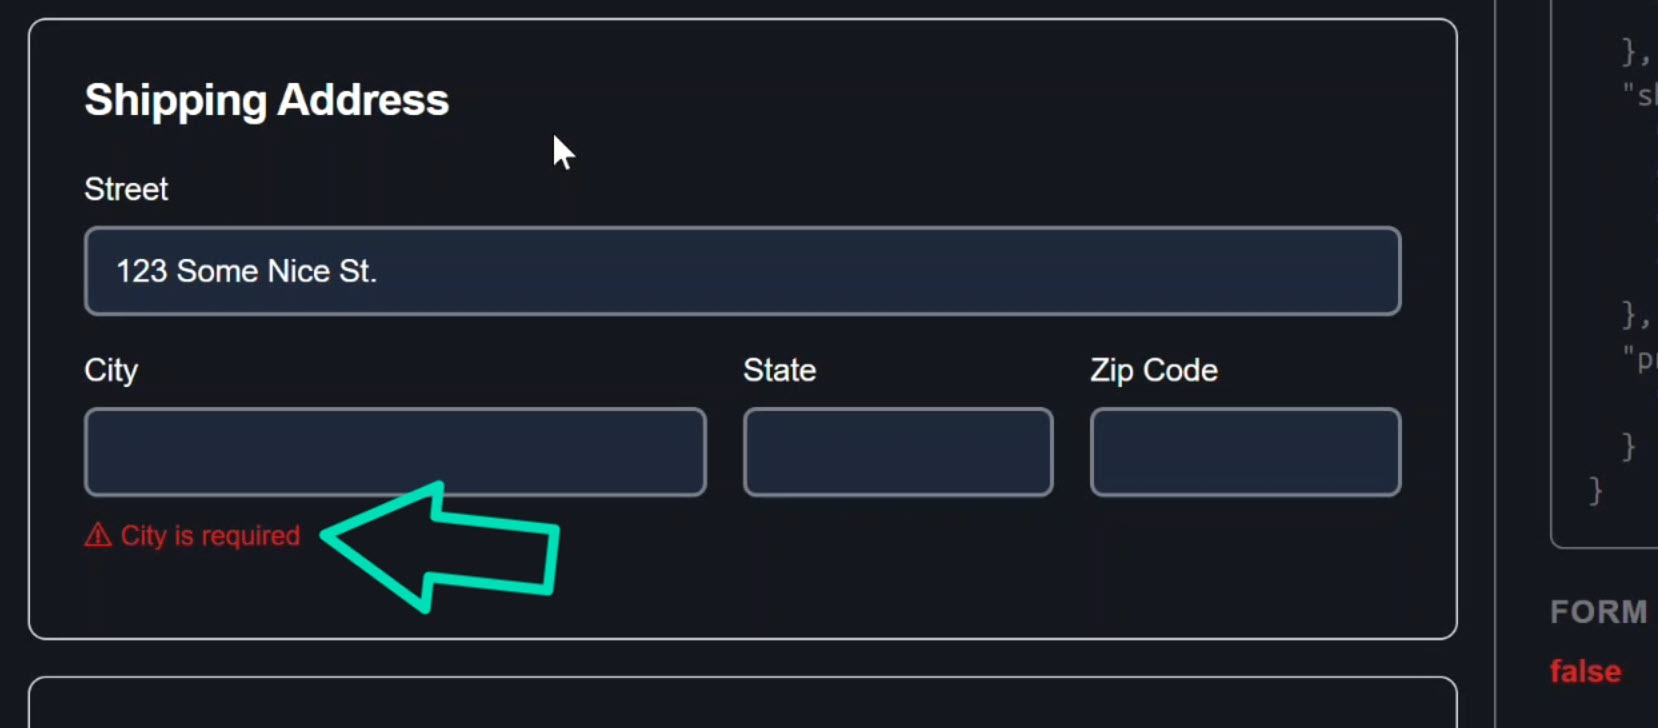
A validation error shows, so our validation is working too!
And once we fill out all of the required fields properly, the form becomes valid and the submit button enables:
How SignalFormControl Enables Incremental Migration
In this example we did not:
- Rewrite the entire form
- Replace the
FormGroup - Break existing template bindings
- Change the submit handler
We adopted Signal Forms incrementally.
For teams maintaining large Reactive Forms codebases, this is a major unlock.
It’s the kind of feature that makes gradual migration possible instead of painful.
If you’re planning a Signal Forms strategy for your app, this is where you start.
If this helped you, be sure to subscribe for more deep dives into modern Angular features.