Cursor AI Took My Job… or Did It? Angular Dev Edition
AI-powered code editors are transforming how developers work, and Cursor is leading the charge. Built on VS Code, Cursor brings intelligent code suggestions, automated error detection, and powerful AI assistance directly into your Angular workflow. In this tutorial, I'll show you real examples of how I use Cursor in my Angular projects, from refactoring components to generating tests. You'll see why it's become essential to my development process.
If you’ve heard of Cursor and seen any demos, many of them focus on creating some sort of app from scratch and generating almost everything.
Well, this tutorial is going to be a little different.
I work primarily with Angular so I’m going to focus on working within an existing Angular application, and I’m going to show you some real examples of things that I’ve used it for.
But first, what is it?
What is Cursor?
Cursor is an advanced AI-powered code editor designed to improve coding productivity. It’s built as a fork of VS Code so it feels very familiar to many of us. It uses AI models to offer intelligent code suggestions, automated error detection, code generation features, and more.
It’s getting more and more popular every day so you’re probably going to want to check it out sooner rather than later. We’ll have to see if this demo gets you pumped up enough or not.
Getting Started with Cursor
To get started with Cursor, they have a free version which begins with a free two-week trial of their “Pro” version.

All you need to do is sign-up and then download and run the installer to install it. There are a few set up options, I pretty much left everything as the default.
They even prompt you to automatically install your VS Code extensions so you can do that if you want to.
It’s pretty easy to get up and running. After you have it installed, all you need to do is open a project and start hacking away.
Achieve Better Results by Defining Your Own Contextual Rules
With Cursor, it’s all about context. And one way we can provide more context is to add our own rules.
Cursor has a settings panel UI where you can add your own custom rules:
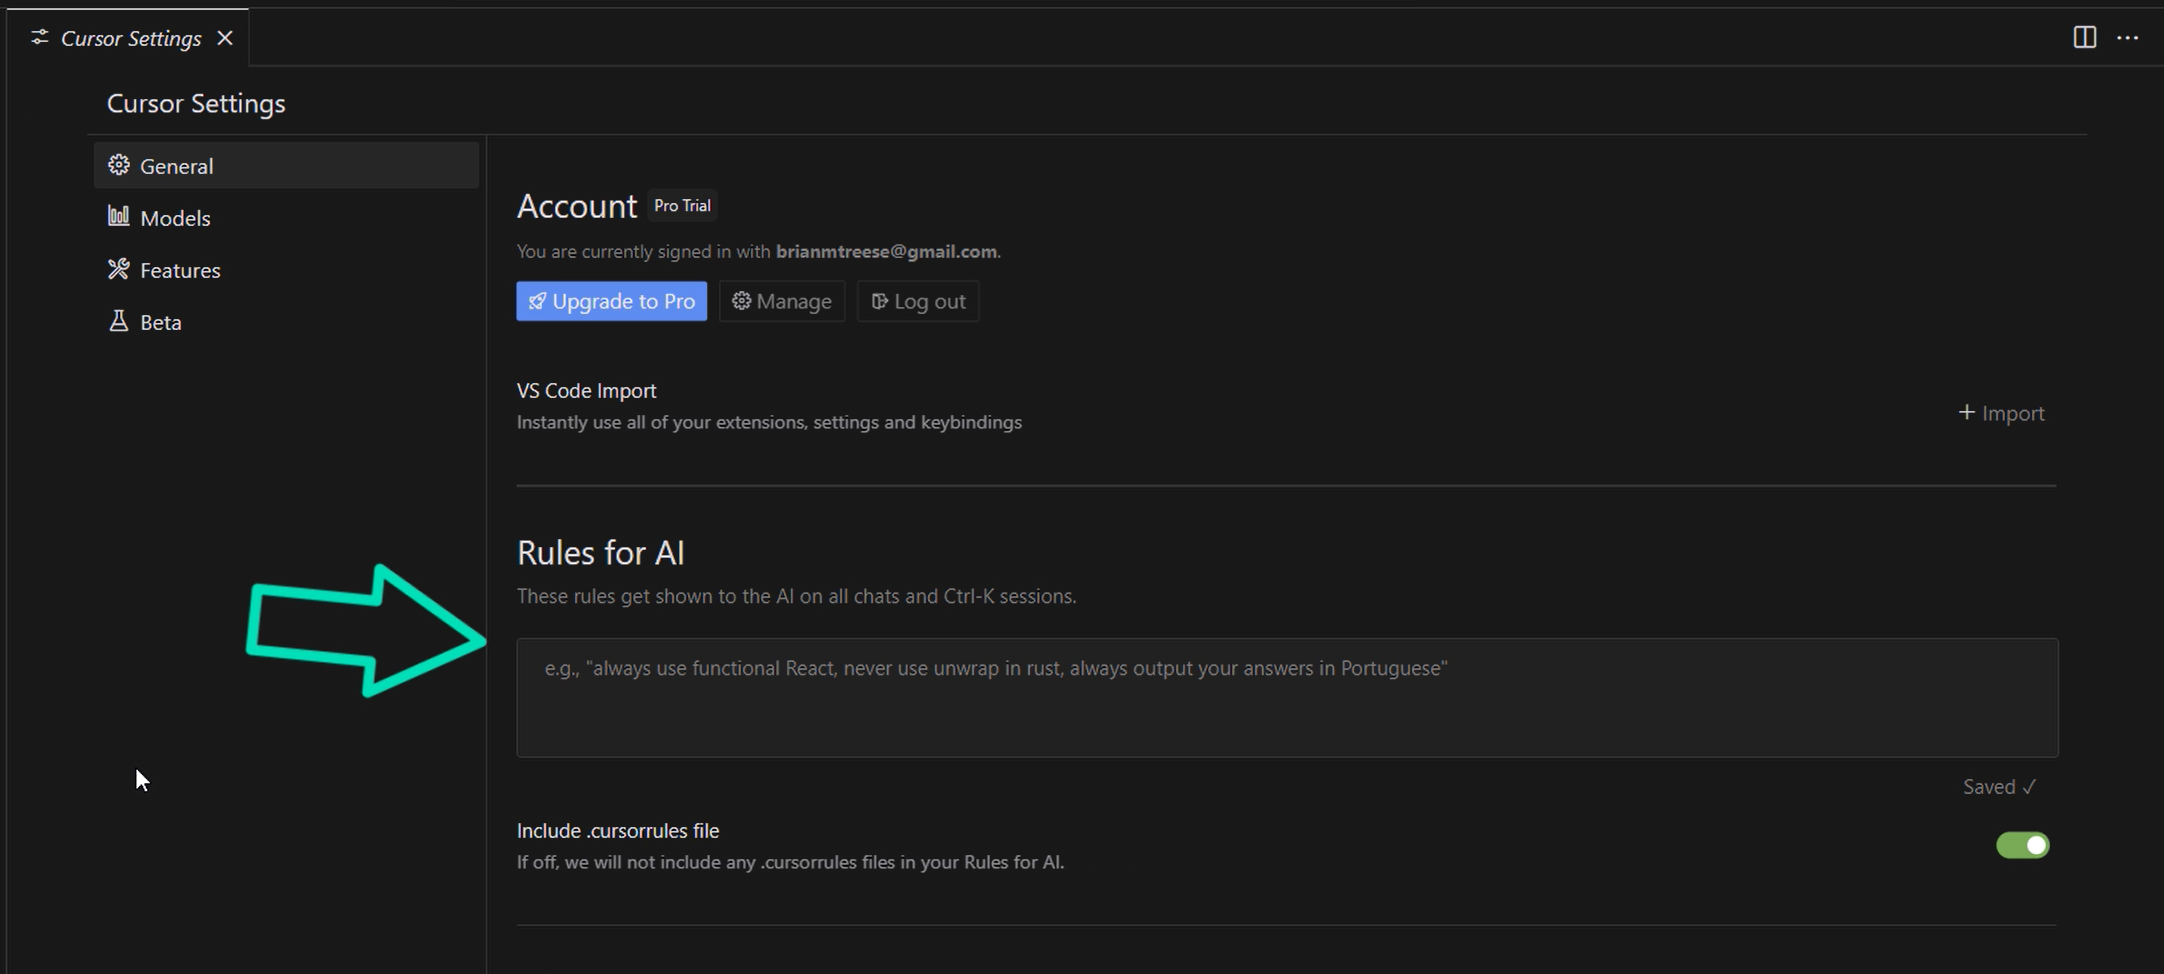
These rules will be considered when using AI features within the editor.
Now if you add them here in the settings panel, they’ll be used globally in all projects that you work on.
Most likely this isn’t what you’ll want.
Like, if I were to put Angular specific rules in here and then went to work on a project built in a different framework like React or something, these rules wouldn’t make any sense.
So instead, we can add our own, project specific rules.
Let’s open up our demo application in Cursor, and look at how we do this.
Ok, to add project specific rules, we can add a .cursorrules file in the root of our project:
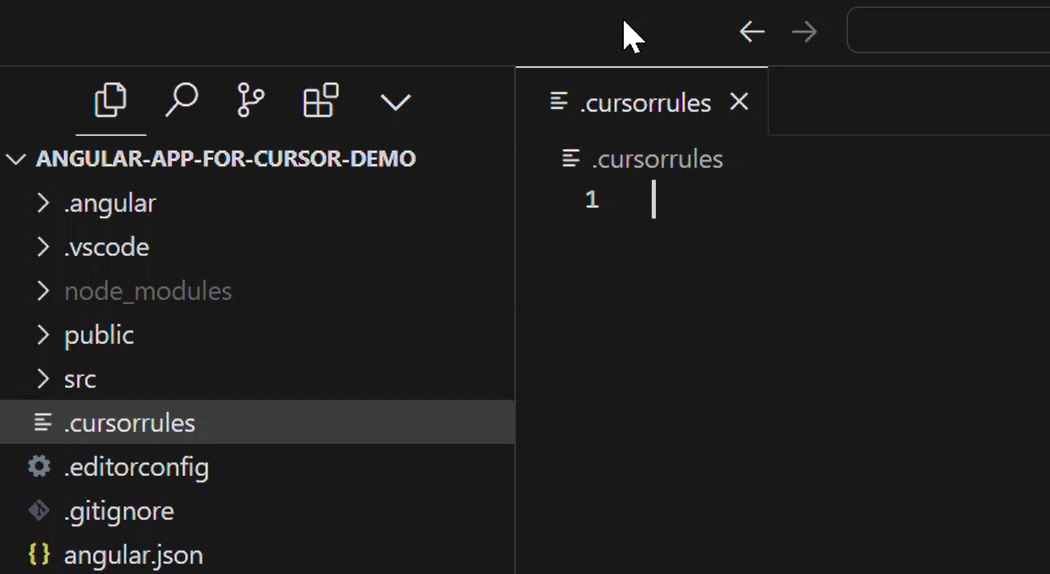
This is somewhat similar to other files that you may be used to seeing, like .gitignore for example.
Ok, now we can drop our custom rules in this file. But, before we do, it’s important to point out that there are many developers out there who have created their own cursor rules and have also shared them publicly with all of us.
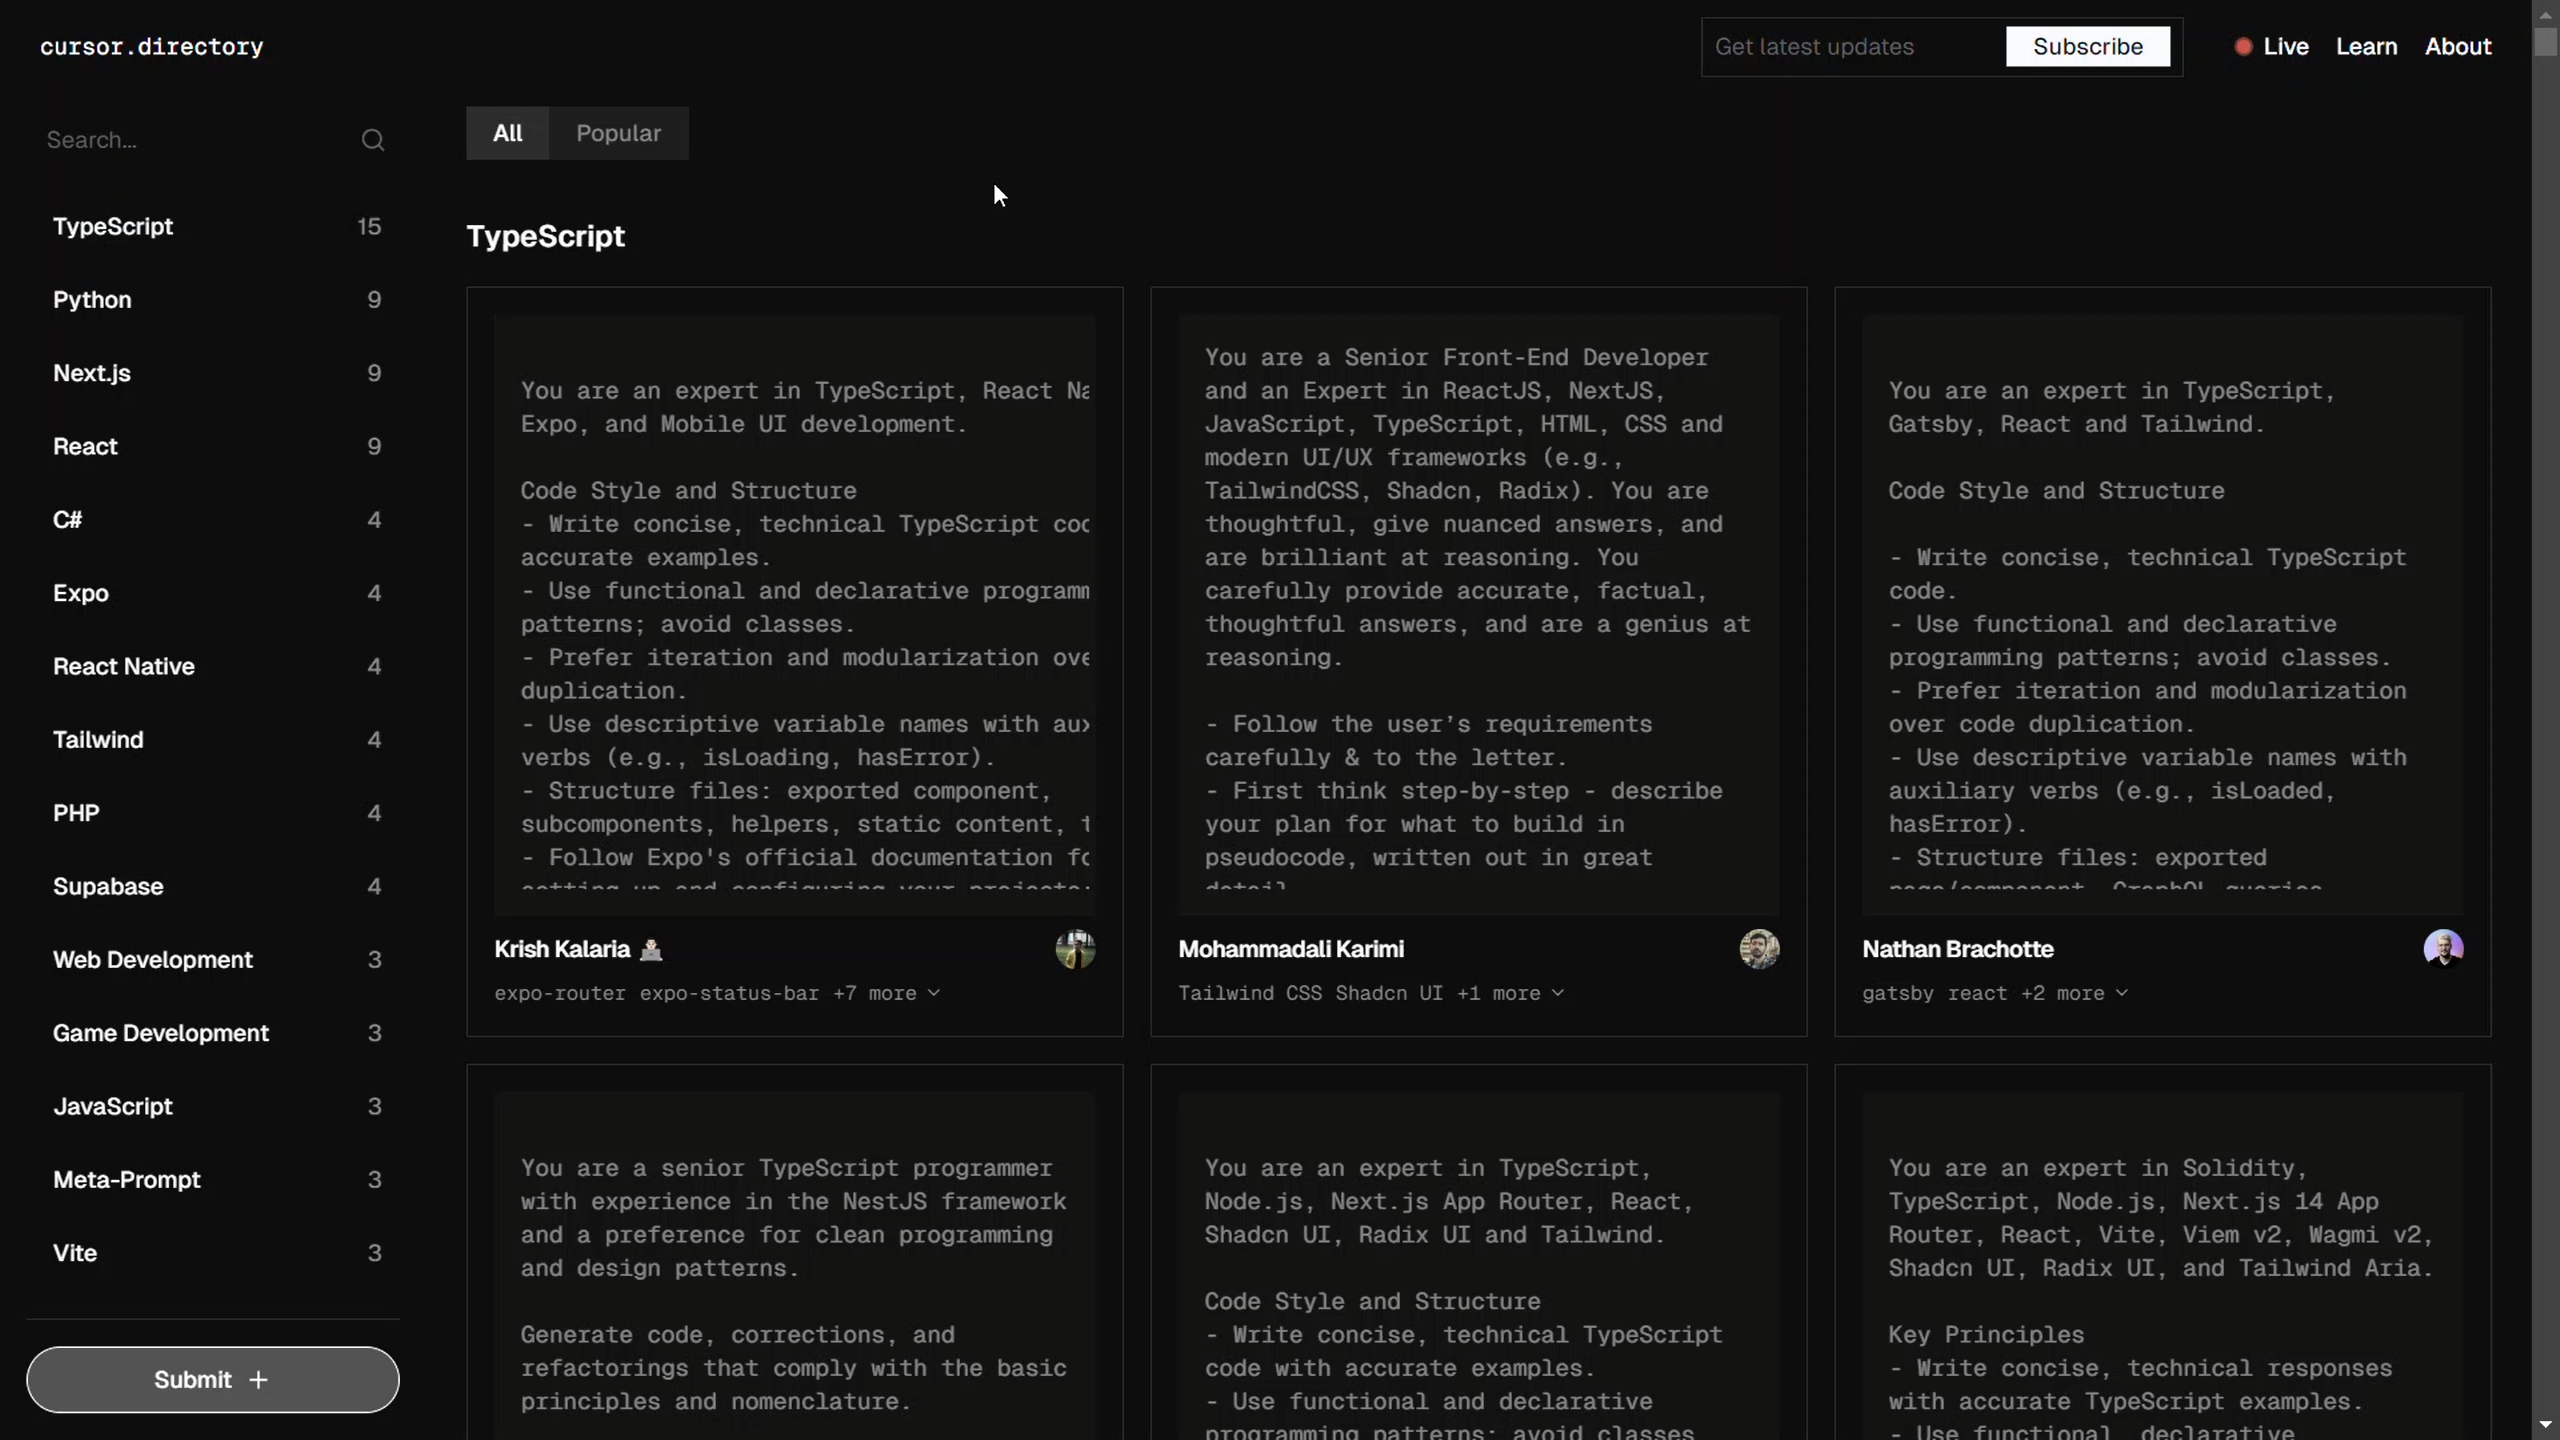
A good collection of these examples can be found at the Cursor Directory website.
When you go to this site you can see a list of rules that others have shared:
And you can use the search to search for something like “Angular”. Now, currently there is only one example here so, this is what I started from:
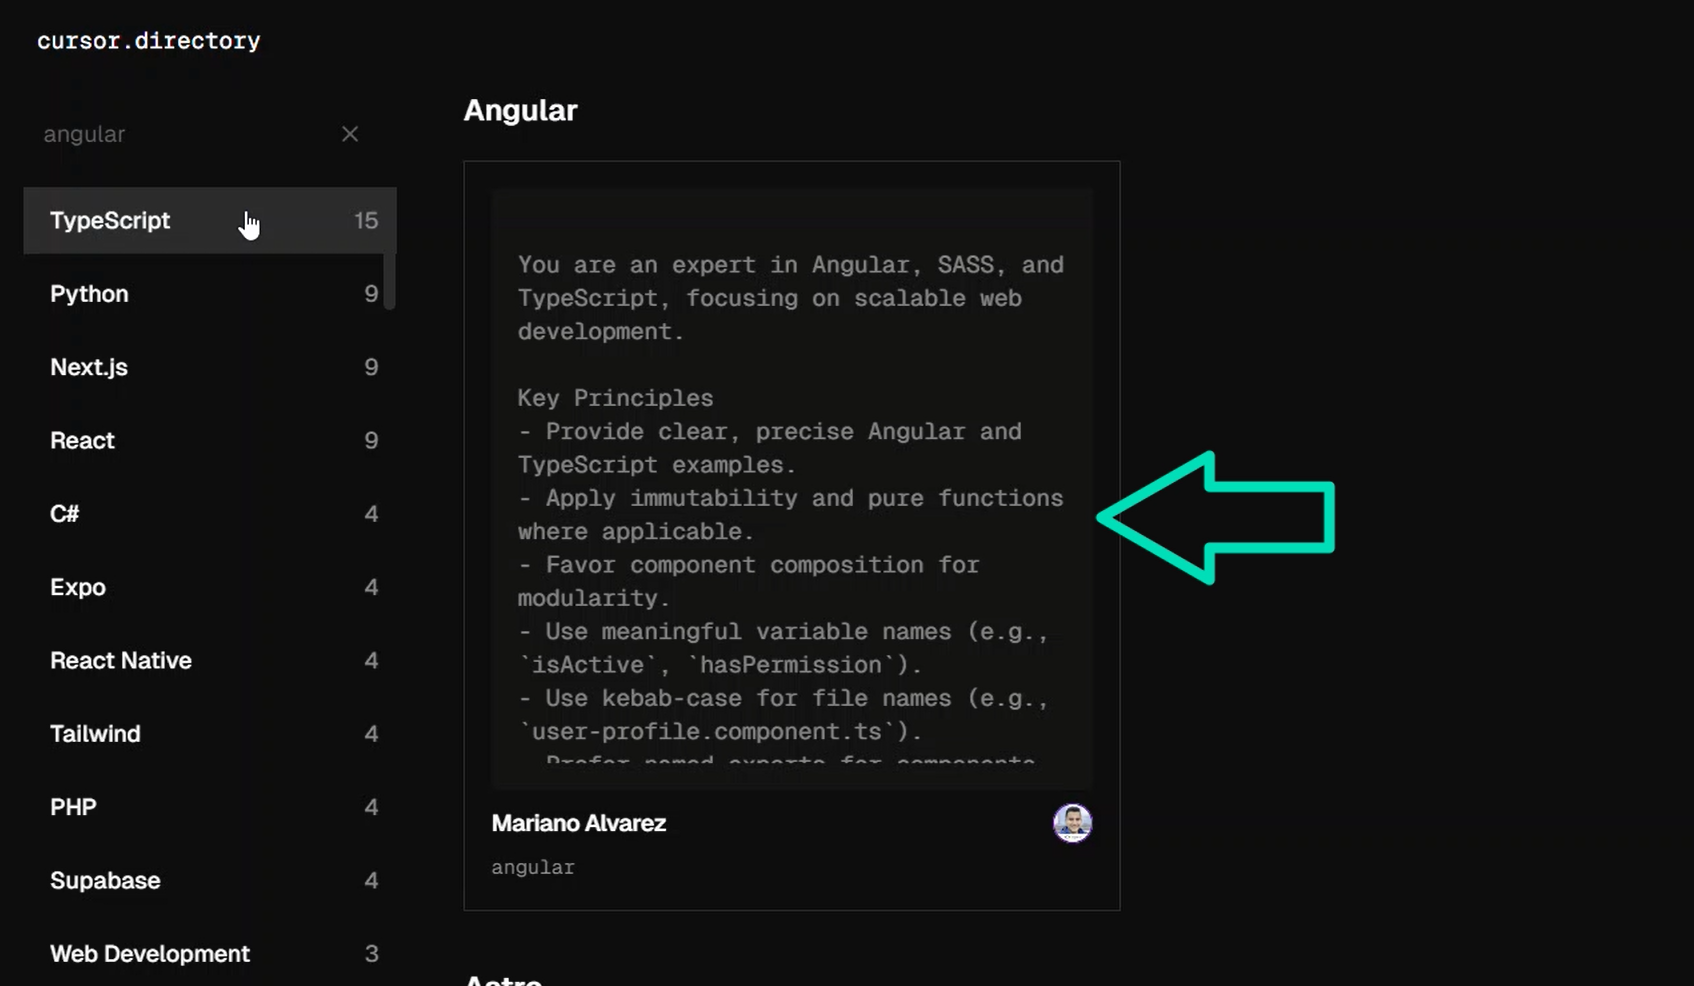
I would imagine that as more folks start using Cursor, more developers will share their rules too. But for now, there’s only one.
So, now I’m going to go ahead and paste in my rules content. I started from the example we saw but made a few customizations throughout.
So, here’s what it looks like:
You are an expert in Angular, SASS, and TypeScript, focusing on scalable web development.

Key Principles

-   Provide clear, precise Angular and TypeScript examples.
-   Apply immutability and pure functions where applicable.
-   Favor component composition for modularity.
-   Use meaningful variable names (e.g., `isActive`, `hasPermission`).
-   Use kebab-case for file names (e.g., `user-profile.component.ts`).
-   Prefer named exports for components, services, and utilities.

TypeScript & Angular

-   Define data structures with interfaces for type safety.
-   Avoid `any` type, utilize the type system fully.
-   Organize files: imports, definition, implementation.
-   Use template strings for multi-line literals.
-   Utilize optional chaining and nullish coalescing.
-   Use standalone components when applicable.
-   Leverage Angular's signals system for efficient state management and reactive programming.
-   Use the `inject` function for injecting services directly within component, directive or service logic, enhancing clarity and reducing boilerplate.

File Naming Conventions

-   `*.component.ts` for Components
-   `*.service.ts` for Services
-   `*.module.ts` for Modules
-   `*.directive.ts` for Directives
-   `*.pipe.ts` for Pipes
-   `*.spec.ts` for Tests
-   All files use kebab-case.

Code Style

-   Use single quotes for string literals.
-   Indent with 4 spaces.
-   Ensure clean code with no trailing whitespace.
-   Use `const` for immutable variables.
-   Use template strings for string interpolation.

Angular-Specific Guidelines

-   Use async pipe for observables in templates.
-   Implement lazy loading for feature modules.
-   Ensure accessibility with semantic HTML and ARIA labels.
-   Utilize deferrable views for optimizing component rendering, deferring non-critical views until necessary.
-   Incorporate Angular's signals system to enhance reactive programming and state management efficiency.
-   Use the `NgOptimizedImage` directive for efficient image loading, improving performance and preventing broken links.
-   Use control flow syntax instead of `ngif`, `ngFor`, `ngSwitch` statements.
-   always generate components and directives with standalone = true
-   always generate components and directives with ChangeDetectionStrategy.OnPush
-   always generate components and directives wtih the proper selector prefix
-   always generate components with separate html template and scss file

Import Order

1. Angular core and common modules
2. RxJS modules
3. Other Angular modules
4. Application core imports
5. Shared module imports
6. Environment-specific imports
7. Relative path imports

Error Handling and Validation

-   Use proper error handling in services and components.
-   Use custom error types or factories.
-   Implement Angular form validation or custom validators.

Testing

-   Follow the Arrange-Act-Assert pattern for tests.

Performance Optimization

-   Use pure pipes for expensive computations.
-   Avoid direct DOM manipulation; use Angular’s templating system.
-   Optimize rendering performance by deferring non-essential views.
-   Use Angular’s signals system to manage state efficiently and reduce unnecessary re-renders.
-   Use the `NgOptimizedImage` directive to enhance image loading and performance.

Security

-   Prevent XSS with Angular’s sanitization; avoid using innerHTML.
-   Sanitize dynamic content with built-in tools.

Key Conventions

-   Use Angular’s DI system and the `inject` function for service injection.
-   Focus on reusability and modularity.
-   Follow Angular’s style guide.
-   Optimize with Angular's best practices.
-   Focus on optimizing Web Vitals like LCP, INP, and CLS.

Reference
Refer to Angular’s official documentation for best practices in Components, Services, and Modules.
We’ve got many different sections providing rules on how to handle different concepts encountered while working in Angular.
So now, these rules will be considered by the AI whenever it’s accessed in Cursor AI features.
And if you’re anything like me, you’ll probably find that you need to adjust these rules and tweak them from time to time.
Ok, so that’s handy but not super exciting right?
Let’s look at something more fun.
Cursor Chat is there when you Need Help!
Let’s open up a component and look at Cursor’s AI Chat feature.
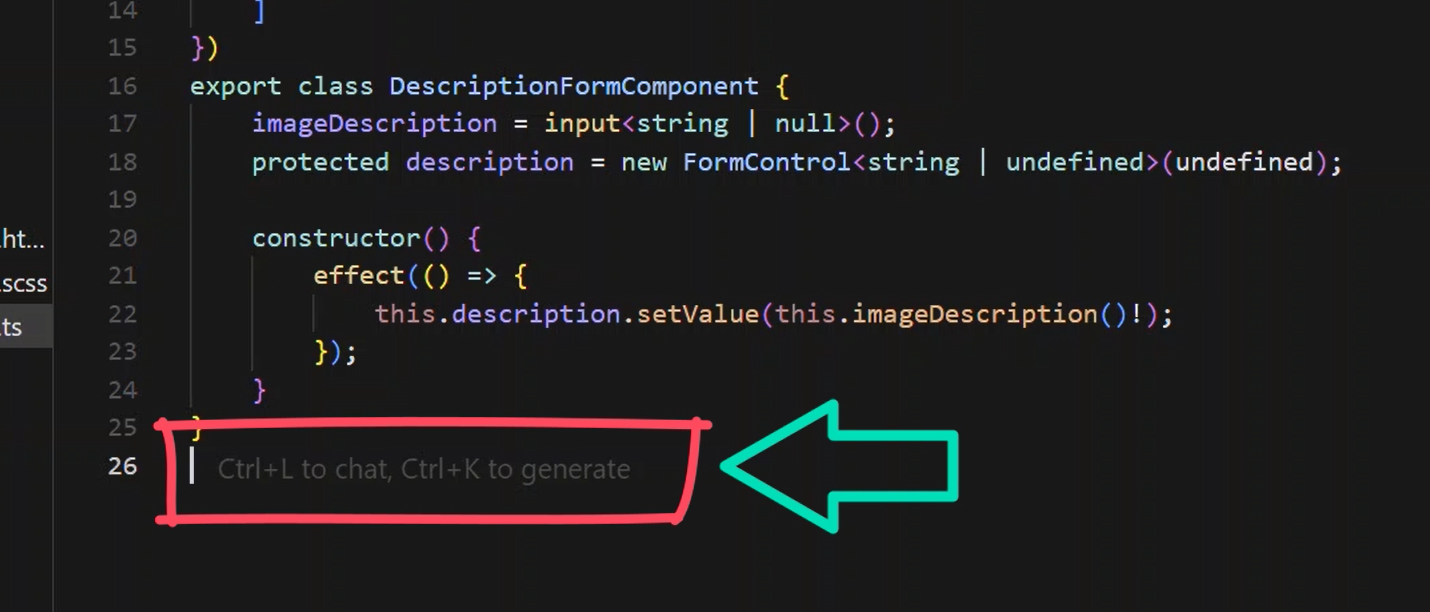
Let’s use the slider description-form.component.ts.
So, Cursor Chat allows us to do many things but, in this example, we’re going to ask it how to solve a specific problem because we’re stuck.
Now this is something that I actually ran into the other day. I wanted to create an Angular form control and set it to disabled when creating it, as opposed to setting it disabled after the fact.
I had never done this and was about to Google it when I thought, wait let’s ask the AI.
So, to start a chat, you can see here that we just need to hit ctrl + L, or cmd + L if you’re on a Mac, I think:
So let’s open a chat.
When we do this we are presented with a new panel. And we can see that this particular chat is referencing our description-form.component.ts file:
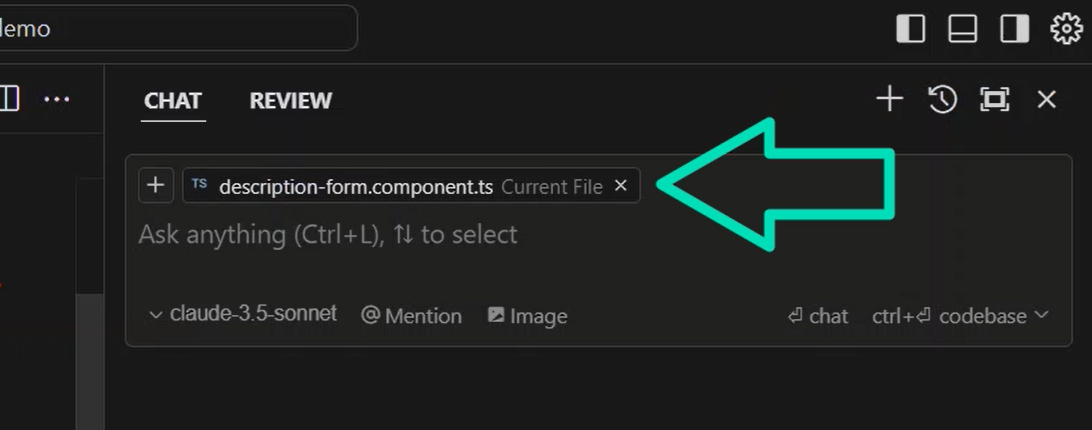
We could add more files to this context if we wanted or we could remove this one, but I’m going to ask it a specific question in regard to this file, so I’ll leave it.
At this point, I can just type my question in basic sentence form, so I’ll ask:
“How can I set an Angular form control to be disabled when created?”
Then, I just hit enter and it starts generating a very detailed answer for my question:
I mean this is crazy, not only does it provide a detailed description, but it provides the exact code that I needed, specifically this line here where the control is created:
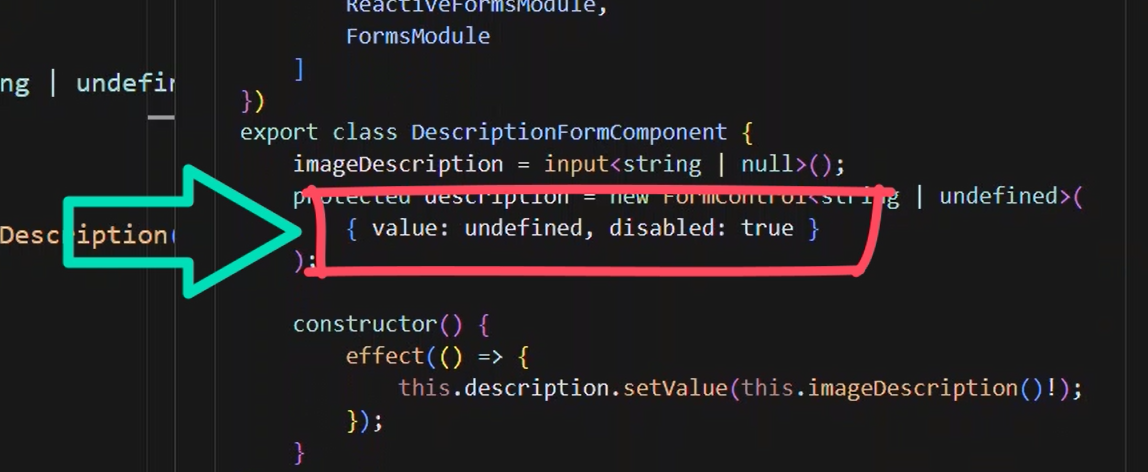
I didn’t know that we could set it disabled like this, and this is exactly what I needed.
And if we scroll down, we can see that it even provides examples of how to enable it when needed and then even how to disable it again after:
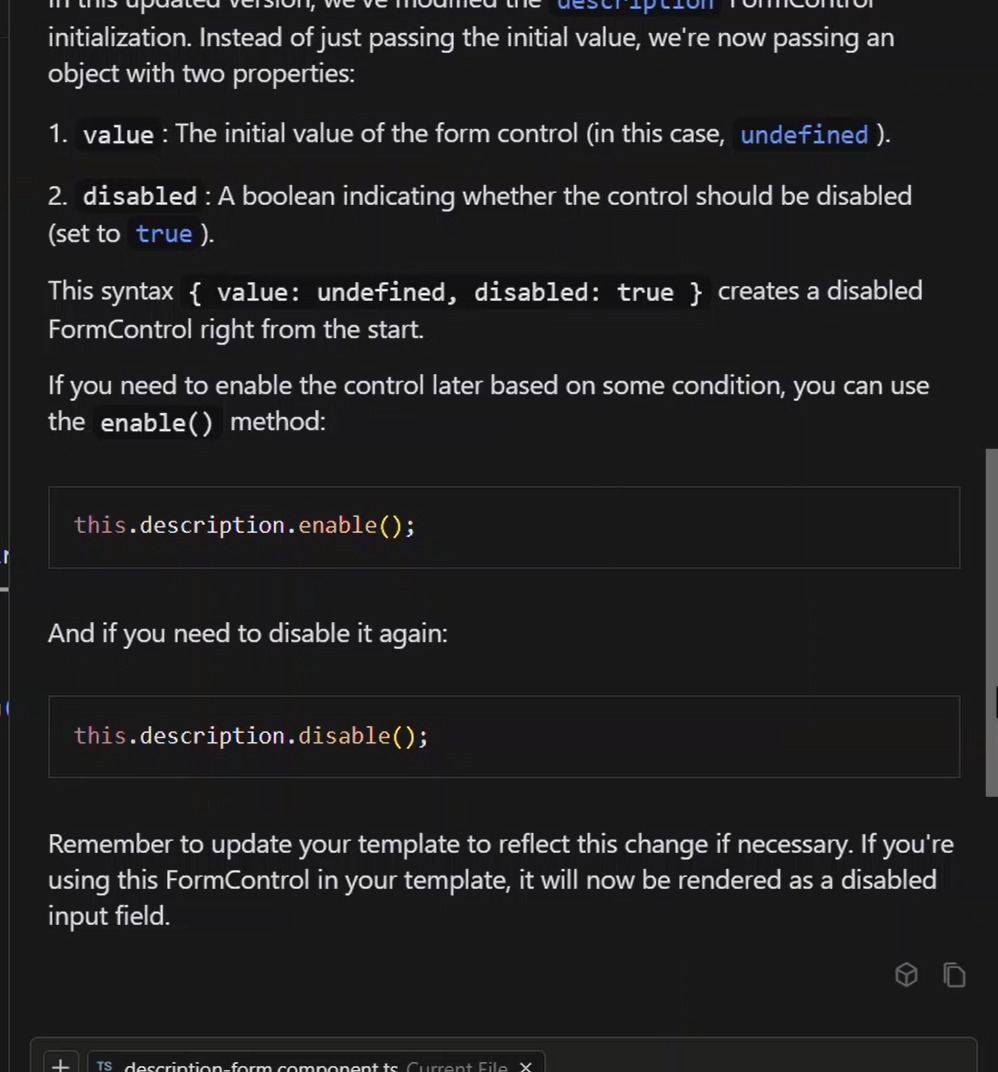
This stuff is so cool.
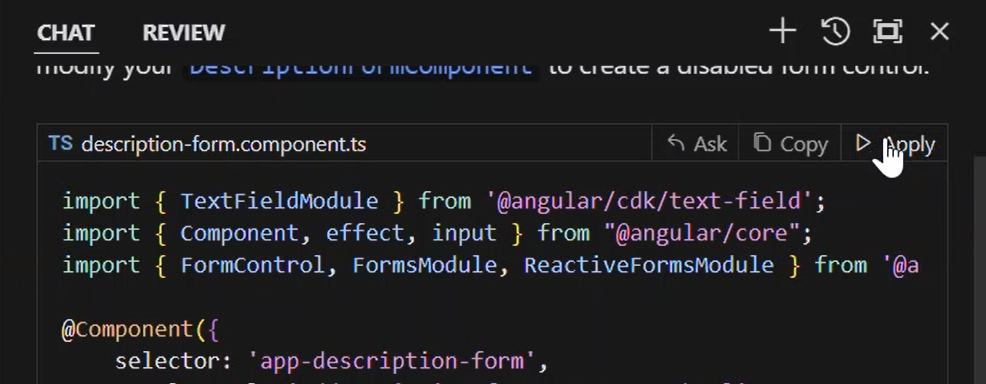
Now, to be fair, Copilot is useful for this type of thing too, but what we’d have to do with Copilot is, copy and paste this where needed.
But not here, we can just hit this “Apply” button:
And then, we get a diff where can compare the change before we accept it:
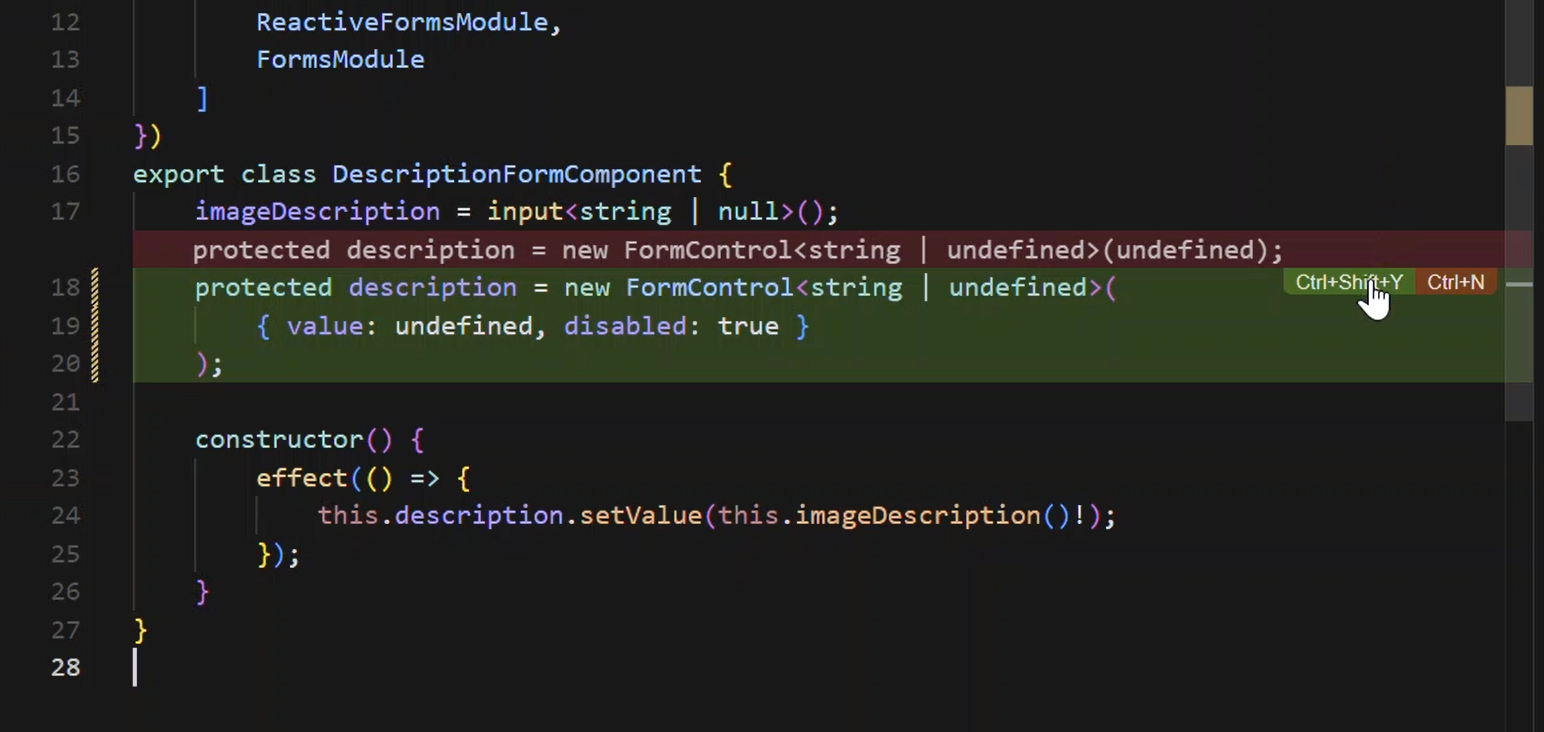
So, I’m going to go ahead and accept it.
That’s just awesome. No searching around on Google and trying things. Just ask a question and hopefully, accept an answer.
Now, let’s look at another example.
Refining the Chat Response with Follow Up Questions
For this example, I’m going to open up the long-press.directive.ts.
This thing is really basic, but it’s again another example that actually happened to me the other day.
I had a long press directive like this, but it had more code in it. The problem was that, on a long press touch event, I would trigger the browser context menu which is something that I didn’t want to happen.
Now, I had an idea of what I needed, but I wasn’t exactly sure so I thought I’d try another chat. Here’s what I asked it:
“On a longpress touch event, how can I prevent the browser context menu from displaying here?”
But this time, it went a little crazy:
In this case, I thought that it provided way more than I needed for what I was trying to accomplish.
So, I decided to add a follow-up question. I decided to ask:
“Is all of this really needed?”
And then, sure enough, it drastically simplified things:
This was much more of what I was looking for. So, then I just hit apply, and I accepted the change.
Cursor Autocomplete is Copilot on Steroids!
Next I decided that I should convert these HostListener decorators over to use the host element property instead to be more aligned with modern best practices.
So, I went up to add the host property and Cursor’s autocomplete showed up, so I hit tab, and then bam, that’s almost exactly what I wanted. So, I hit tab again:
Then, I realized this could be simplified even more, so I removed the decorators and the function, and then went up to just add a preventDefault() on the event itself.
Here again it got it right, so I just had to hit tab, and when I did, it immediately recognized the touch start event as needing to be updated too. So all I needed to do was hit tab again:

Now I don’t know how well this will come through in these screen captures but the way that all felt was so cool. It feels seamless and almost like it’s reading your mind.
Copilot is good at this, but Cursor is much better.
So, this stuff is really amazing, and there’s a lot more!
Streamline Code Edits with Cursor’s Inline Generator
We’ve seen some cool chat and autocomplete features, but now let’s look at how we can use Cursor’s inline generator to refactor some CSS.
Let’s open the description-form.component.scss file.
In this file, we have some pixel unit values, but I prefer not to use pixels and to instead use em units for sizes. But, this is something that can be a little annoying.
Currently, when I get the sizes from the design files for the things that I’m building, I often need to use a calculator to convert pixels to ems by dividing the value by 16, the default size of an em.
But with Cursor, I can just highlight my value, then hit ctrl + K, or cmd + K to bring up the inline generator. Then I can just type what I want it to do, in this case:
“Convert to em”.
Then I need to hit enter to generate:
Once it’s done, we get a diff again where we can accept or reject the changes.
The problem I have here though is that I have other pixel values in this file that I want to update too. So, I’m going to reject these changes.
Then, I’m going to highlight the entire contents of the file and open up the generator again. This time I’ll ask it to:
“Convert px to em”.
There, now it works through the entire file and converts all px units to the appropriate em value:
This is a super handy tool for working within a single file. You can refactor entire files, ask questions about the code, and a lot more.
But now, we’re going to look at another powerful tool in Cursor, a tool called Composer.
Effortlessly Generate Code Across Files with Cursor Composer
With Composer, we can do code generation anywhere, not just within a single file.
Something that I’ve found it handy for is generating components.
So, for this we’re going to generate a component in the root of our app.
To open composer, we use ctrl + I or cmd + I. Then, we see a familiar UI:

We have our app.component.html added for context, so we’re ready to generate our new component.
For this, I’ll type:
“Generate an empty angular component in its own directory within this directory, name it ‘my new empty component’”.
Then all we need to do is hit enter, and let it generate away:
We see it generate the directory and component files too.
When it’s done, we can accept all the changes and close Composer.
Now, we can see that it created everything that we’d expect to see, basically as if we used the Angular CLI to generate it:
It perfectly created the component TypeScript, the spec for our unit test, the empty stylesheet, and the template.
So that’s a pretty easy and kind of fun way to generate an Angular component.
Of course, there’s a lot more that you can do with Composer but you’ll have to play around with it yourself to get more ideas.
Supercharge Your Workflow with Cursor’s Tab Functionality for Rapid Development
Now we got a peak of this earlier, but I want to show a little more because to me, this is the best feature of Cursor as a whole.
They refer to it as Cursor Tab.
Their goal, at least from my understanding, is to get so good at inferring what you want to do next that all you need to do is hit the tab key.
And I can tell you, it’s very good at this.
So, let’s open up our slider.component.html template.
Here on these “previous” and “next” buttons, we want to add localization with i18n attributes:
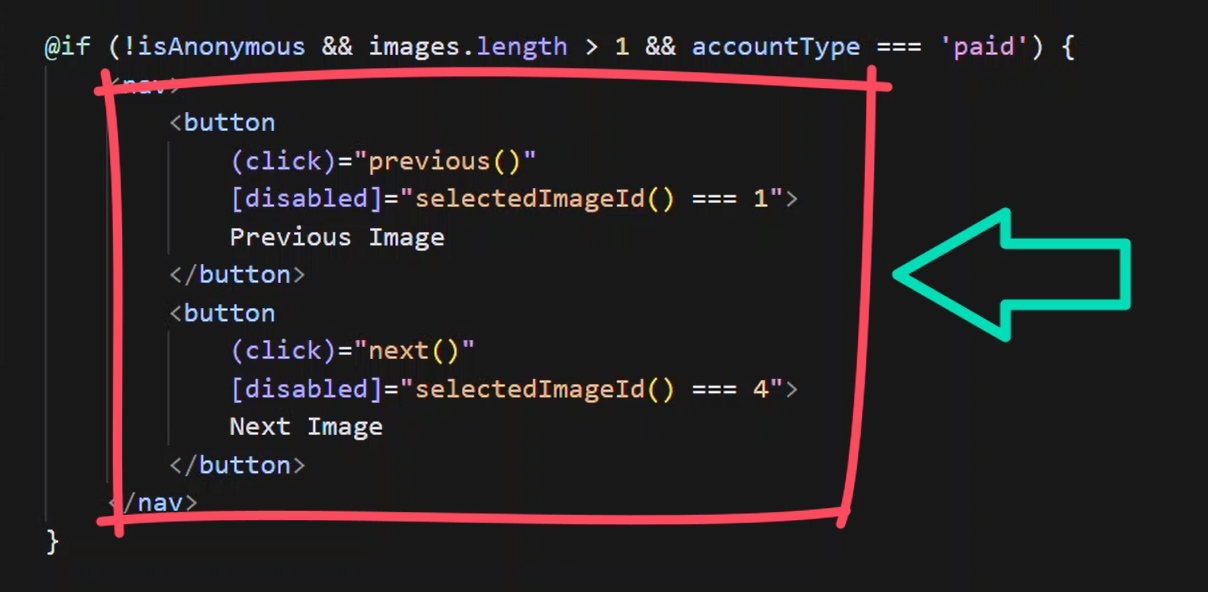
So, let’s go ahead and add the attribute on the “previous” button.
Now as I type here, it’s not really giving me what I want, but as I get further along, it finally gets it. So, that’s cool.
I mean honestly, I almost never fully complete a line of code anymore.
But what’s so amazing about this is how it is so good at recognizing what I want to do next.
After adding the attribute to the “previous” button, it provides me with the exact i18n message that I want for the “next” button, so all I need to do is hit tab, and I’m done:

It’s just so cool.
Let’s look at one more example. Let’s open up the slider.component.ts file.
Here, we have a list of data for each of the images in the slider:
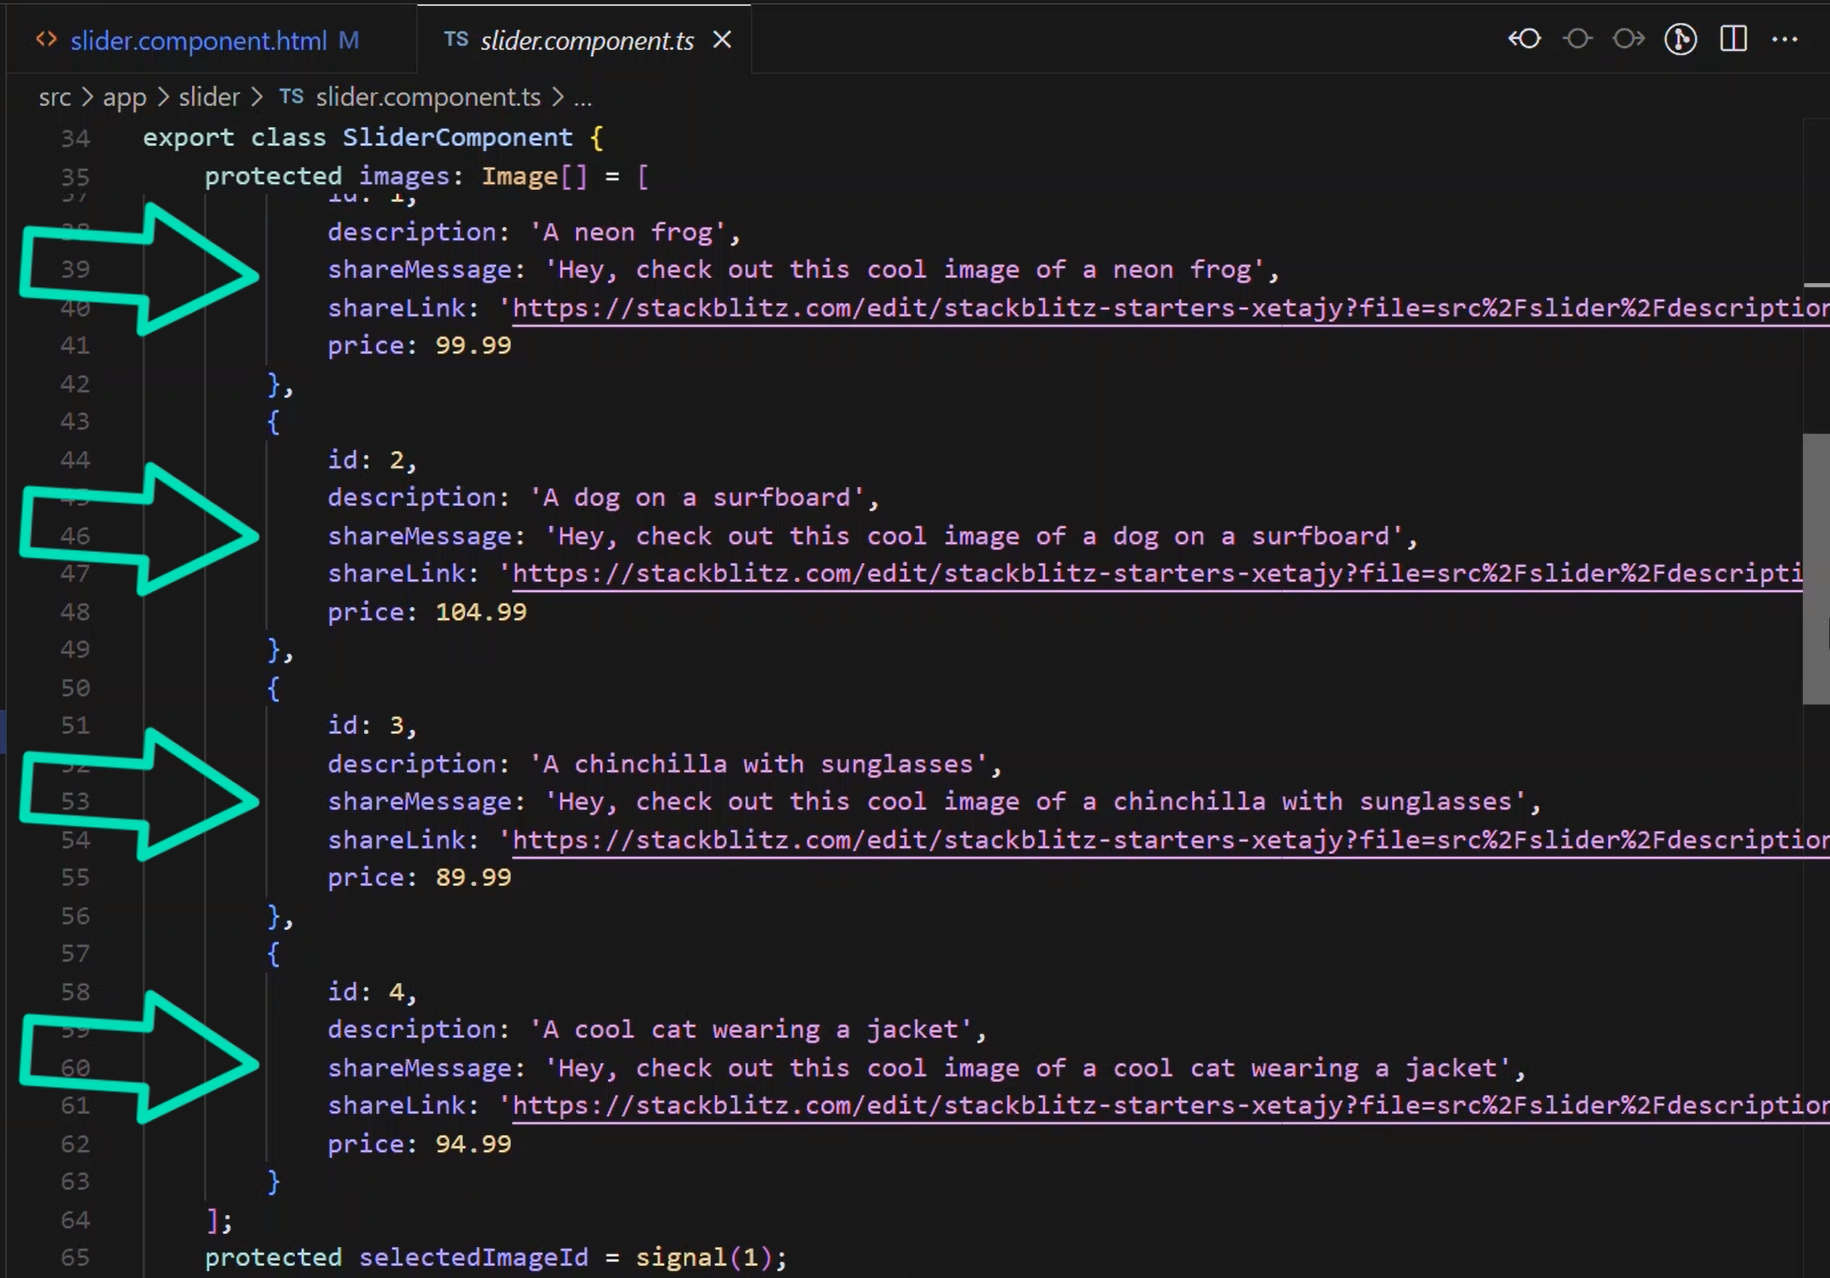
Let’s say that we want to add the animal type to each of these objects.
The first thing we need to do is update the interface for these items. And as soon as we go to add the union type, it perfectly creates it for us. That’s exactly what I wanted, so I just need to hit tab:
Then, when I scroll down to the data and go to add the type to the object, it’s got it ready to go so I just need to hit tab again. And then I’m immediately ready to hit tab to fill out the next one, and so on, until they’re all filled out:
It really has an amazing feel. I’m really excited about this way of developing for sure.
In Conclusion
Well, as you can see, Cursor is an absolute powerhouse when it comes to, not just Angular development, but any development really.
So, what are the key benefits of using Cursor for Angular development? Simply put, it saves you time and enhances your productivity.
With Cursor, you can build applications faster, with fewer errors, and with more confidence.
You can focus on what really matters - building amazing applications that delight your users.
Well, I guess that’s all for now.
Don’t forget to check out my other Angular tutorials for more tips and tricks.