Angular CDK: Copy to Clipboard
When we build things with Angular, we often find ourselves needing to do stuff that we see on the web or in other applications every day. Like copying text to the clipboard for example. Something like that could take a little work to pull off if we were creating it from scratch. But one of the benefits of working with a framework like angular is that many of these common application concepts have already been figured out for us and made available by either the framework itself or, in this case the Component Dev Kit (a.k.a., CDK). So, in this example we’ll see just how easy this task is thanks to the CDK. Alright, let’s get to it.
The Demo Application
For the example in this post, we’ll be working with this demo application, Petpix. It’s an app where people can share cool images of their pets.
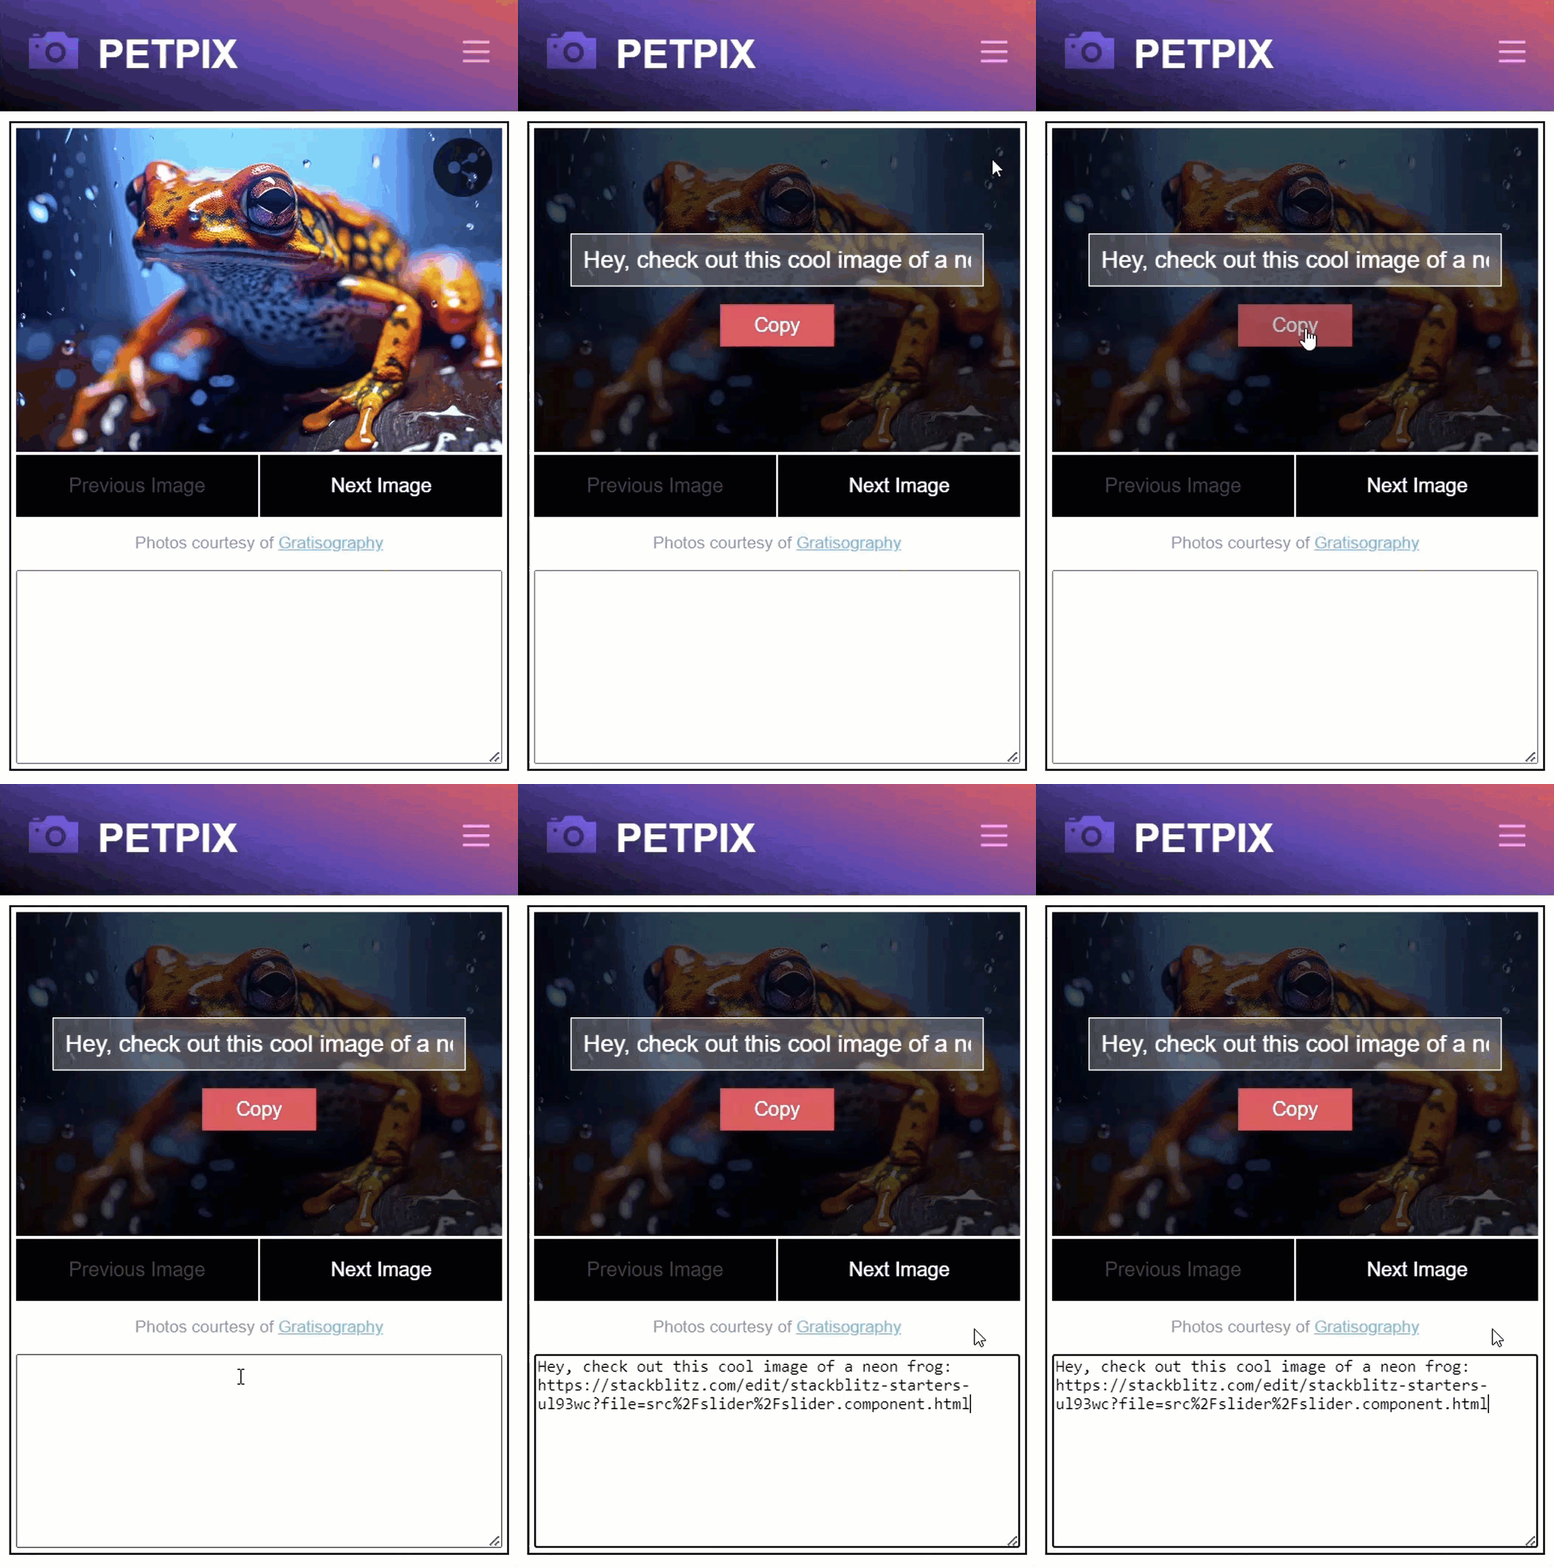
Here, we’re looking at an image gallery where we can navigate between the images. In the upper right corner of each image, there’s a share button. When we click this button, we get a form containing a message and a link to this image. We also have a copy button.

Right now, the copy button isn’t wired up to do anything, so when we click it nothing happens. And, it’s probably pretty obvious, but we want this button to copy the contents of the form field to the user’s clipboard so that they can then paste it in a text message, or an email, or something else.
Well, this is exactly what we’re going to do in this example, and it’s going to be pretty easy to do too.
Installing the Angular CDK
Ok, since we’re using the CDK, we‘ll need to make sure before we do anything else, we install it using the following command.
npm i @angular/cdk
Now once we have it installed, we will be able to use the Clipboard Module to do exactly what we need. And, in particular, we will be using the cdkCopyToClipboard directive on our copy button.
Ok, let’s look at some code.
The Existing Code
Let’s start by looking at the template for the slider component which contains the markup and logic for our image gallery. Within this template we have a switch statement that is used to determine which image and content to show.
slider.component.html
<div ... class="image">
    @switch(selectedImage()) {
        @case(1) {
            ...
        }
        @case(2) {
            ...
        }
        @case(3) {
            ...
        }
        @case(4) {
            ...
        }
    }
</div>
For each of the images, we have a share component that wraps the image. This share component has a “message” input that we are using to pass a message and a URL. Now in a real application this would be a real link to the image itself but for this example, it just links to this demo.
<app-share message="Hey, check out this cool image of a dog on a surfboard: https://stackblitz.com/edit/stackblitz-starters-ul93wc?file=src%2Fslider%2Fslider.component.html">
    <img src="/assets/2.jpg" alt="A dog on a surfboard" />
</app-share>
Next, let’s take a look at the share component.
Here we have the share button, and it’s displayed when a “messageVisible” signal is false. When this button is clicked, it sets the value of this “messageVisible” signal to true.
share.component.html
@if (!messageVisible()) {
    <button (click)="messageVisible.set(true)">
        Share Image
    </button>
} @else {
    ...
}
Then, when that signal is true, the “message” region will be displayed which contains the textbox with our message in it, and the button that we will use to copy this value to the clipboard.
@if (!messageVisible()) {
    ...
} @else {
    <div class="message">
        <input type="text" [value]="message()" readonly/>
        <button>Copy</button>
    </div>
}
Adding “Copy to Clipboard” Functionality with the Angular CDK Clipboard Module
Now, before we can use the directive, we need to import the module into our component, so let’s switch to the typescript. Then, within our imports array, let’s add the ClipboardModule, and we need to be sure that it gets imported properly from the CDK.
share.component.ts
import { ClipboardModule } from '@angular/cdk/clipboard';

@Component({
  selector: 'app-share',
  ...
  imports: [ ..., ClipboardModule ]
})
Ok, now let’s switch back over to the template. On the copy button, let’s add the cdkCopyToClipboard directive. This directive requires a text value to be passed as an input, so we’ll pass it our “message” input value from this share component.
share.component.html
<button [cdkCopyToClipboard]="message()">
    Copy
</button>
And that’s it, pretty easy right? That’s all we need to make it so that this button will now copy our message value to the clipboard.
So, let’s save and see how it works.
We’ll hit the share button, then the copy button, and at this point it’s hard to know if it worked or not. So, we’ll paste the contents of our clipboard in the textarea at the bottom of the page.

And there it is, pretty cool right?
Adding Logic After the Value Has Been Copied to the Clipboard with the “Copied” Event
So that was cool and easy to do, but there’s even more we can do with this directive. Let’s say we want to switch the button text from the word “copy” to “copied” once the value has been copied to the clipboard. Well, we can do this with the cdkCopyToClipboardCopied event that gets emitted from the cdkCopyToClipboard directive once the value is copied.
To do this, let’s add a “copied” signal that we’ll use to toggle the text in the button. Let’s give it an initial value of false.
share.component.ts
import { ..., signal } from "@angular/core";

@Component({
  selector: 'app-share',
  ...
})
export class ShareComponent {
    ...
    protected copied = signal(false);
}
Ok now let’s switch back to the template and let’s add the cdkCopyToClipboardCopied event to the copy button with the directive. When the event fires, let’s set our “copied” signal value to true.
share.component.html
<button
    [cdkCopyToClipboard]="message()"
    (cdkCopyToClipboardCopied)="copied.set(true)">
    Copy
</button>
So that will change the value of that property, now we need to swap out the label.
Let’s switch to string interpolation here and we’ll use a ternary operator with our “copied” signal to display the word “copied” when it’s true, and “copy” when it’s false.
<button
    [cdkCopyToClipboard]="message()"
    (cdkCopyToClipboardCopied)="copied.set(true)">
    {{ copied() ? 'Copied!' : 'Copy' }}
</button>
Ok, there we go, now let’s save and try this out.
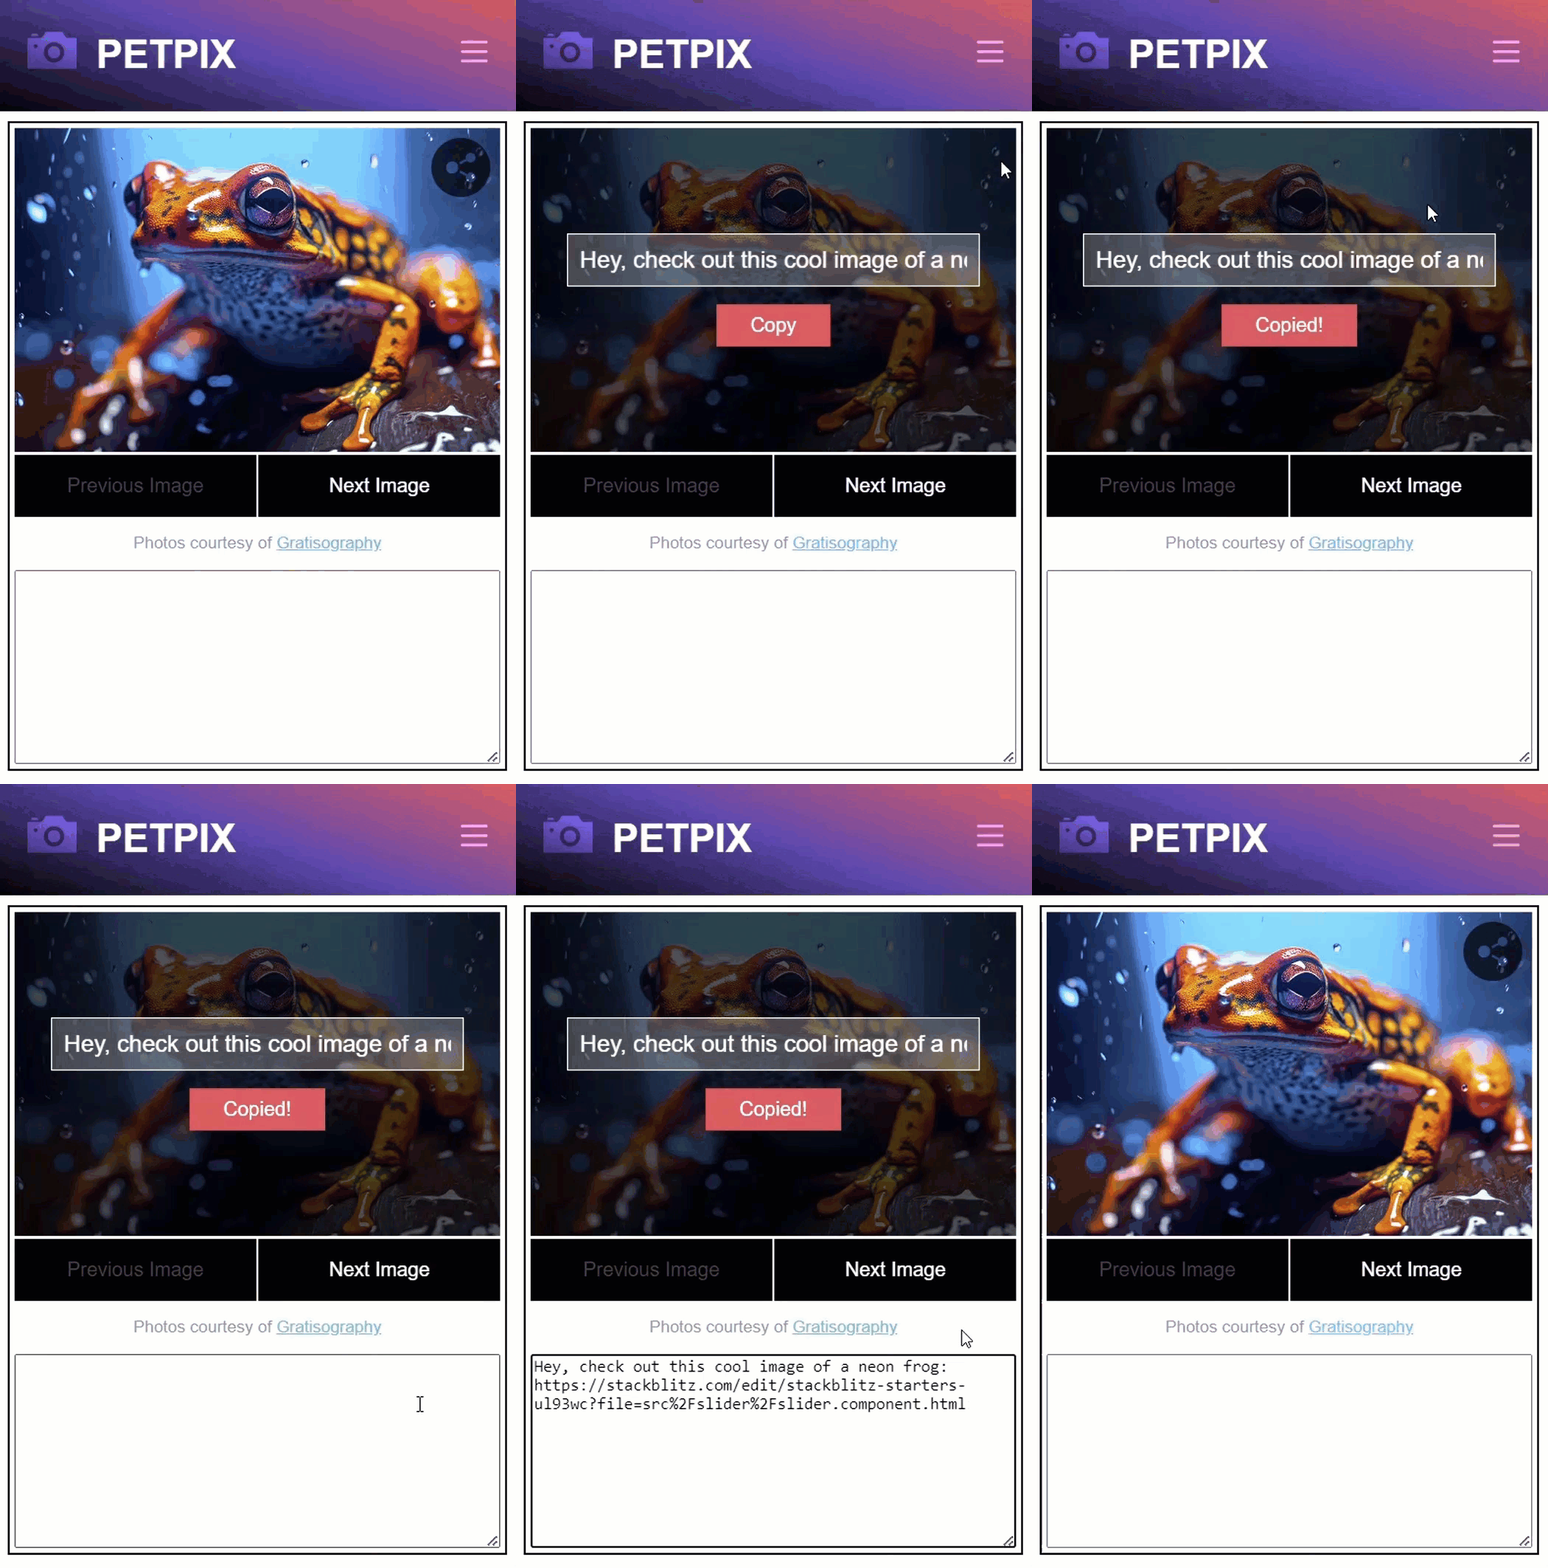
We’ll click the share button and then we’ll click on the copy button. Now, the button label should switch from “Copy” to “Copied!”. And when we paste, we should still see that the value is properly copied to our clipboard as it was before.

Conclusion
So, how easy was all of that? Thanks to the folks who work on the Angular CDK, we have a really easy way to copy stuff to our clipboard with the Clipboard Module. And now you know how to use it!
Now there are many more features available in the Angular CDK so be on the lookout for more posts in the future. Also, check out my YouTube channel where you’ll find more videos on the CDK and Angular in general.
Want to See It in Action?
Check out the demo code and examples of these techniques in the Stackblitz example below. If you have any questions or thoughts, don’t hesitate to leave a comment.