Angular Host Element Binding: Replace @HostBinding and @HostListener (v19+)
Angular's @HostBinding and @HostListener decorators are deprecated, existing only for backwards compatibility. Modern Angular uses host element bindings in the component decorator and host event bindings in templates, providing better type safety, clearer syntax, and improved performance. This tutorial demonstrates how to migrate from deprecated decorators to modern host binding patterns, updating real-world examples and modernizing component code along the way.
Using Host Element Class Binding to Replace the @HostBinding Decorator
We have this application that was originally created to demonstrate different ways to bind classes on elements.

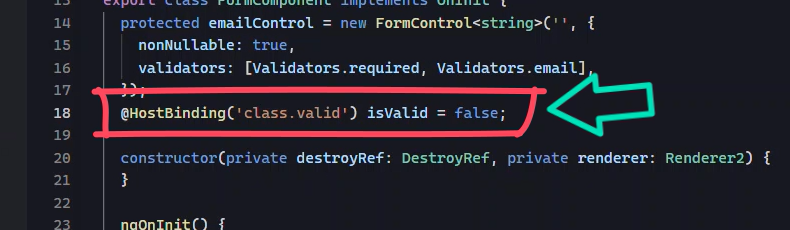
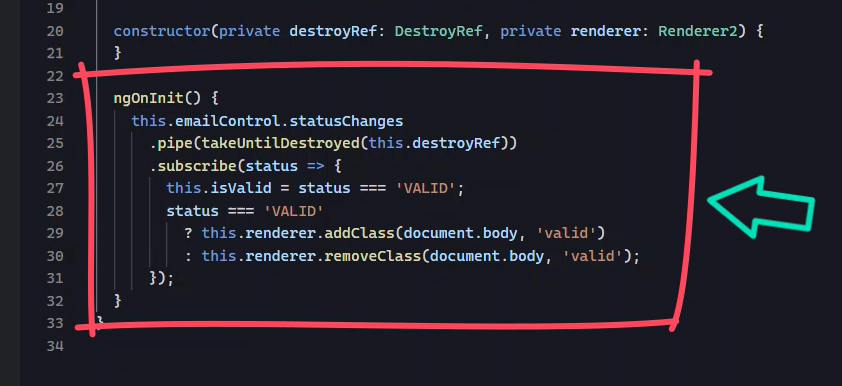
For one of the examples in this video, I used the @HostBinding decorator to conditionally bind a class on the host element of this form component when the email field status changes from invalid to valid.
So, If I add a valid email here, you can see that the style changes.

Now part of this is the host bound class changing, and the rest is a class that’s toggled on the body. All of this happens in an observable subscription to the email control’s status change.
So, let’s modernize all of this. First, we can remove the @HostBinding decorator and we can remove its import too since we won’t need it anymore.
Ok, what we’ll use now is something that existed back in the day, after we switched from AngularJS to Angular 2 or modern Angular. We’ll use the old/new host property on the component decorator.
In this property, we can bind classes just as we would in the template. Since we’re binding a “valid” class, we’ll use square brackets to bind to the class attribute. And then this class will be bound to our “isValid” property.
form.component.ts
@Component({
  selector: 'app-form',
  ...
  host: {
    '[class.valid]': 'isValid'
  }
})
export class FormComponent {
    private isValid = false;
    ...
}
Ok, at this point, what we have now is equivalent to what we had before we removed the decorator, but there’s still more we can do here.
How to Convert Form Value Observable to a Signal
One thing we can do is use signals to bind directly to the email control value status with the new toSignal() function. This function will convert an observable to a signal.
So, we need to pass it the control status changes observable. Then we’ll add a pipe, and we’ll map the status so that we can return a Boolean value based on whether the control status is valid or not.
private isValid = toSignal(this.emailControl.statusChanges
    .pipe(map(status => { return status === 'VALID'; })));
So now this “isValid” property is a signal that will automatically update when status of the control changes. This means that we’ll need to add parenthesis to the property in our class binding.
Before:
host: {
    '[class.valid]': 'isValid'
}
After:
host: {
    '[class.valid]': 'isValid()'
}
Ok, now that the status change has been converted to a signal, we can actually use the new effect() function to toggle the valid class on the body instead of the subscription.
How to Use an effect() to Toggle a Class When a Form Field Status Changes
To do this, let’s add the effect() function within the constructor. Then we can just copy the code that toggles the class currently and paste it into the effect().
Then we just need to change this condition to instead use the “isValid” signal. Now this will execute every time the “isValid” signal value changes, so we won’t need the old subscription. We won’t need the OnInit() method anymore either. We can remove the DestroyRef too. Then, we can remove all of the imports as well.
import { inject } from '@angular/core';
import { Renderer2 } from '@angular/core';

export class FormComponent {
    private renderer = inject(Renderer2);

    constructor() {
        effect(() => {
            this.isValid()
                ? this.renderer.addClass(document.body, 'valid')
                : this.renderer.removeClass(document.body, 'valid');
        });
    }
}
Ok, that’s about all we can probably change here. Now it should look and work just like it did before, but everything is now updated to work in a modern Angular way without the @HostBinding decorator.
So that’s the new way to bind to the host element, but what about host events using the @HostListener decorator? Well, this has changed too.
Using Host Element Events to Replace the @HostListener Decorator
We have an example that, like the last demo, was created to demonstrate different ways to listen to events in Angular.
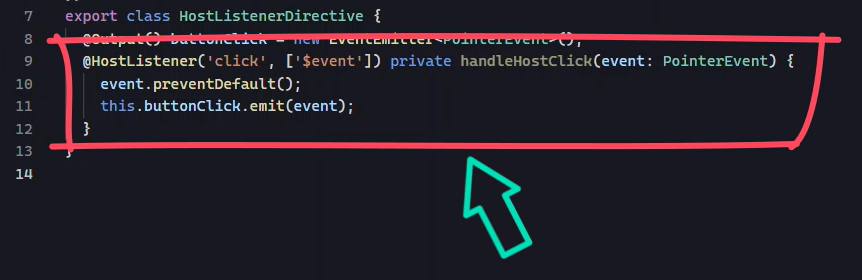
For one of the examples I used the @HostListener decorator to listen for a click event on the host of a directive and emit the event using the @Output decorator and an EventEmitter.
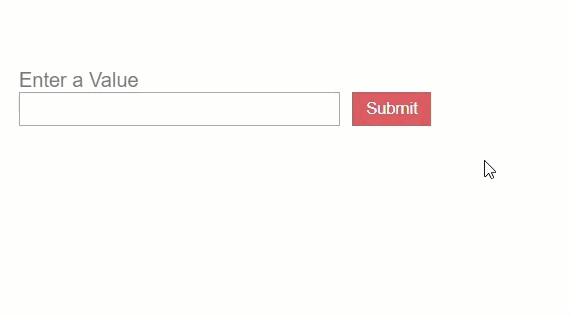
So, if I simply click on the “submit” button, we will see a message that the button click occurred.
So just like the @HostBinding decorator, we can remove the @Hostlistener because we don’t need it anymore. We’ll instead use the host property again.
And this time, since we’re binding to an event, we’ll use parenthesis. When the event fires, we’ll call our handleHostClick() function and we’ll pass it the click event.
host-listener.directive.ts
@Directive({
  selector: '[appHostListener]',
  ...
  host: {
    '(click)': 'handleHostClick($event)'
  }
})
export class HostListenerDirective {
  @Output() buttonClick = new EventEmitter<PointerEvent>();
  private handleHostClick(event: PointerEvent) {
    event.preventDefault();
    this.buttonClick.emit(event);
  }
}
How to Convert an Output Using the @Output Decorator to the New output() Function
Ok, now that we got rid of the @HostListener, we can also update this output to use the new output() function instead.
We can then remove the @Output decorator and the EventEmitter too since neither are needed with the new output() function. Then, we can replace them the new output() function.
Before:
@Output() buttonClick = new EventEmitter<PointerEvent>();
After:
buttonClick = output<PointerEvent>();
And everything else remains the same for this so we don’t need to change anything else.
So, that’s about all we can update in this directive, If we were to save we should see everything working working the same as it did with the @HostListener decorator, @Output decorator, and EventEmitter, but it’s now all updated to work in a modern Angular way.
Conclusion
Ok, so that’s about it. Now you should have a solid understanding of how to bind to and listen to events on component and directive host elements without using the old decorators.
I hope you found this tutorial helpful, and if you did, check out my YouTube channel for more tutorials about various topics and features within Angular.
Want to See It in Action?
Check out the demo code and examples of these techniques in the Stackblitz example below. If you have any questions or thoughts, don’t hesitate to leave a comment.