Step-by-Step: Create a Click Outside Directive in Angular
Dropdown menus and popovers need to close when users click outside them, but implementing click-outside detection requires handling event propagation, component references, and edge cases. This tutorial demonstrates how to build a reusable click-outside directive in Angular that detects clicks outside target elements, handles common bugs like immediate closure, and provides a clean API for any component that needs outside-click detection.
The Problem
First, let’s take a look at the app:
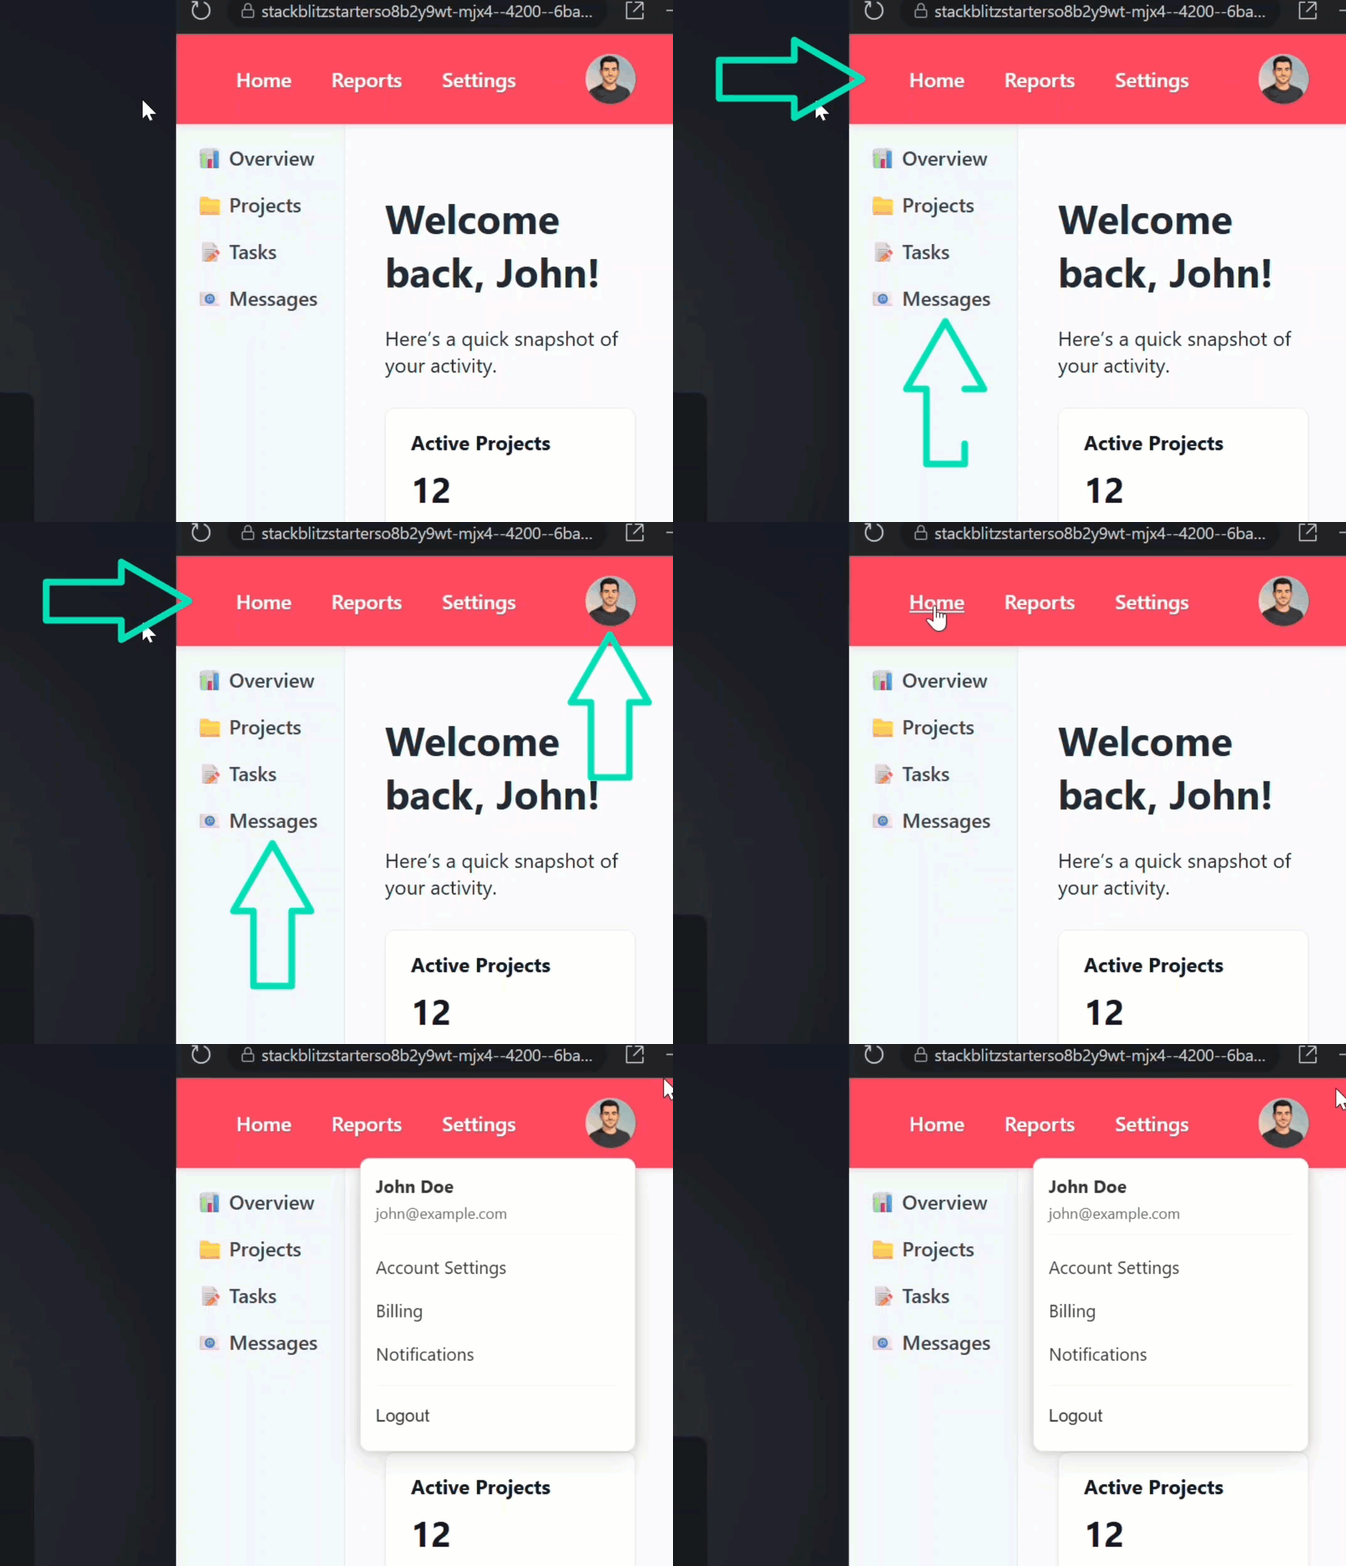
This is a simple dashboard.
It has a top nav, a sidebar, and in the top right corner, we’ve got a user menu.
When we click this avatar, it opens a dropdown with a few links.
So far, so good.
But there’s one big problem: there’s no way to close it.
How the Dropdown Works Now
Let’s open the user-dropdown component template to better understand how this all works currently.
Here’s the button that opens the menu, it just sets a signal called “isOpen” to true when clicked:
<button (click)="isOpen.set(true)">
    ...
</button>
And here’s the menu itself, it’s wrapped in a condition based on this “isOpen” signal so it only renders when it’s true.
@if (isOpen()) {
    <div class="dropdown">
        ...
    </div>
}
But we don’t have anything set up to switch that signal back to false.
So how should we fix this?
Let’s Try the Shield Method
Probably the best way to do this is to add a full-page invisible element behind the menu, a “shield”, and when you click it, we close the menu.
Let’s try it.
Let’s drop in a simple button.
We’re just going to test this out to see if it’ll actually work, so let’s add some inline styles — a background color and a fixed position to attach to the viewport:
@if (isOpen()) {
    <button style="background: red; position: fixed; inset: 0;"></button>
    <div class="dropdown">
        ...
    </div>
}
Okay, let’s save and see how this works:
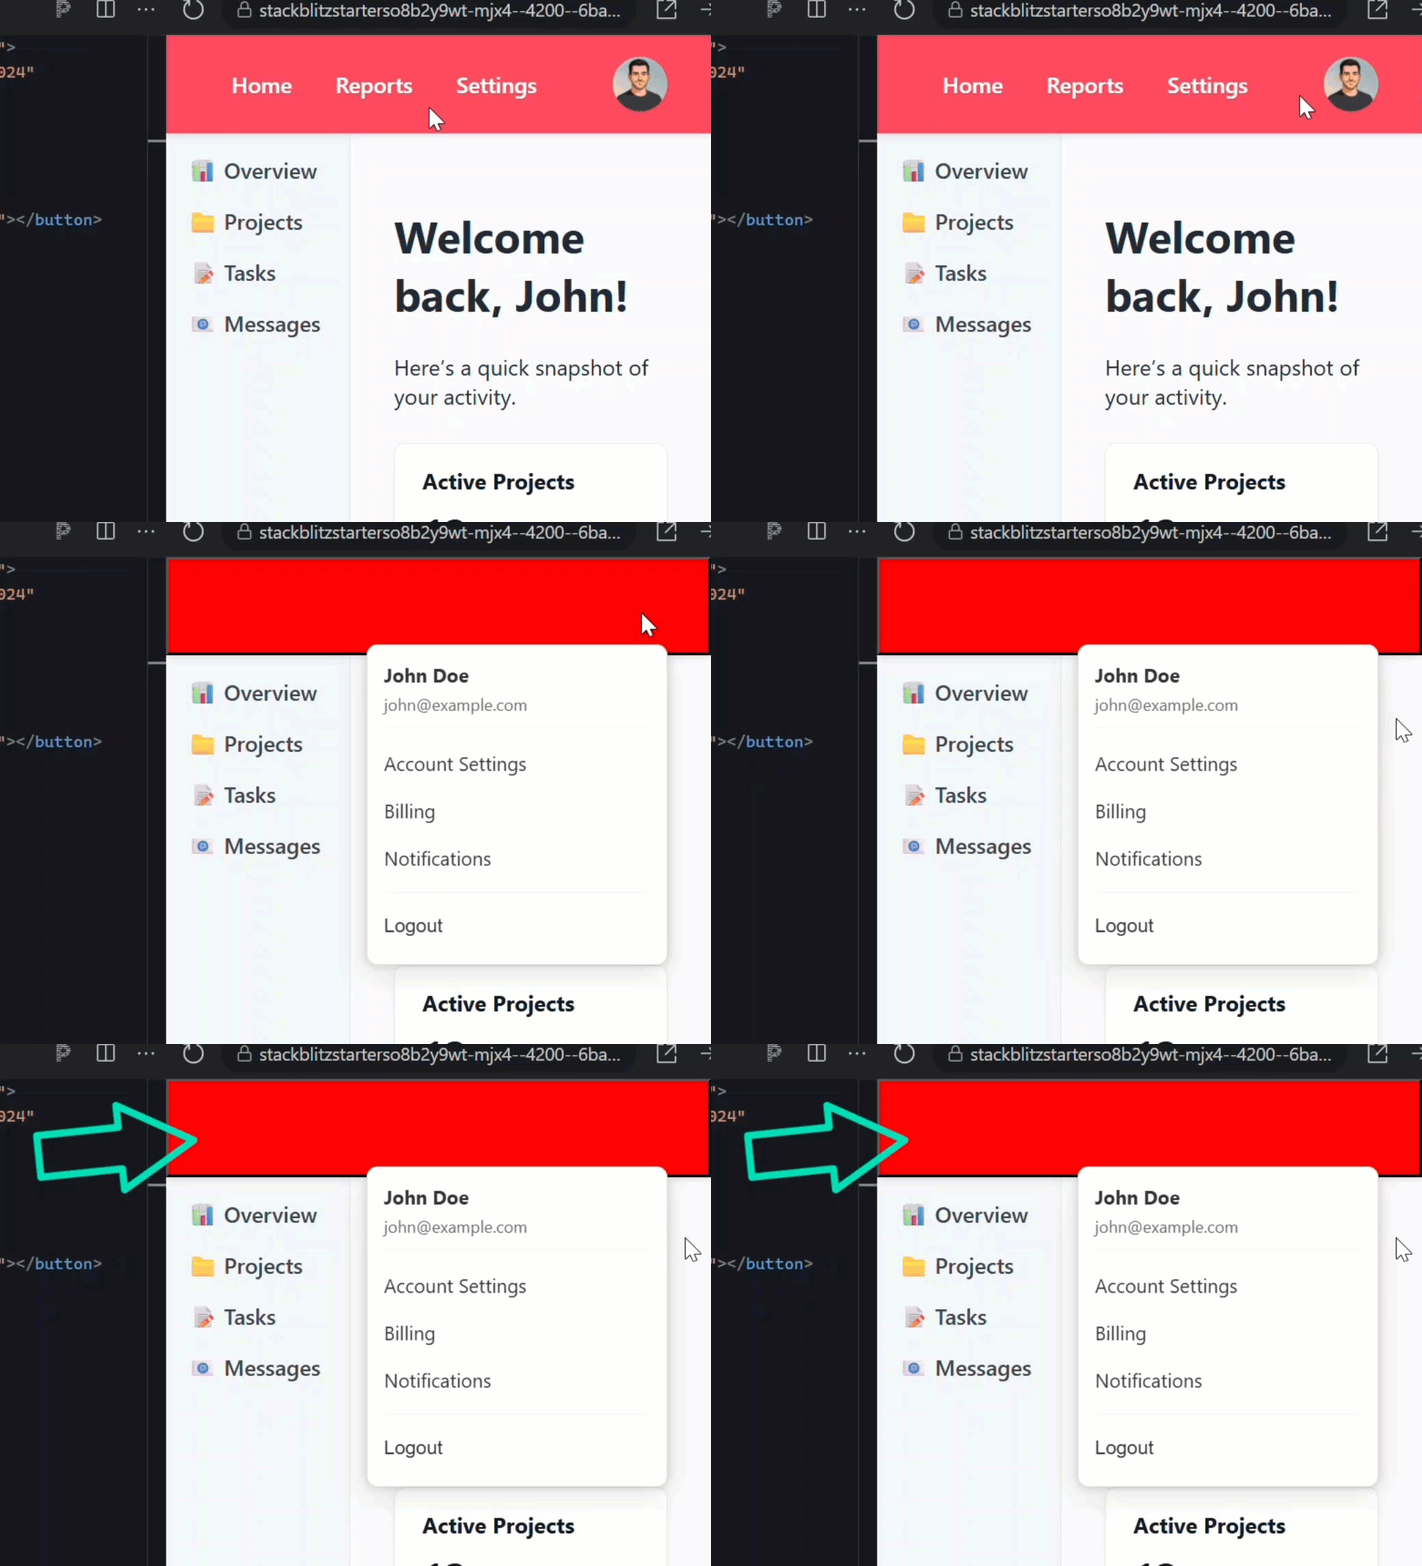
Now, when we open the menu… bummer.
The shield is here but it only covers the header, not the entire page.
This happens because of how certain styles are set up.
I think in this case, it’s a CSS filter with a drop shadow that is preventing this from applying like we want it to.
This is often the challenge with pop-ups in a framework like Angular.
When it’s in a component, that component can be used anywhere.
And we don’t always know, or have the ability to change the styles on the parent components that affect it.
So, this approach works sometimes, but in this layout it fails.
We’re going to build something better.
We’re going to create a directive that monitors elements for clicks outside.
Create the clickOutside Directive
I’ve already stubbed out a basic “clickOutside” directive, it looks like this:
import { Directive } from '@angular/core';

@Directive({
    selector: '[clickOutside]'
})
export class ClickOutsideDirective {

}
Right now, it’s just an empty directive with a “clickOutside” attribute as the selector.
We’ll start by adding an output called “clickOutside”:
import { ..., output } from '@angular/core';

export class ClickOutsideDirective {
    clickOutside = output<void>();
}
This will be emitted when the user clicks outside.
Now we need to access the host element that this directive gets applied to in order to later determine if the click occurred inside or outside of the element, so let’s inject ElementRef:
import { ..., ElementRef } from '@angular/core';

export class ClickOutsideDirective {
    ...
    private readonly elementRef = inject(ElementRef);
}
To listen to a document click event in Angular, we’ll use the Renderer2 class, so we’ll need to inject it as well:
import { ..., Renderer2 } from '@angular/core';

export class ClickOutsideDirective {
    ...
    private readonly renderer = inject(Renderer2);
}
For this concept, we will be using the listen method from the Renderer2 class.
This method returns a function that, when called, removes the event listener to avoid performance issues and memory leaks.
So, let’s add a property called “listener”:
export class ClickOutsideDirective {
    ...
    private listener: (() => void) | null = null;
}
Now, let’s add a constructor.
Within it, we’ll use this “listener” property to store the event listener, and we’ll use the “renderer” property to call the listen method.
The first parameter is the node we want to listen to events on in this case, it’ll be the document.
The second parameter is the event, in this case, we want to listen for click events on the document.
The third parameter is the callback function that will be called when the event is triggered, and in this callback, we’ll have access to the event that fired:
export class ClickOutsideDirective {
    ...
    constructor() {
        this.listener = this.renderer
            .listen('document', 'click', (e: Event) => {
        });
    }
}
At this point, what we have is a function that will be called anytime there is a click event that happens anywhere in the document.
What we need to do now is determine if that click occurred inside of our host element or outside.
If it occurred outside, we can emit our “clickOutside” event, if not, we don’t need to do anything.
So, let’s add a condition to make sure that the host element does not contain the element from the event target.
Then, within this condition, we just need to emit our event:
export class ClickOutsideDirective {
    ...
    ...
    constructor() {
        this.listener = this.renderer
            .listen('document', 'click', (e: Event) => {
                if (!this.elementRef.nativeElement.contains(e.target)) {
                    this.clickOutside.emit();
                }
        });
    }
}
Now, when using event listeners, it’s really crucial to clean them up when they’re no longer needed to prevent performance issues.
So we need to be sure to remove this listener when the directive is destroyed.
To do this, let’s implement the OnDestroy interface on the directive:
import { ...t, OnDestroy } from '@angular/core';

export class ClickOutsideDirective implements OnDestroy {
    ...
}
Then, let’s add the ngOnDestroy() method and then call the “listener” function:
export class ClickOutsideDirective implements OnDestroy {
    ...
    ngOnDestroy() {
        this.listener?.();
    }
}
Now, the listener will be removed when this directive is removed from the DOM.
So that’s pretty much everything we need in the directive.
Hook It Up in the Component
Let’s switch to the user-dropdown.ts.
Before we can use the “clickOutside” directive, we need to import it:
import { ClickOutsideDirective } from '../click-outside';

@Component({
    selector: 'app-user-dropdown',
    imports: [
        ...,
        ClickOutsideDirective
    ]
})
Now we can switch to the template and use this directive.
Let’s add it to the div that contains our dropdown.
In this case, since the output and the directive selector are named the same, we can combine them with the event binding syntax.
Then, when the “clickOutside” event fires, we just need to flip the value of the “isOpen” signal:
@if (isOpen()) {
    <div
        (clickOutside)="isOpen.set(false)"
        class="dropdown">
        ...
    </div>
}
Okay, that should be everything, so let’s save and try this out:
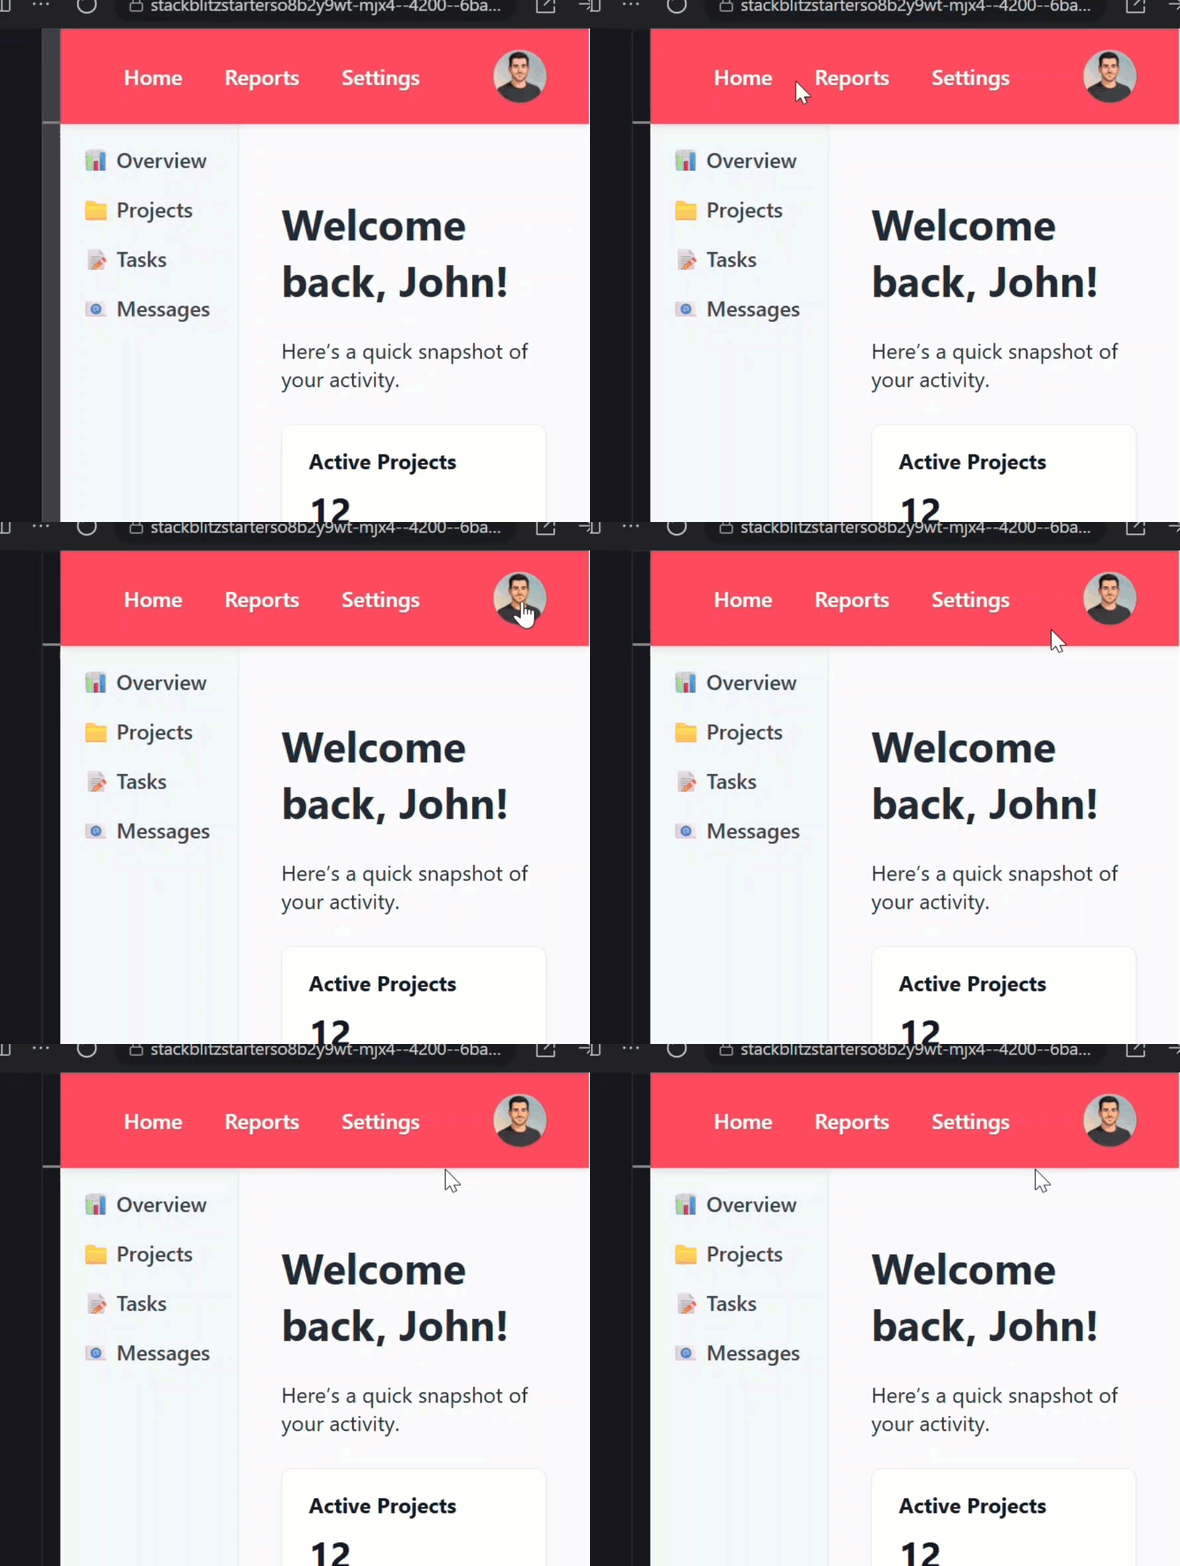
Now when I click to open the menu… nothing happens. That’s weird.
Let’s inspect what’s going on.
Debug the Bug
When we click the button… yep, you can actually see the menu does open, but it closes instantly:
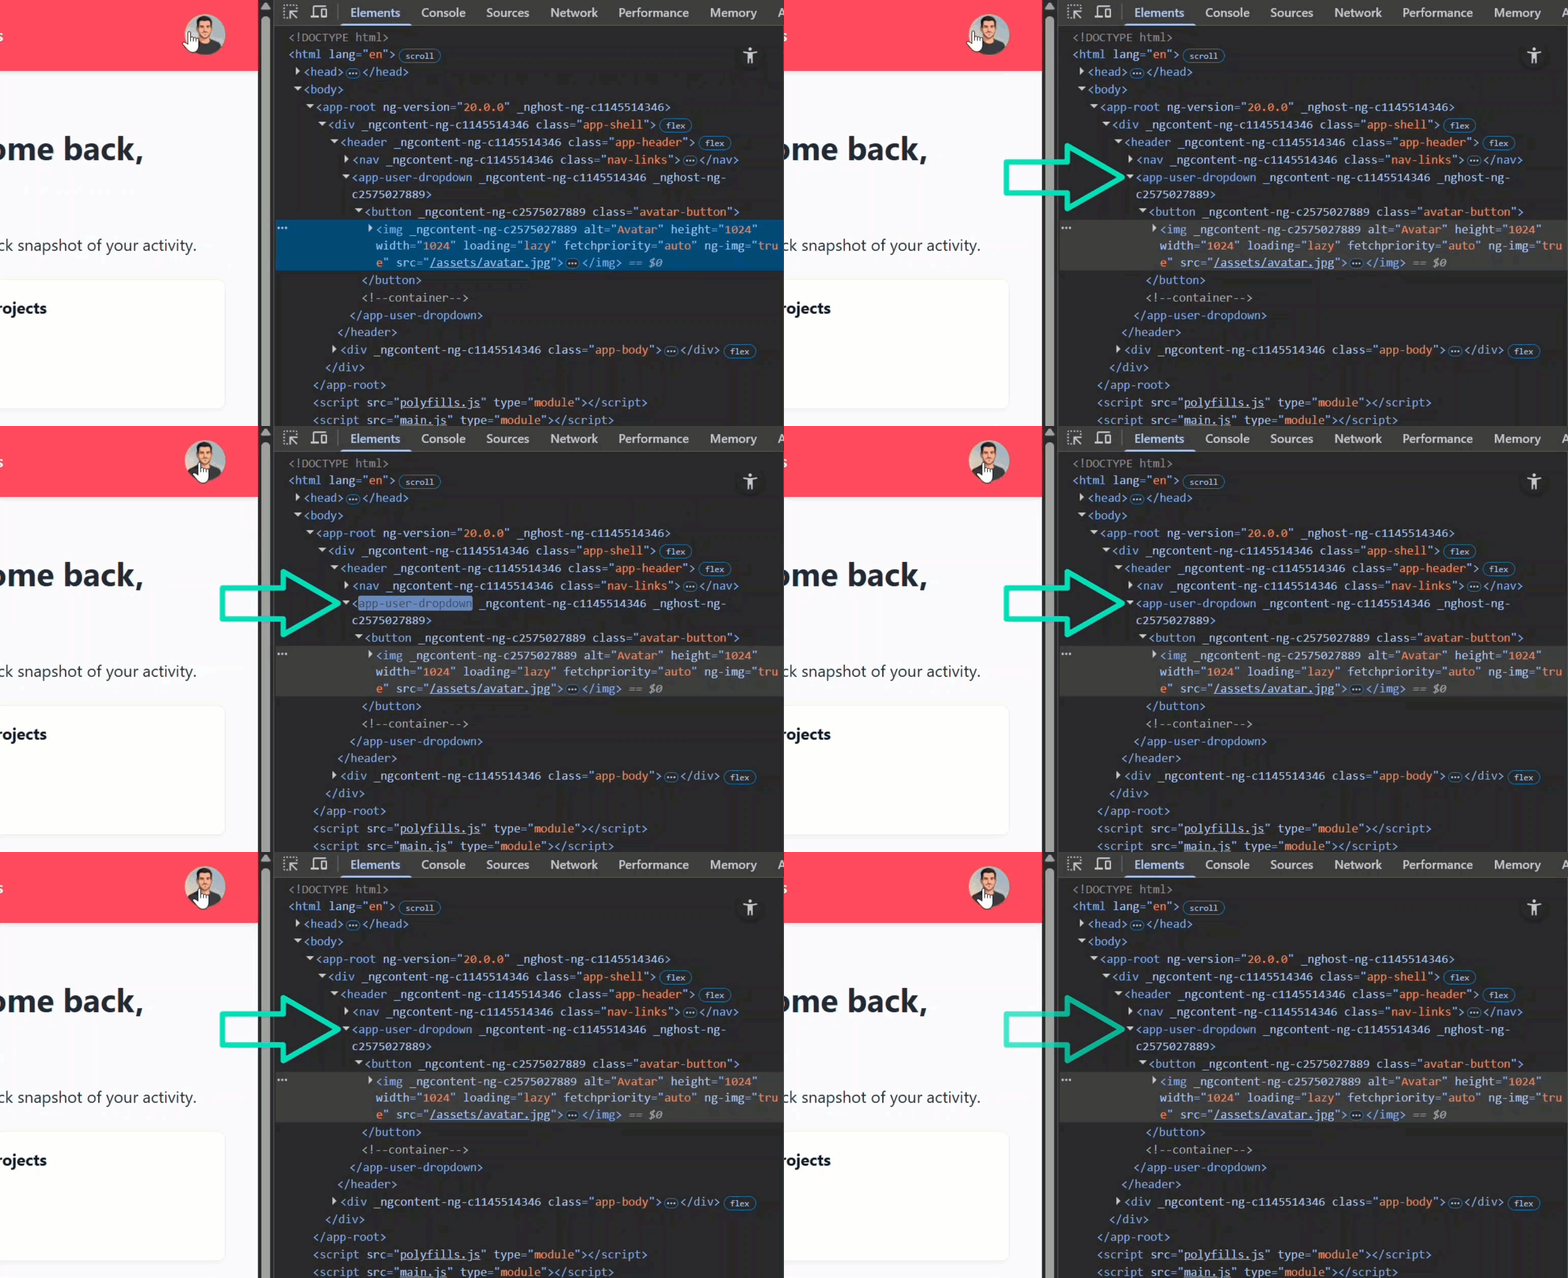
Here’s what’s happening: the click event that opens the menu also bubbles up to the document, and our clickOutside directive sees that click after the menu is rendered.
So it thinks we just clicked outside, and immediately closes it again.
We need to prevent the directive from responding to the very first click that triggered the menu to open.
Prevent the Immediate Close Bug
Let’s head back to the directive.
First, let’s add an “isFirstClick” Boolean property and set it to true:
export class ClickOutsideDirective implements OnDestroy {
    ...
    private isFirstClick = true;
}
This will be used to track whether it’s the first click event or not.
Now, within our listener callback, let’s add a condition based on this property.
If it’s true, we’ll set it to false, and just return to avoid emitting the click event:
export class ClickOutsideDirective {
    ...
    ...
    constructor() {
        this.listener = this.renderer
            .listen('document', 'click', (e: Event) => {
                if (this.isFirstClick) {
                    this.isFirstClick = false;
                    return;
                }
                ...
        });
    }
}
This should now skip the first document click event that happens right after the menu appears.
Now let’s save and try it again:
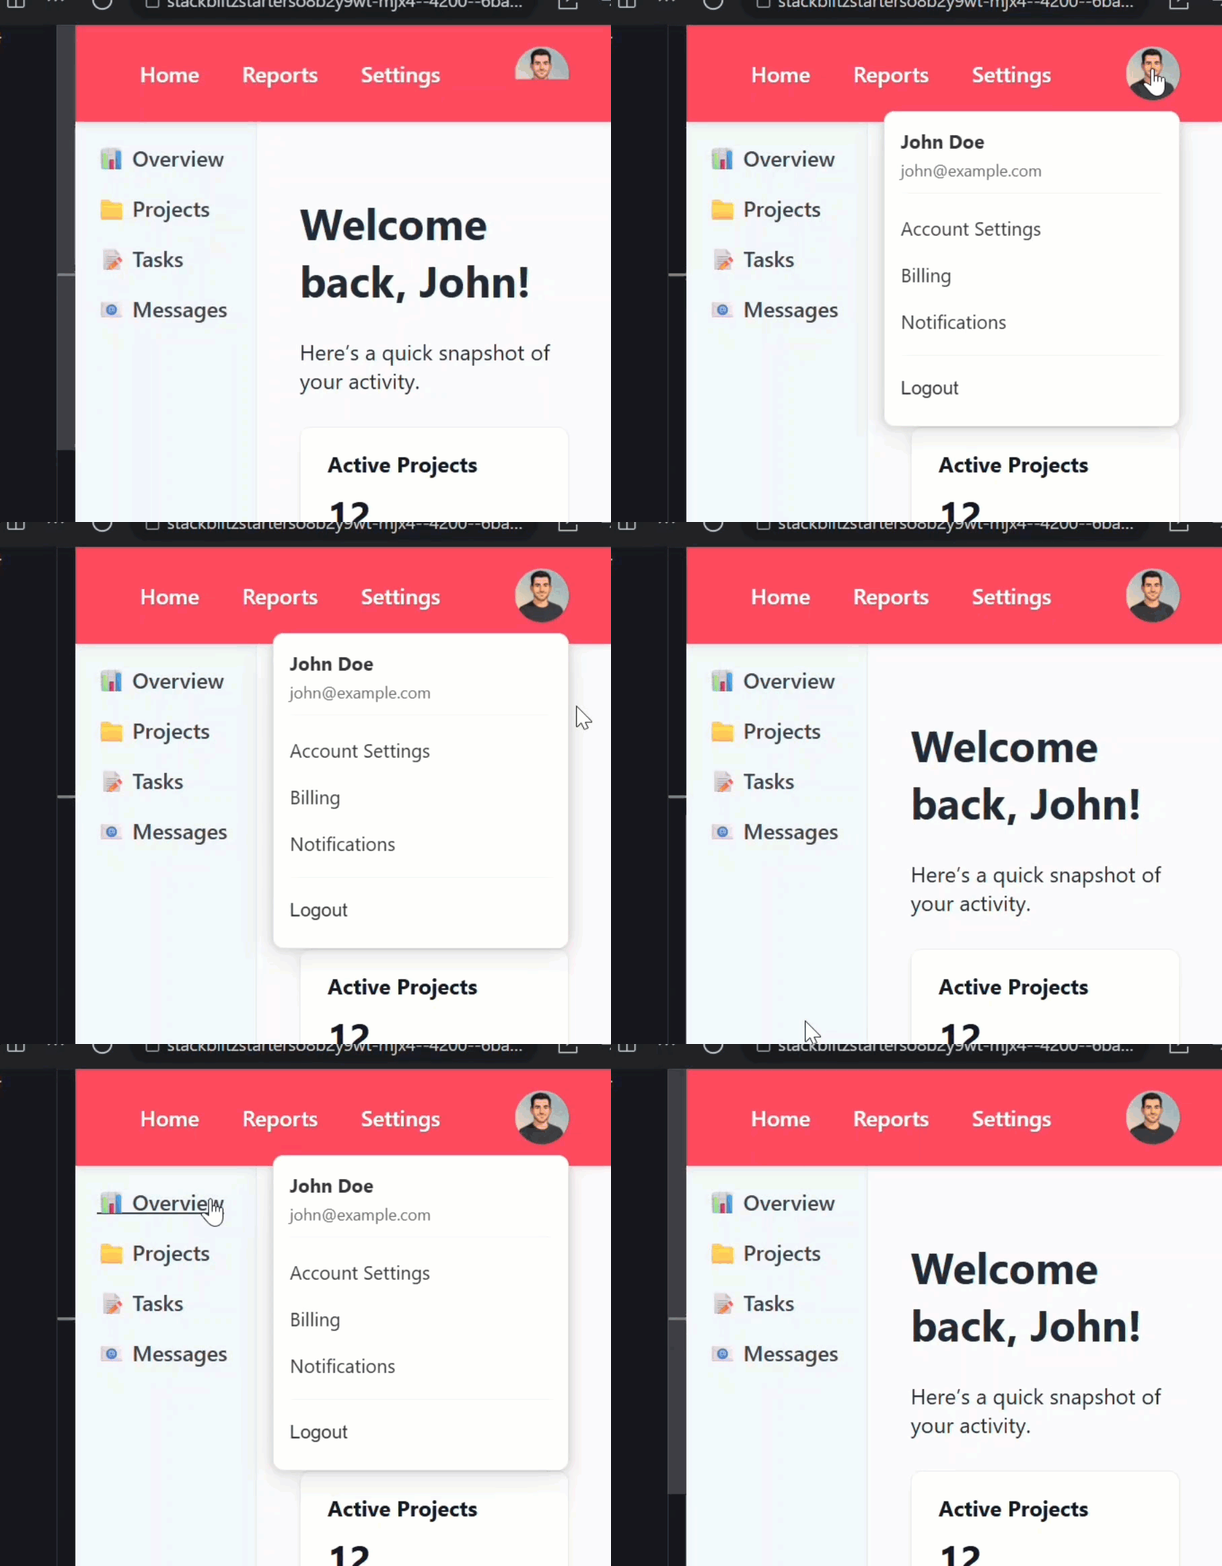
Now when we click the avatar, the dropdown opens, and when we click anywhere else it closes.
Perfect.
Why stopPropagation() Can Break Everything
This works… but there’s one sneaky edge case.
Let’s say we have an element somewhere on the page that uses stopPropagation().
For example, maybe a sidebar item needs to prevent bubbling for some reason.
Let’s open the main component template and find the first link in the sidebar.
Let’s add a click event handler here that calls stopPropagation():
<aside class="sidebar">
    <a (click)="handleClick($event)">
        📊 Overview
    </a>
    ...
</aside>
Now, let’s save and try it out:
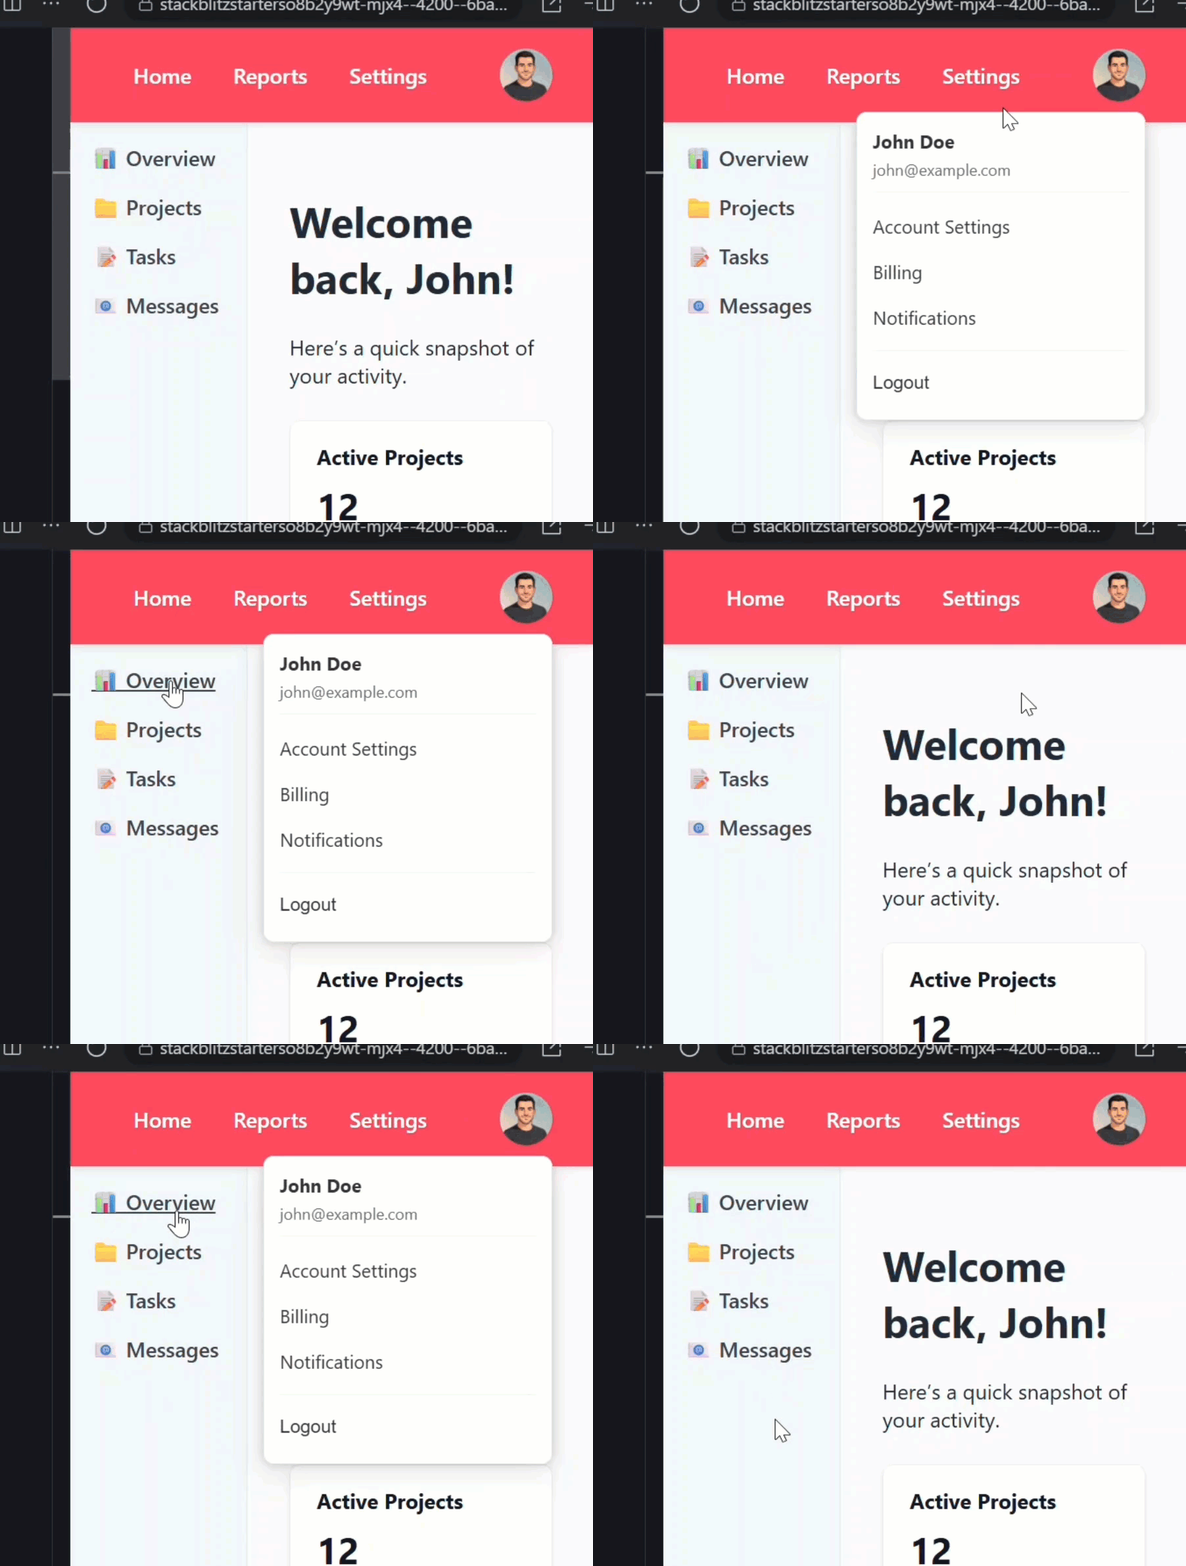
Now when we open the menu and click that link, it doesn’t close.
Why? Because the document click event never fires, stopPropagation() blocked it.
This isn’t a bug in our directive, it’s just something to be aware of.
The directive depends on the document event firing.
If another part of your app cancels that event, it won’t work.
This is why I prefer the first example, the “shield” concept, if possible.
It’s often a more bulletproof choice when layering modals, dropdowns, or overlays.
But, sometimes it just won’t work, and you need a global “click outside” event.
The Bottom Line
The bottom line is that while this directive works great for most use cases.
Just be aware that if other parts of your app are interfering with event propagation, it might not behave as expected.
Final Recap: Shield vs. Directive
Alright, we’ve built a fully functional “click outside” directive in Angular.
We walked through the pitfalls, fixed the immediate-close bug, and even looked at why stopPropagation() can quietly break everything when you least expect it.
You now have two solid patterns in your toolkit:
- A shield element, which works reliably for overlays and modals.
- And a directive that’s clean and reusable, when that shield concept doesn’t work.
If this helped you out, do me a favor, share it with someone who’s probably fighting this exact bug right now, and subscribe if you want to see more tutorials like this.
Additional Resources
- The demo app BEFORE any changes
- The demo app AFTER making changes
- Angular Official Docs – Directives
- Angular Renderer2 API
- Understanding Event Propagation in JavaScript
- Angular Signals
- Clean Up with OnDestroy
- My course: “Angular: Styling Applications”
Want to See It in Action?
Want to experiment with the final version? Explore the full StackBlitz demo below. If you have any questions or thoughts, don’t hesitate to leave a comment.


