Angular linkedSignal(): Advanced Features and Multiple Sources (v19+)
Angular's linkedSignal() goes beyond simple two-way binding with advanced features that enable intelligent update logic. By comparing old and new values, you can create conditional updates, prevent unnecessary changes, and implement complex state synchronization patterns. This tutorial explores advanced linkedSignal() features including value comparison callbacks, multiple source signals, and smart update strategies that optimize performance and reduce unnecessary re-renders.
Angular Signals Tutorial Series:
- linkedSignal() Basics - Learn the fundamentals of linkedSignal()
- Signal set() vs update() - When to use each method
- Signal Inputs & output() - Replace @Input/@Output with signals
Setting the Stage: Inside the Current Demo Application
Here we have the same application that we used in our previous example, but now we’ve added a “shipping type” control:

In this application, it’s possible to have different shipping options for different images.
So, if we open the menu, we can see that we have five different options:
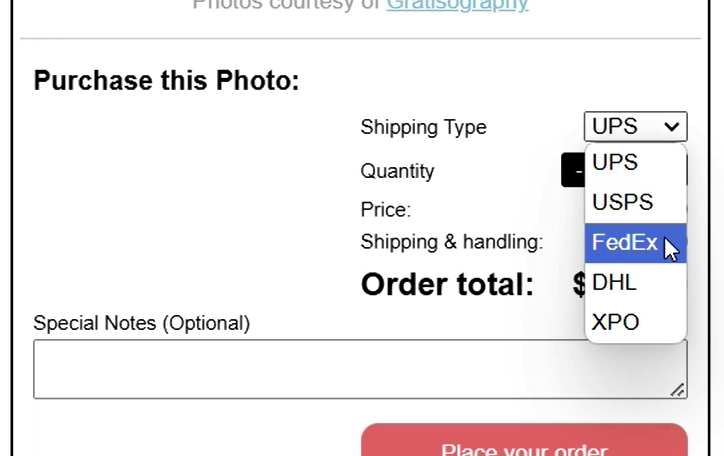
Then, when we switch to the next image, now we only have three options:
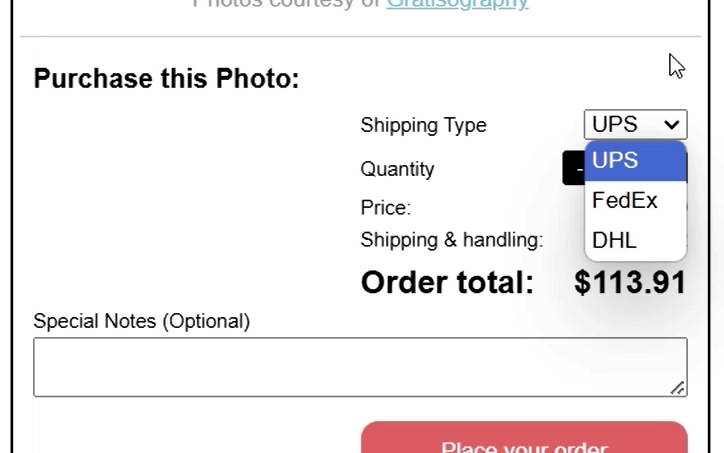
For this image, we can’t use USPS or XPO.
Now currently, this “shipping type” control state is not being tracked.
What we’re going to do in this example is create this state using a linkedSignal.
But first, let’s understand what’s going on.
If we look at the purchase form component template, here we have a basic HTML select with options listed out from a “shippingOptions” signal.
<select>
    @for (option of shippingOptions(); track option) {
        <option [value]="option"></option>
    }
</select>
Let’s look at the component TypeScript to understand where this signal gets its options from.
Here we can see that it comes from an input using the new signal input function:
shippingOptions = input.required<string[]>();
So, the shipping options are expected to be provided as an input in the form of an array of strings.
Ok, that’s what we’re starting with, now let’s create a signal to track the state of this control.
But, before we do, it’s important to note that we want to reset the selected shipping value when switching between images since we can’t guarantee that the selected shipping option will be available for the new image that we’re switching to.
And this is why we want to use a linkedSignal.
It will allow us to create a writable signal, that can be updated when switching shipping options, but that can be reset when the “shippingOptions” input signal is updated.
Tracking the Selected Shipping Option With Linked Signal
Let’s start by adding a protected, “shippingOption” field, for which we’ll use the linkedSignal function:
protected shippingOption = linkedSignal();
Now, in my previous tutorial, I provided both the source signal, and the computation function, but in this case, we can actually provide a simplified version.
What we want to do here is set the value of this signal to the first shipping option in the list whenever the “shippingOptions” input changes.
So we can just use that signal, and grab the option with an index of zero:
protected shippingOption = linkedSignal(() => this.shippingOptions()[0]);
This will use the “shippingOptions” signal as it’s source and then compute its value from that same signal.
Ok, that’s what we need for our signal, now we need to configure how we update this signal when the select changes.
Let’s use the ngModel directive to do this:
<select [(ngModel)]="shippingOption">
    ...
</select>
Now to be sure that we understand what’s going on here, let’s use string interpolation to render the value of this “shippingOption” signal in the template so that we will know what it’s set to as it changes.
{{ shippingOption() }}
Ok, now let’s save and see how this works:
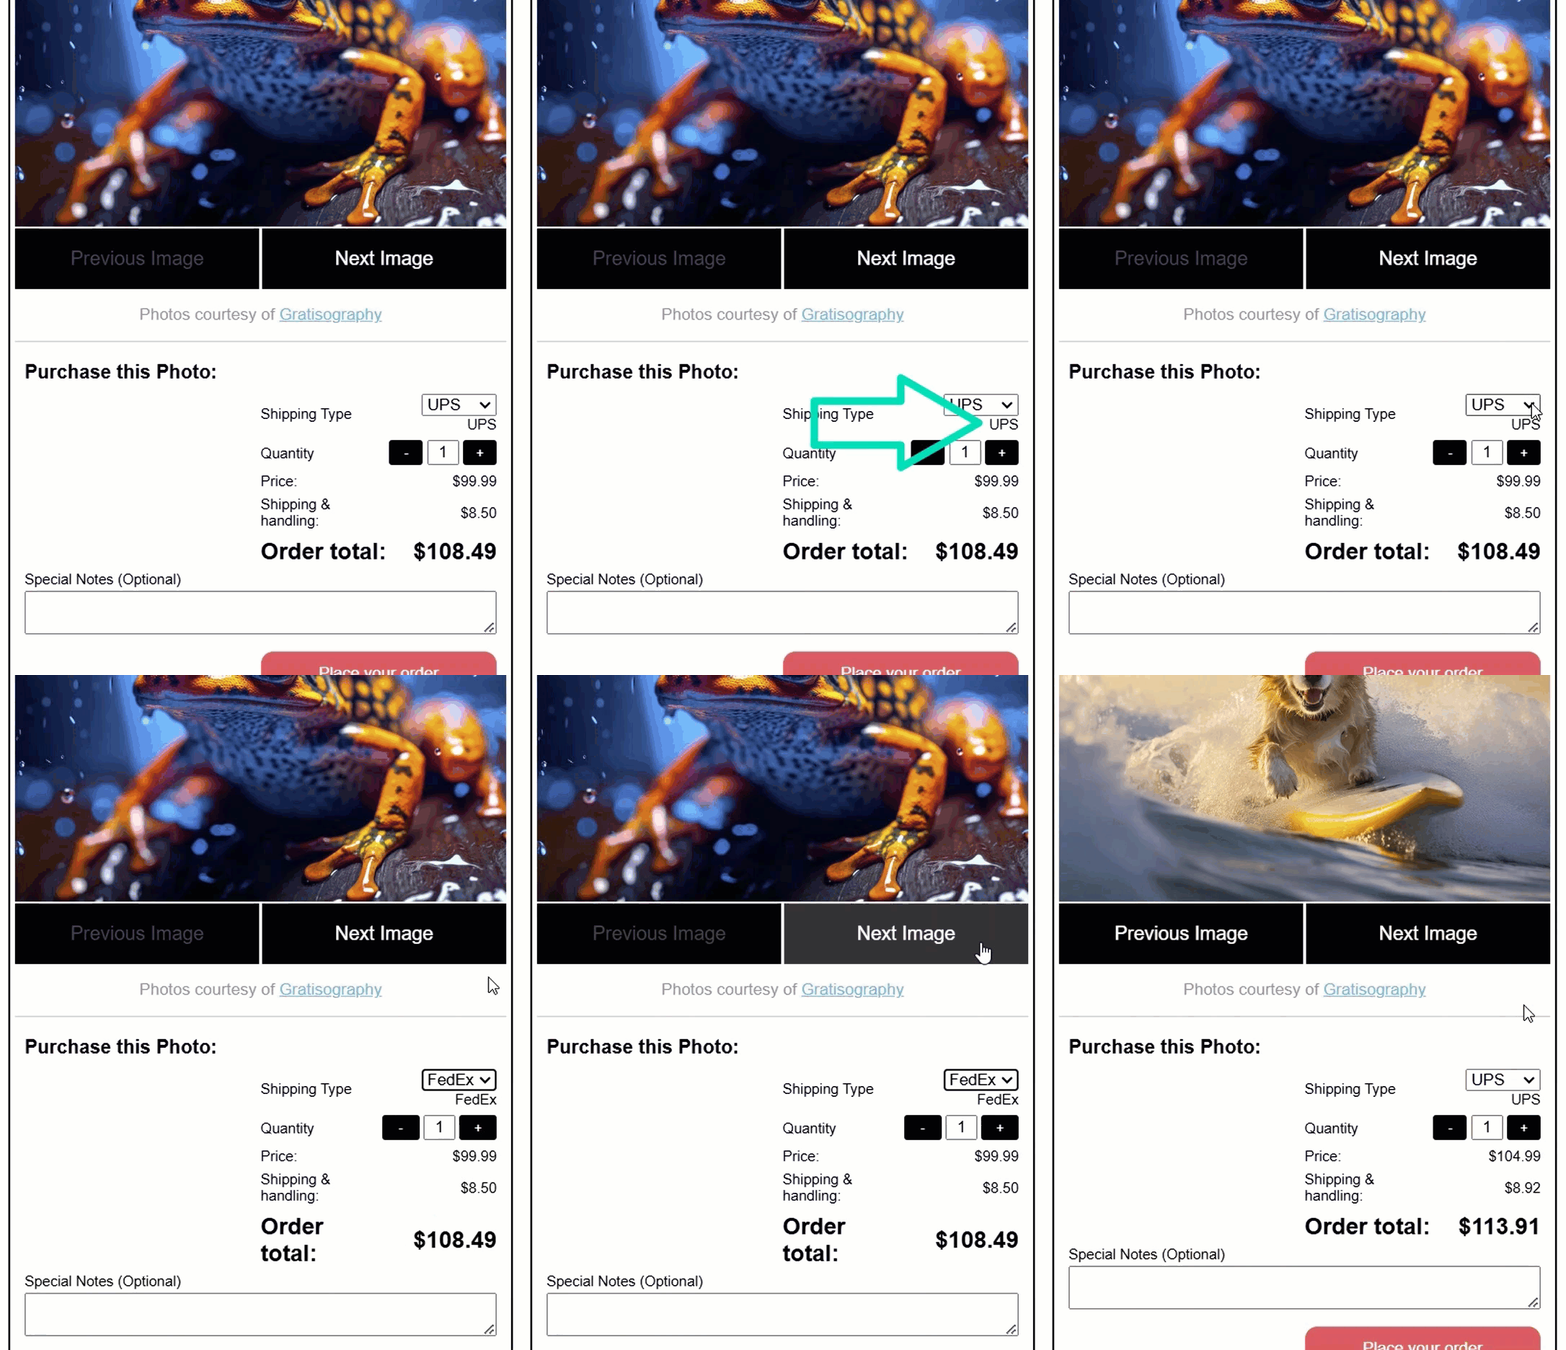
Ok, it starts off with “UPS” selected because that is the first value in the list for this particular image.
Then, when we switch this to “FedEx” our signal value is now updated to “FedEx”.
Then, when we switch the image it is reset to “UPS” since it’s the first option in the new list.
So that’s pretty cool right?
But what’s a bummer here is that, in this case, “FedEx” is actually part of this new list of shipping options.
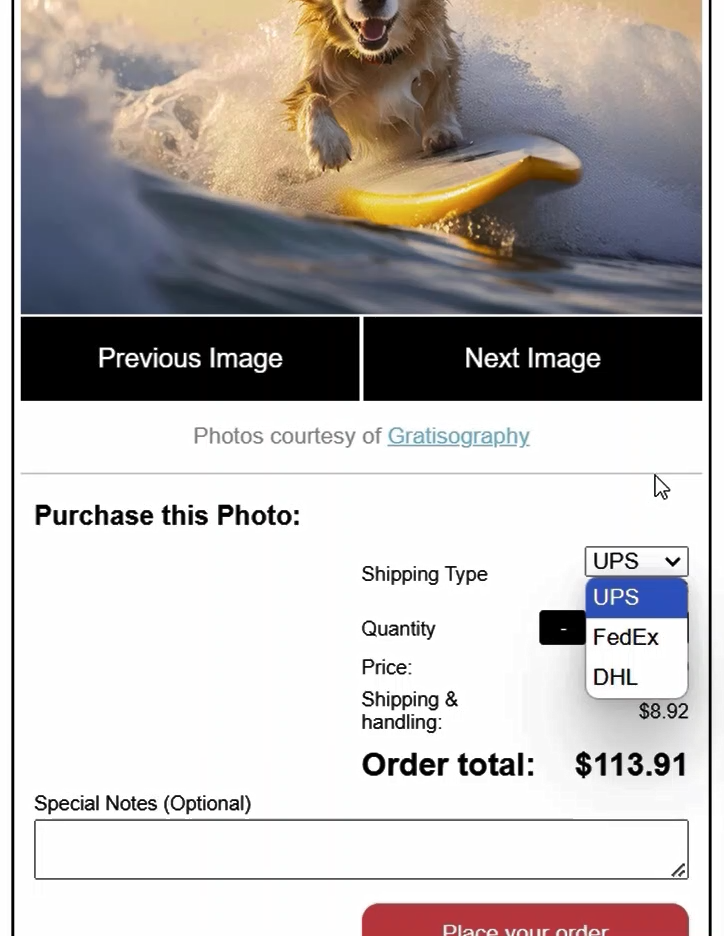
So, it would be cool if we could keep the selected value if it still exists in the new list of options.
Well, we can actually do this with linkedSignal.
Smarter Linked Signal Resets: Updating Only When Values Change
When using linkedSignal we can compare the new value of the source signal against the previous value.
Let’s switch to the more expanded concept for a linkedSignal.
Our source signal will be the “shippingOptions” input and now, we will add a computation function.
Within this function, we can access the current value and the previous value for comparison.
Then we can see if we can find an option with the previous value within the new list of options.
If not, we’ll set it to the first option from the input.
All of this would look something like the following:
protected shippingOption = linkedSignal({
    source: this.shippingOptions,
    computation: (current, previous) =>
        current.find(o => o === previous?.value) ?? current[0]
});
So, if the currently selected option is found, it will remain the selected value.
If not, it will set it to the first option in the new list.
Alright, let’s save and see how this works now:
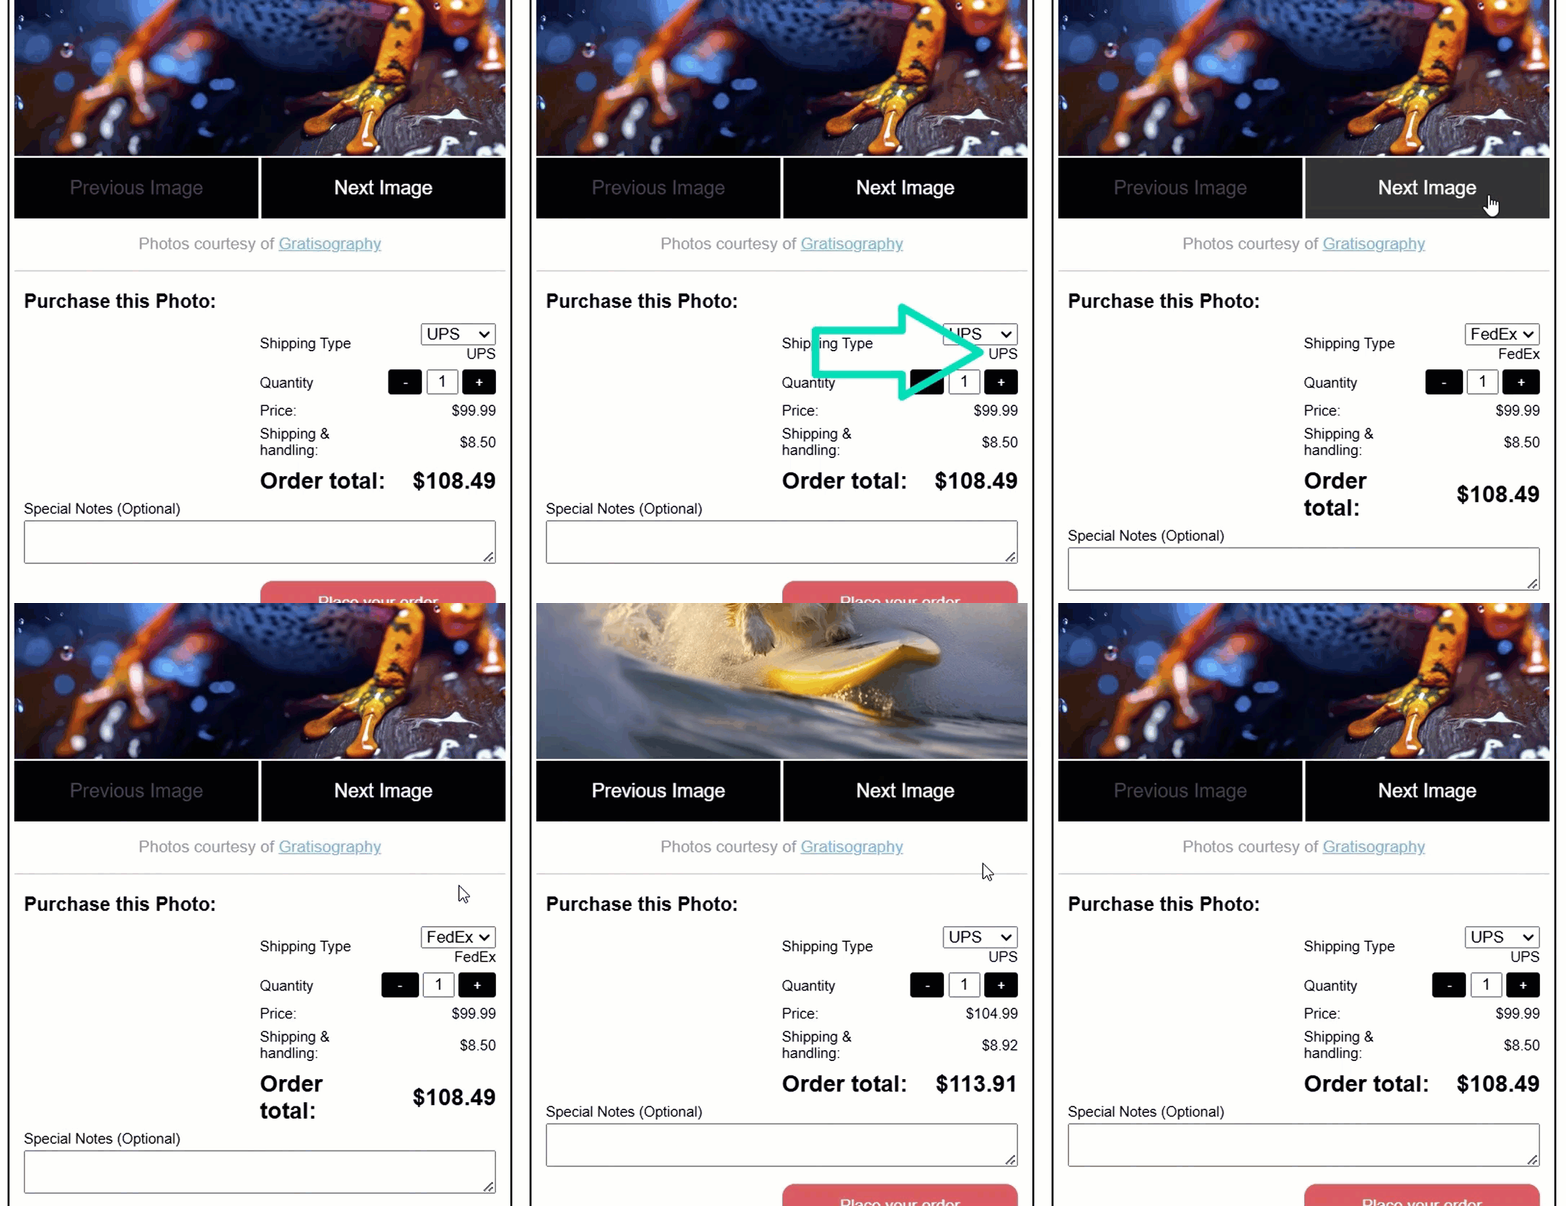
Ok, “UPS” is selected initially again since it’s the first in the list.
Then, when we switch to “FedEx” again and switch the image, now we see that “FedEx” remains selected.
Then, when we switch to “XPO”, and then switch images again, we see that the value gets set to “UPS” because “XPO” doesn’t exist in the new list of options.
So, now we have a way to compare current and previous values and update the signal only when needed.
In Conclusion
Ok, so that’s a handy feature available with the new linkedSignal function.
Hope that was helpful.
Don’t forget to check out my other Angular tutorials for more tips and tricks.
Additional Resources
- The demo BEFORE making any changes
- The demo AFTER making changes
- linkedSignal documentation
- Signal inputs documentation
- Computed signals documentation
- The effect function documentation
- The ngModel directive documentation
Want to See It in Action?
Check out the demo code and examples of these techniques in the Stackblitz example below. If you have any questions or thoughts, don’t hesitate to leave a comment.


