User Experience Design With Illustrator
Every time I go to design a new site I jump directly into PhotoShop because, well, it's the tool I've used since the very first site I designed as a professional. I know it very well and can move quickly and efficiently.
PhotoShop became the industry standard as there weren’t a whole lot of other good tools out there. Many are now shifting to using a little bit of PhotoShop to nail down basic design components and then moving to code designing “in browser” for the rest. This can be very effective but I think it depends on the project and complexity of the application being designed. More complex applications may require much more to be designed.
A while back I was having a conversation with a newer member to the design team and he mentioned that he had always used Illustrator to develop designs. I thought this was crazy since I have used illustrator a lot in the past and had never used it to design a site or interface. I knew Illustrator well but just hadn’t taken the time to think about the way the tool has evolved.
It wasn’t until we began to take a “mobile first” approach in our design process that I began to see its value. As we started planning our process we quickly realized that dealing with different pixel densities and screen sizes would not be very easy to deal with if using raster graphics. I still jumped into PhotoShop to create design mock-ups but everything was vector based using paths, shapes, and smart objects. Looking back on this, there is no reason that I couldn’t have done all of this within Illustrator while taking advantage of some stuff that PhotoShop just doesn’t have.
And just this last week another member of the design team shared this great article that she had read about about “Speed Design with Illustrator” which highlights some of the amazing features it provides for interface design. There is some great info there, you should definitely checkout the video if you have time.
All of this has been swirling around in my brain as we have begun to work on a few projects that are really pushing us to rethink all of our processes. Below are some of the highlights that Illustrator brings to the table as a modern web design tool.
Symbols for Global Objects
You can easily create your own custom symbols for components that are reused across your designs.
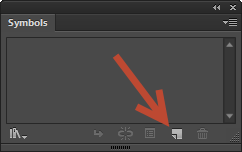
Create a Design Component
Simply create the design component that you would like to encapsulate as a symbol

Convert it to a Symbol
Select them and in the symbols panel select the “New Symbol” icon
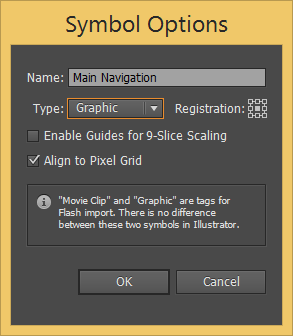
Switch it to a “Graphic”
When the symbol options dialog opens up you should name it and you will probably want to switch its type from “Movie Clip” to “Graphic” and then hit “Ok”
You can then take these symbols and add them to their own symbol library so that they can be used in multiple documents.
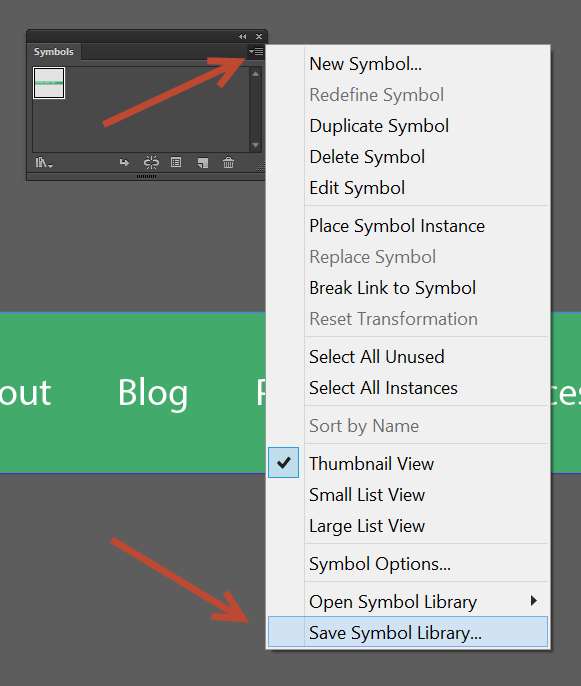
Add Them to a Symbol Library
Click the symbol panel options icon in the top right side of the panel
Global Color Swatches
Global color swatches are awesome. Often, when discussing design mock-ups we decide that we need to globally change colors across many different layers and documents. This takes a ton of time sifting through designs and probably missing some elements that need to be changed. With Illustrator’s global color swatches this can be handled with much less effort and pain.
I covered this in an earlier article, so if you’d like to learn about it you can check it out here.
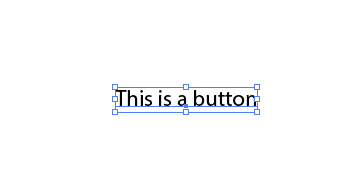
Dynamic Text Buttons
You can create buttons that grow and shrink dynamically based on the text within them.
Just Type Some Text
Edit its Appearance
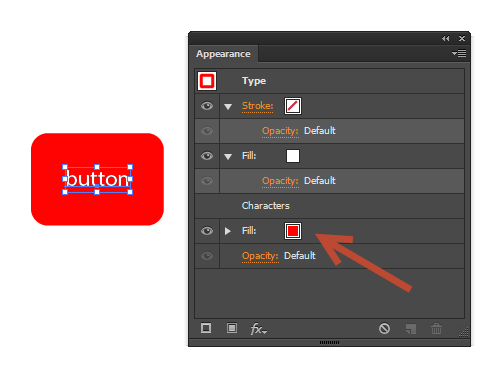
With the text selected using the “Selection Tool” open the “Appearance” panel if you don’t already have it open and add a 2 fill layers with the solid square icon in the lower left corner
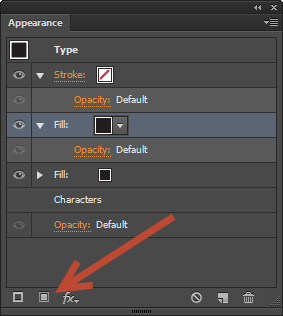
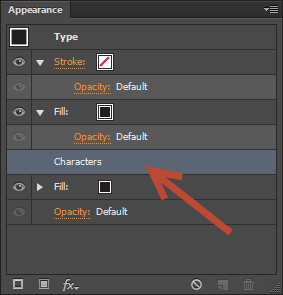
Move the Characters
Move the characters layer between your new fill layers
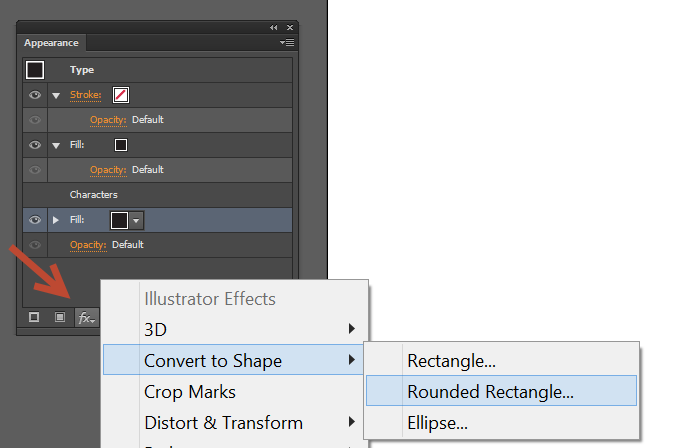
Convert to Shape
Select the bottom fill layer and click the “fx” icon, then choose “Convert to Shape”, then choose “Rectangle” or “Rounded Rectangle” and adjust the options in the dialog as needed
Change Text Color
You can then change the color of the text by changing the color of the first fill layer
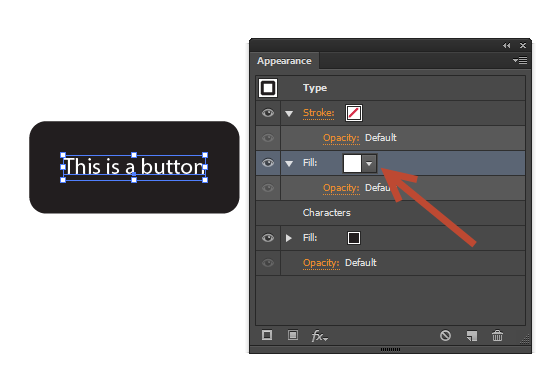
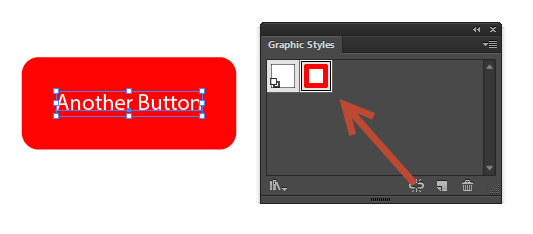
Change Button Color
You can also change the color of the button by changing the color of the bottom fill layer and you will notice that the button will grow and shrink automatically if you change the text
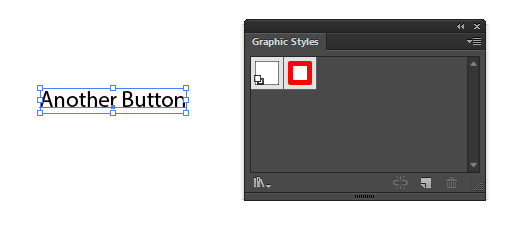
Create a Graphic Style
The next step should be to set this new button style as a “Graphic Style” so that it can easily be reused later on. To do this, open up the “Graphic Styles” window and hit the “New Graphic Style” icon in the lower right corner.

Type Some Text
Simply type some text and hit the graphic style icon for your new button style
Artboards
I always thought the artboard concept in Illustrator was odd. I thought it was essentially the same as the document and didn’t understand why it was needed. The concept is actually pretty neat:
“The artboard works just like a piece of paper would on a physical desk. For example, if you were creating a collage, you could put elements you are not currently using on your desk outside of the bounds of the paper. They are still close for easy access, but they don’t interfere with the artwork taking shape on the document. Illustrator works in a similar way.”
This concept of multiple artboards comes in really handy for creating things like multiple layout designs for different screen dimensions and breakpoints for the same screen or in showing workflow through a series of screens. It keeps related items in the same document instead of being scattered across multiple different documents.
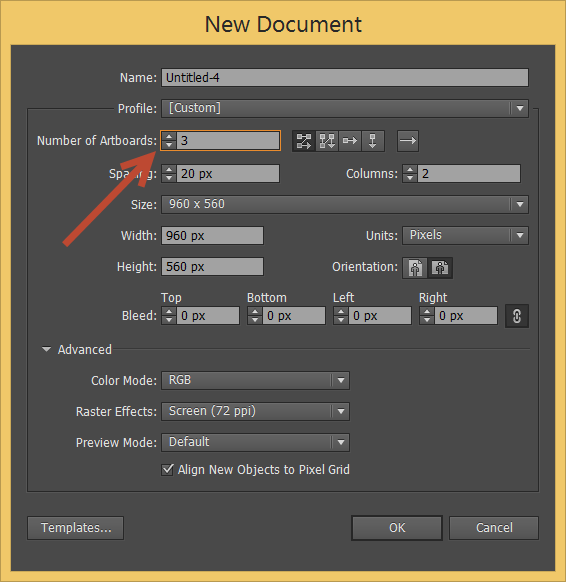
Create a Document
You can create multiple artboards when creating a document
Add/Edit Artboards After a Document Has Been Created
You can also add/edit artboards at any time by hitting the “Document Setup” button in the tools

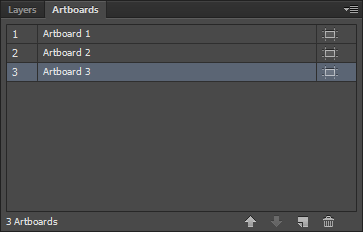
Focus Artboards
You can also control which artboard you are focused on from the “Artboards” panel so when you do things like hitting ctrl + 0 you zoom into the correct location
In Conclusion
Since Adobe is ditching Fireworks it appears as though they are looking to focus on Illustrator as their web design tool. Many of these newer features add so much to our workflow and should help to make us more efficient. It looks as though it’s really worth giving a shot.